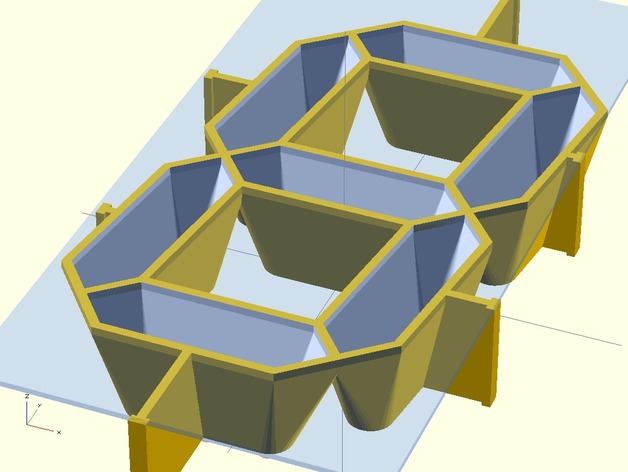
Customizable Large 7 Segment Display with Std. LEDs
thingiverse
Create Your Own Large Clock or Temperature Display with Easy-to-Use Standard 5mm LEDs. Adapt to Various Digit Heights, LED Diameters, Font Weights, and Spacer Dimensions Using the Customize Feature. Perfect for Use in a Picture Frame! Follow these Instructions to Print Your Digital Clock: 1. Optimized for Single Extruder 3D Printer: Print from LED-mount up. 2. For a Digital Clock: Print 4 Single Digits and 1 Colon (or 6+2 with Seconds). 3. Add Spacers to Fit in the Frame. For a More Beautiful Display, Follow these Tips: * Use Silver or White Ink for Easier Lighting * For More Diffuse Lighting: Sand the Tip of the LEDs or Use LEDs with Wide Angle Use an Aspirated Opal Acryl as Diffusor for Even Light Distribution Recipe for a 4-Digit-Clock DIN A4 Picture Frame (IKEA "RIBBA" 21x30cm): * DigitHeight = 85 * SegWidth = 10 * MountingDepth = 20 * MountingWidth = 59 * MountingHeight = 125 * ColonMountingWidth = 24 * SpacerMountingWidth = 20 Mount the Display Using 2K Glue and Fix it in the Frame with SMD-Hot-Air-Gun. Recipe for a WIDE Picture Frame 6-Digit-CLOCK (IKEA "RIBBA" 50x23cm): * 6x Digit * 2x Colon * 2x Sapcer * Use Default Parameters for the rest of the parts. To Mount the Display: * Cut a DIN A2 Sheet of Paper to 500x230mm. * Put it between Display and Frame Glass. * Use SMD-Hot-Air-Gun to melt Spacers. * Fix with 2K Glue.
With this file you will be able to print Customizable Large 7 Segment Display with Std. LEDs with your 3D printer. Click on the button and save the file on your computer to work, edit or customize your design. You can also find more 3D designs for printers on Customizable Large 7 Segment Display with Std. LEDs.
