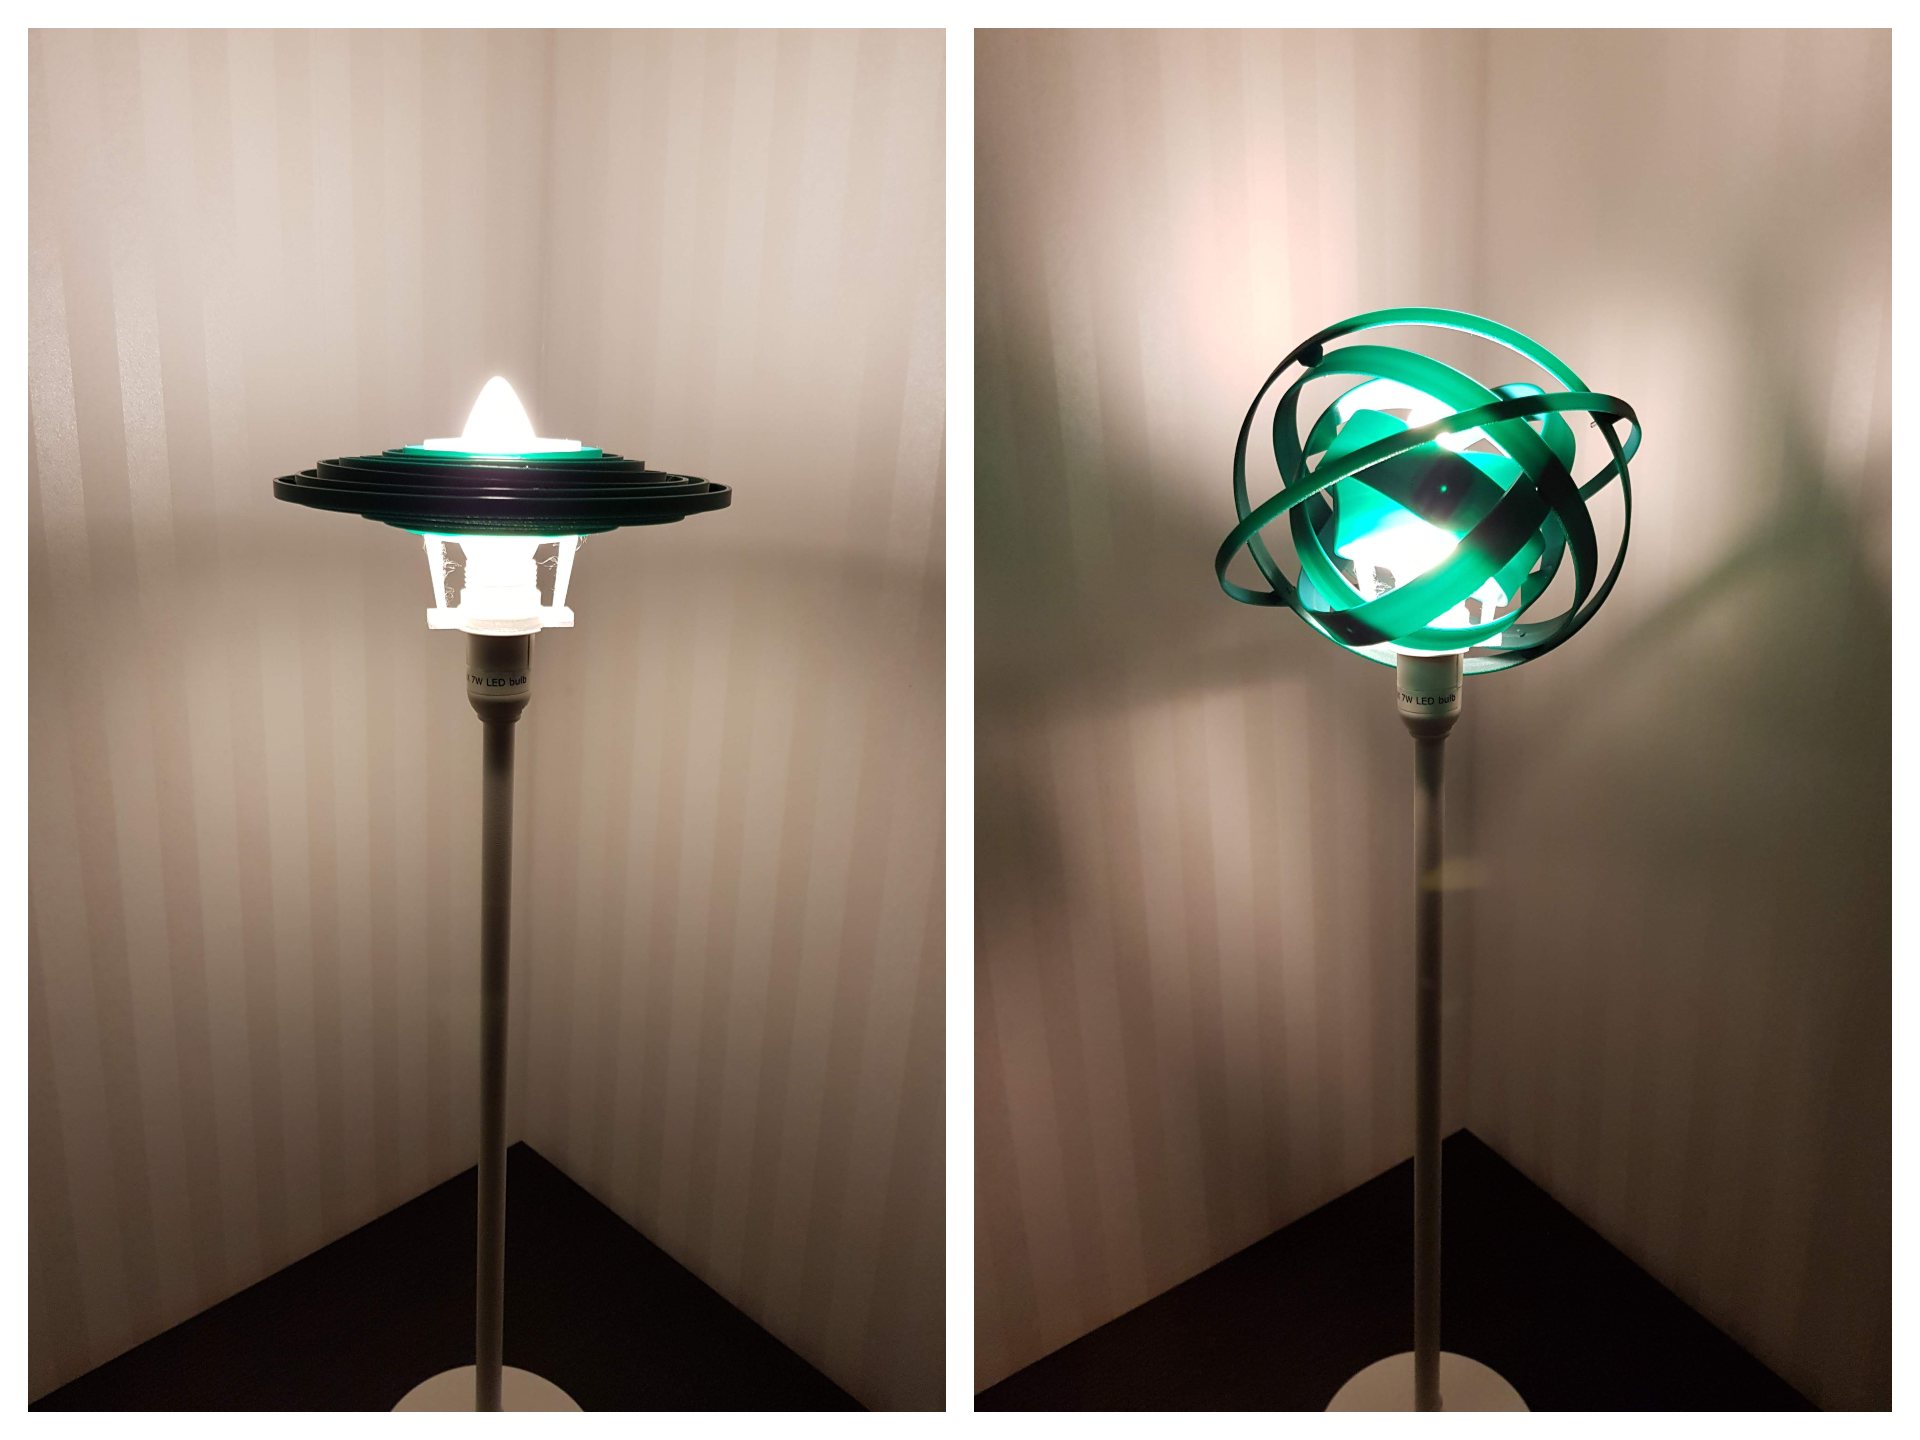
Customizable gyro lamp shade
prusaprinters
<p>A fully customizable parametric gyro lamp shade.</p> <p>The main file for this model is the gyro_lamp_shade.scad which is an OpenSCAD script which you can use to customize the model to your liking.<br/> To use the customization you will need <a href="https://www.openscad.org/">OpenSCAD</a> version 2019.05 (or newer)</p> <p>I have also included the two test models I have printed, one for an IKEA HEMMA cord set to which can be printed on a Prusa MK3 (largest ring is 202mm) and one for an IKEA STRÅLA table lamp base which can be printed on a Prusa Mini (largest ring is 171mm).</p> <p>When redering all parts will be placed level on the Z plane and oriented for printing.<br/> Any rings which have a diameter larger than your maximum print size (set in parameters) will be split into multiple parts which can be connected using short filament pieces.</p> <h3>Print instructions</h3><h3>Safety</h3> <p>When 3D printing lamp shades you should always use a low energy LED light bulb to minimize heat and use a temperature resilient material for any parts close to the light bulb.</p> <h3>Printing</h3> <p>The innermost ring, mounting plate and top plate should be printed with infill, for the other rings it depends on your customization.</p> <h5>Included models</h5> <p>For the included STLs you should print the smallest ring, mounting plate and top plate in a more temperature resilient material (not PLA).</p> <p>Print the parts using at least 10% infill.</p> <h3>Customizing</h3> <p>To use the script to create your own gyro lamp shade you will need OpenSCAD version 2019.05 (or newer) which can be downloaded <a href="https://www.openscad.org/downloads.html">here.</a></p> <p>Open the script in OpenSCAD and go to View and uncheck Hide Customizer. This will present the customizer panel which you can use to edit the parameters to your liking.</p> <h5>Rendering</h5> <p>To be able to export the model as STL you must first render it (shortcut F6). To make sure you end up with a printable model you will not be allowed to render if you have not checked the highResolution box (or set the variable to true if you are editing the code) or if you have selected renderMode 0.</p> <h5>Sanity checks</h5> <p>There are a lot of sanity checks implemented to ensure that you end up with a functional and printable model. If you try to preview or render and nothing happens (the model disappears) open the console (uncheck View -> Hide console) and read the error message. It will mention at least one parameter which you can edit to solve the issue.</p> <h3>Assembly</h3> <h5>Mounting plate</h5> <p><img alt="assembly" src="https://i.imgur.com/cAISh6K.png" width="100%"/></p> <p>Assemble the mounting plate, top plate and smallest ring as pictured above and then attach it to your lamp socket.</p> <h5>Rings</h5> <p>The rings are put together by flexing them slightly. If you are using the filament connectors option (recommended) insert a short piece of filament into the cone shaped connectors on the inside of each ring. Depending on your design you might have to put the rings together before inserting the filament.</p> <h5>Multi part rings</h5> <p>If you have any rings larger than your print bed size they will be split into multiple parts. Connect the parts by using short filament pieces and, if needed, a small amount of glue.</p> <h3>Parameters</h3> <p>Below is a visual representation of the customizable parameters. All parameters are also explained in the script file.<br/> <img alt="render modes" src="https://i.imgur.com/52mjNau.png" width="100%"/><br/> <img alt="high resolution" src="https://i.imgur.com/dTeh0lh.png" width="100%"/><br/> <img alt="parameters 1" src="https://i.imgur.com/prAlaPz.png" width="100%"/><br/> <img alt="parameters 2" src="https://i.imgur.com/fFFqYp9.png" width="100%"/><br/> <img alt="parameters 3" src="https://i.imgur.com/8HXxSND.png" width="100%"/><br/> <img alt="parameters 4" src="https://i.imgur.com/bWxS2Pj.png" width="100%"/><br/> <img alt="parameters 5" src="https://i.imgur.com/B3XRntD.png" width="100%"/><br/> <img alt="parameters 6" src="https://i.imgur.com/5LazXj6.png" width="100%"/><br/> <img alt="parameters 7" src="https://i.imgur.com/s8cKKRE.png" width="100%"/><br/> <img alt="parameters 8" src="https://i.imgur.com/b9bLuah.png" width="100%"/><br/> <img alt="filament connectors" src="https://i.imgur.com/jriBnBa.png" width="100%"/><br/> <img alt="parameters 9" src="https://i.imgur.com/gdDRQ0o.png" width="100%"/></p> <h3>Example profiles</h3> <p>If you want to make your own lamp shade based on the two models I have included you can do so by putting the following in a file named gyro_lamp_shade.json in the same folder as the gyro_lamp_shade.scad file before opening it in OpenSCAD. Then you can access and edit the profiles by using the customizer (uncheck View -> Hide Customizer).</p> <p>{<br/> "parameterSets": {<br/> "ikea_hemma_cord_set_prusa_mk3": {<br/> "evenRingColor": "BurlyWood",<br/> "filamentConnectorDiameter": "2",<br/> "filamentRotationClearance": "0.1",<br/> "highResolution": "false",<br/> "innerRingDiameter": "86",<br/> "lightBulbDiameter": "60",<br/> "maxPrintSize": "210",<br/> "mountClearance": "0.2",<br/> "mountingBarMinimunThickness": "2",<br/> "mountingBarWidth": "6",<br/> "mountingPlateCenterHoleDiameter": "40.4",<br/> "mountingPlateColor": "Gray",<br/> "mountingPlateThickness": "3",<br/> "oddRingColor": "Wheat",<br/> "outerRingMaxDiameter": "210",<br/> "renderMode": "0",<br/> "ringHeight": "18",<br/> "ringHeightStepping": "0",<br/> "ringSpacing": "6",<br/> "ringThickness": "2",<br/> "showLightBulb": "true",<br/> "socketNutMaxDiameter": "58",<br/> "socketTopToRingCenterDistance": "80",<br/> "splitConnectorHoleDepth": "5",<br/> "topPlateColor": "LightGray",<br/> "topPlateThickness": "1",<br/> "useFilamentConnectors": "true"<br/> },<br/> "ikea_strala_table_lamp_prusa_mini": {<br/> "evenRingColor": "BurlyWood",<br/> "filamentConnectorDiameter": "2",<br/> "filamentRotationClearance": "0.1",<br/> "highResolution": "false",<br/> "innerRingDiameter": "55",<br/> "lightBulbDiameter": "35",<br/> "maxPrintSize": "180",<br/> "mountClearance": "0.2",<br/> "mountingBarMinimunThickness": "3",<br/> "mountingBarWidth": "8",<br/> "mountingPlateCenterHoleDiameter": "28.4",<br/> "mountingPlateColor": "Gray",<br/> "mountingPlateThickness": "3",<br/> "oddRingColor": "Wheat",<br/> "outerRingMaxDiameter": "180",<br/> "renderMode": "0",<br/> "ringHeight": "34",<br/> "ringHeightStepping": "-4",<br/> "ringSpacing": "6",<br/> "ringThickness": "2",<br/> "showLightBulb": "true",<br/> "socketNutMaxDiameter": "34",<br/> "socketTopToRingCenterDistance": "52",<br/> "splitConnectorHoleDepth": "5",<br/> "topPlateColor": "LightGray",<br/> "topPlateThickness": "2",<br/> "useFilamentConnectors": "true"<br/> }<br/> },<br/> "fileFormatVersion": "1"<br/> }</p>
With this file you will be able to print Customizable gyro lamp shade with your 3D printer. Click on the button and save the file on your computer to work, edit or customize your design. You can also find more 3D designs for printers on Customizable gyro lamp shade.
