Customizable Glass Plate Clip for Flashforge
thingiverse
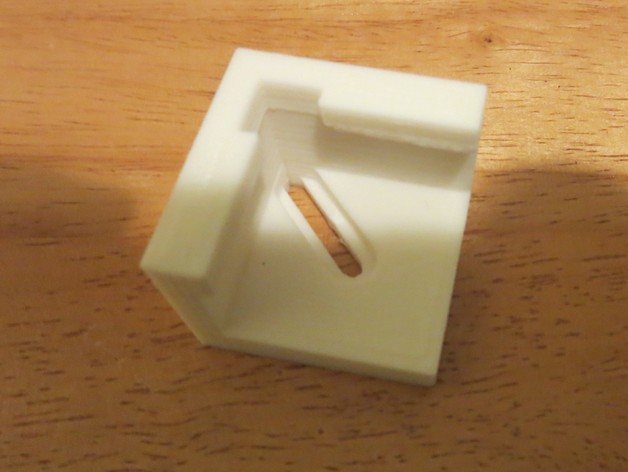
Updated so you can change the length of each side of the clip independently. I wanted the side to be shorter than the back to avoid hitting my custom internal spool holder. Generally, Back Right/Front Left clips are the same, and Back Left/Front Right clips are the same, so I created a single variable that reverses the measurements of the Front Right and Back Left variables, eliminating the need to change them all for the other side. Make sure you use ABS to print these for a heated build plate to prevent melting. This is a customizable glass plate clip remixed from Customizable FlashForge glass bed corner by markwal with more customization options. It allows you to resize almost everything. You can mount this over the top of the existing nut on the build plate and add another nut/wing nut to secure the clips in place. I use a clip on each corner to keep the glass secure. The tabs allow for glass that doesn't quite cover the build plate, enabling a nice centered and tight fit. You can set the size for each of the two tabs separately. The tabs press up against the glass tightly, they do not clip the glass down. Ensure the tabs are level with the top of the glass or just below it (not above the glass plate) to avoid interfering with the print head. Make sure the tabs are not above the glass or they will interfere with the print head. Adding an extra nut to the bolt works better than removing and reusing the existing nut. If you try to reuse the existing nut, you cannot tighten the nut with the glass on the build plate since the bolt will turn, making it difficult to put the clips on correctly so the glass will be centered and the clips are tight against the glass. The included files work perfectly for my Dreamer with this glass plate: https://smile.amazon.com/gp/product/B019VPY9VK/ref=oh_aui_detailpage_o00_s00?ie=UTF8&psc=1. If you have the same exact setup, you will need 2 of each clip. When installing the clips, align them so the smallest tab is at front/back and the biggest tab is at the side (There is a bigger size discrepancy on the sides with this particular glass plate). You should also have 4 M3 nuts or wing nuts. You can check the case that came with the Dreamer for extra nuts... I think it came with spares. But I think the wing nuts will be better in the long run to re-tighten as they loosen up over time. If you do not have the exact same setup, then make sure you put your glass plate in the center of the build plate and measure the amount of gap on each side if the glass is smaller.... Then enter the numbers into the customizer for tab_right and tab_left. The left and right correspond to the clip when looking at the open end. So this will be the side or front/back amount of space depending on which corner the clip is going on. If your glass plate is a perfect fit for your build plate, you can put zero for tab_right and tab_left or maybe 1 if you want to have a tighter fit. Also, ensure to check the height/thickness of your glass plate and change the number in Customizer if needed. Make sure you print one of the Z-Axis spacers so you don't have the print head crunch down into the glass! Print Settings: Printer: Flashforge Dreamer Rafts: No Supports: No Resolution: 0.18mm Infill: 35% Notes: I used the Standard ABS setting in FlashPrint and changed the infill.
With this file you will be able to print Customizable Glass Plate Clip for Flashforge with your 3D printer. Click on the button and save the file on your computer to work, edit or customize your design. You can also find more 3D designs for printers on Customizable Glass Plate Clip for Flashforge.
