Customizable Chainlink Bracelet
prusaprinters
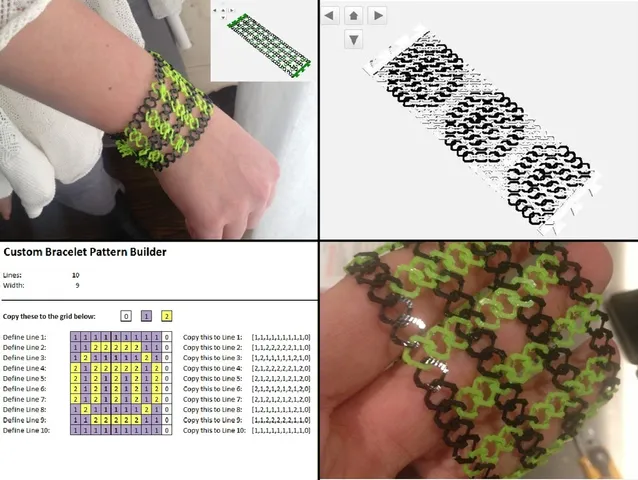
Note: This model was imported from Thingiverse where it originally used the “Customizer” add in. Fear not, it can still be customized by downloading the .scad code and open it using OpenScad!------- This is ahighly customizable bracelet that allows you to choose multiple patterns, link sizes, and bracelet sizes - you can even create your own pattern on the fly! By using 1 or 2 colors of rings as well as omitting some rings, you can achieve some very cool effects. Check out the pre-configured patterns for ideas!This design would not be possible without Zomboe's great chainmail thing - thanks Zomboe! http://www.thingiverse.com/thing:8724InstructionsUpdate March 13 - Refined clasp design and added a few new custom designsUPDATE!Use the new MS Excel "Pattern Builder" to easily build your own patterns!Now you can customize the link size for a chunkier look or just a easier print!Step 1:Open in customizer and select the key parameters:Overall lengthLink SizeDesignBracelet width (only affects some designs)See below for notes on custom designs.Step 2:This is a very intricate print and relies on you to pre-plan the layer thickness and line thickness. The defaults are set for a MakerBot Replicator on "Medium" ABS settings, but you can tweak from here using the corresponding parameters.Step 3:Once you're happy with the design, save as an STL and watch your queue for 3 files - one solid colored file and 2 that can be used for dual-strusion. Good luck, and please post your prints, successful or not!!Custom DesignsFor custom designs, the easiest thing to do is open the attached excel file "Thingiverse Customizable Bracelet - Custom Pattern Builder.xlsx" and tweak your pattern there. You can get a good sense for the pattern using the preview in the file. When you copy back to Customizer, make sure to copy the number of lines in the pattern and the width as well!If you're editing directly in customizer, I strongly recommend you fill out the custom line definitions FIRST, then select the custom design - this will prevent constant re-compiling while you edit the line definitions.In each line, you should enter 10 values in an array. Note that, if you chose a bracelet width of less than 10, the leftmost values in the array will be used, up to the width you specified.In the arrays, a "1" signifies a ring of the primary color, while a "2" signifies a ring of the secondary color. "0" (or any other number) will leave a gap in that spot.***It's VERY IMPORTANT that line definitions be entered as arrays with 10 elements, i.e. [1,1,0,2,2,2,2,0,1,1]You only need to fill out as many lines as you will used, based on the length of pattern variable*Good luck again!Category: Jewelry
With this file you will be able to print Customizable Chainlink Bracelet with your 3D printer. Click on the button and save the file on your computer to work, edit or customize your design. You can also find more 3D designs for printers on Customizable Chainlink Bracelet.
