Customizable Bike "Trunk" Container Adaptor
thingiverse
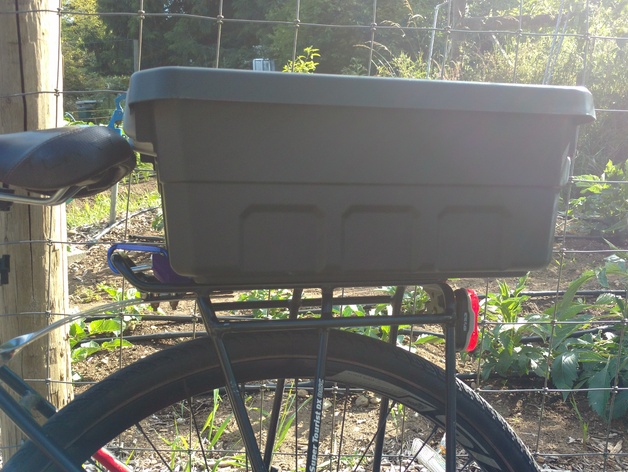
As a Father's Day gift for my cycling dad, I crafted a custom-designed holder to carry a half-flat of strawberries (or any other item he likes to bring home). It utilizes 3D printed adapter pieces that slide into the bike rack behind the rear wheel and connect to any container using 1/4" bolts and lock nuts. A carabiner keeps the holder from sliding out of the rack. I used a Sterilite 4 Gallon Stacker Tote as an example, but nearly any container can be attached to the adapters. More detailed instructions and assembly for my example are posted below. If you have a father or know someone who enjoys cycling and wants to carry more items than fit in their regular bike bag, this gift might just make their day. You can also support this design by voting in Pinshape's bike accessory competition: https://pinshape.com/items/22668-3d-printed-customizable-bike-trunk-container-adaptor. Print Settings: Printer: Flashforge Creator Rafts: No Supports: No Resolution: .3 mm Infill: 20% Notes: I printed three "Bike Holder Main" pieces with no support material upside down and one "Bike Holder End" piece with support to aid in countersunk holes. Each part fits within a 100mm x 65mm x 35mm build envelope, making it suitable for most 3D printers. Post-Printing: Supplies and Assembly Instructions Supplies: Container - Sterilite 4 Gallon Stacker Tote (18"L x 12.625"W x 7.125"H) 1/4” diameter by 1/2” length bolts (14 to 22 screws, depending on desired tightness) Lock nuts and washers for 1/4” diameter bolts (14 to 22 each) Drill, 5/32” drill bit, and wrenches 3/4 ” thick fiber board or plywood (about an 8.5” x 4.25” area) A saw to cut wood to size Three 3D printed base pieces and one 3D printed end piece A carabiner to clip the 3D printed end piece to the bike rack Optional foam or 3D printed organizers for added protection within the container Assembly Instructions: Cut the wood into an 8.5” x 4.25” rectangle, with precision not being essential. Flip the container upside down and place the wood in the recessed rectangle at its center. Align the 3D printed parts so their larger counterbored holes face towards you. Drill down through the 3D printed holes to create 5/32” holes in both the wood and the container. Assemble your holder using nuts and bolts.
With this file you will be able to print Customizable Bike "Trunk" Container Adaptor with your 3D printer. Click on the button and save the file on your computer to work, edit or customize your design. You can also find more 3D designs for printers on Customizable Bike "Trunk" Container Adaptor.
