Custom cat door pass through
thingiverse
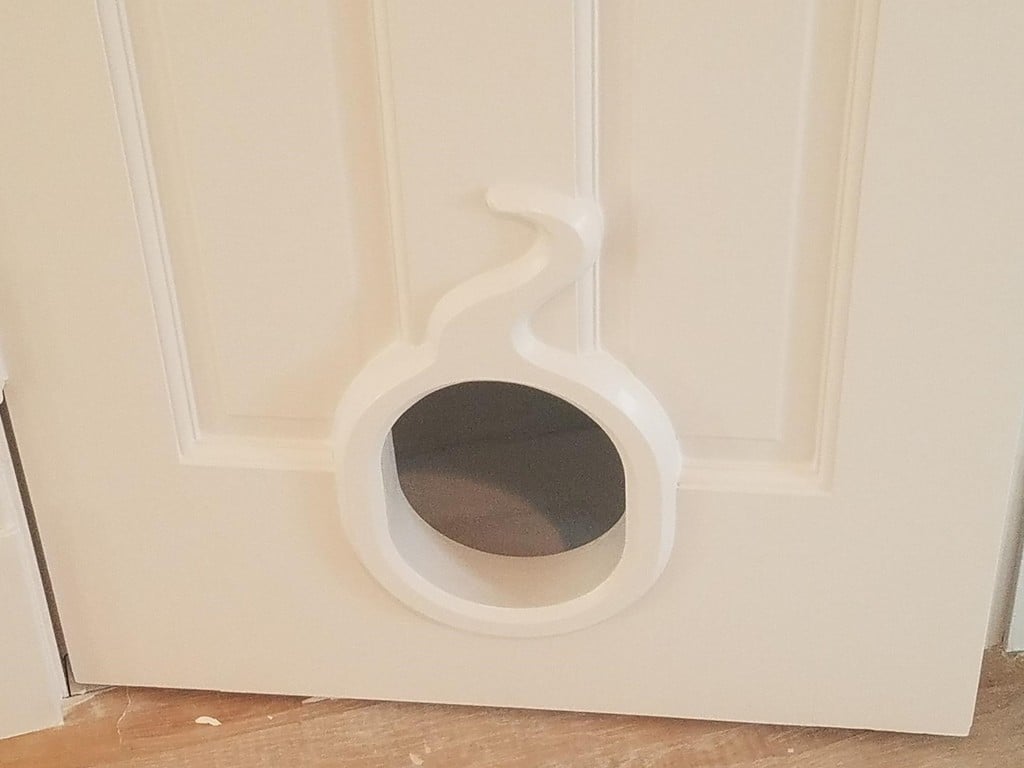
We're giving our home a total makeover and one exciting addition is a cozy closet for our feline friends (the cats are beyond thrilled!). We wanted to create an easy way for them to come and go without having to leave the door wide open. After exploring various commercial options, we found that none of them fit perfectly with the trim on a panel door, and most had either round or floor-touching designs. Neither method appealed to us, so we decided to invest some quality time in modeling! There are numerous models available, each catering to different requirements for attachment parts. To get started, print an interior piece with the hole trim attached. Position it accurately on your door (centering is crucial) and mark the outside of the hole trim, leaving a 1/8" radial clearance. We used a roto-zip with a circle cutter attachment and made multiple passes from both sides to cut out the two arcs. Once the cutout drops, tidy up the short straight sections. We highly recommend devoting quality time to smoothing out the layers to ensure your spouse or significant other gives their approval. A coarse file worked wonders for us, thanks to our printer's strong and fast prints (1.2mm). Be prepared to spend at least an hour on finishing per side. The challenging part lies ahead: you can either print the trim edging separately or integrate it into the main piece. You only need trim edging on the upper portion – we had three sections on our design. If we'd planned ahead, we would have carefully crafted the tail to avoid sloping over the center section of the door! Mark the straight edges of the door pockets and cut back your trim everywhere it's not needed; file flush. Then, invest quality time in trimming the trim – we recommend using a woodworking profile transfer tool (the one with all the pins lined up). Simply press it in place tangent to the cat hole trim and transfer it to an inch or so of edge trim. A sneaky trick is to make your trim edging the right height for your door, ensuring at least a little bit doesn't need cutting. Our printer produces single-width trim, which is easy to clip with flush cutters or a file – results may vary. We glued the inside and outside pieces to the door one at a time, then added some filler and sanded out the joints to achieve a smooth finish.
With this file you will be able to print Custom cat door pass through with your 3D printer. Click on the button and save the file on your computer to work, edit or customize your design. You can also find more 3D designs for printers on Custom cat door pass through.