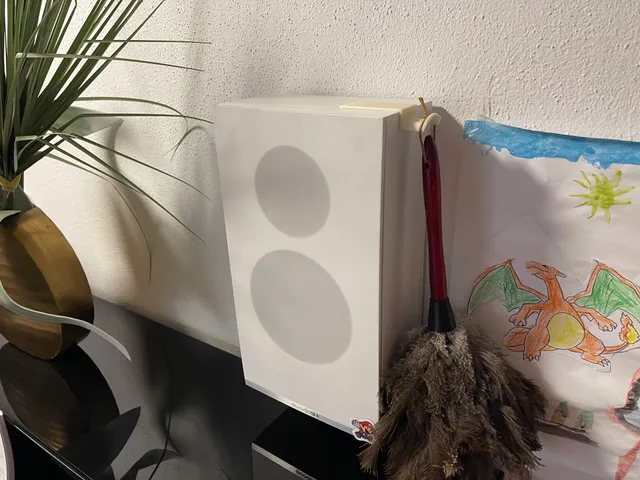
Cubicle Hook Tesa Power Strip Mod
prusaprinters
A small mod of Ben G's original model to be sticked to a flat cornered surface by double sided tape or Tesa Power Strips.I added a small cavity with 3 different depths (.stl with no addition is flat for double-sided tape, 0,6 mm for thicker tapes and 0,3 mm for thinner ones). The only difference between the 3 model files is this depth.I printed it without supports, but was really wondering if my Prusa Mini can bridge the part you can see in the 3rd picture, since it bridges around a small corner.It had no problem with the deep 0,6 mm model and needed no cutting of not nice overhangs, so yay, learned something new! Long story of why and howSince our piano is a real dust magnet I wanted to have our duster somewhere near the thing to inspire me to dust more often.Being not a really good 3D designer (yet, hopefully…) I wanted to design a simple hook to be attached by double sided tape or Tesa Power Strips.But first I thought I search for “hook” on pursaprinters.orgBut first-first I decided to scroll through the newly released models a bitAnd the third newly published model (see the original part from my remix) was was pretty much exactly what I envisioned ♥️ Small “how to” for Fusion360 beginners like meMinor adjustments where necessary for my use case, probably there are easier and better ways, but that is what I did:Fusion360 is free for private use, I think it is a good program to get started and works really well for editing existing mesh files like .stl or .3mf.I use the German version of the software, so I hope I use the correct terms and menu names, but I think you will get the idea.In a new project I selected import - mesh and switched to the mesh workspace on the top menu bandThere I had the original model in yellow/orange colorI just wanted to cut some parts, namely the corner on the end and the small triangle because I wanted to stick it to a flat, cornered surface like a bookshelf (or speaker in my case)The simplest way to do this (that I know of) is to use the menu construct - offset plane where I want to divide the model.This requires some visual judgement, but mostly the model have even millimeter sizes and with the top & left/right view in Fusion360 it will work out very well.When the offset plane is placed I use modify - cut plane.This has some options, I don't like to delete the remaining part but split it. Also it is useful to select a filling option, but I don't know what the difference between the 2 is…Like this I made all the cuts and dragged the undesired parts away with the move tool (M key)Here I could start printing, but I wanted to add a little detail, too:I selected the parts I wanted to print and selected modify - convert mesh.Back to the solid workspace I joined all the divided parts I needed together and created a sketch to negatively extrude a cavity for the Tesa Power Strips.The smaller Poster Strips measure 14,5 x 42 mm, the large ones 50 x 20 mm, so I decided to make the space a little larger with 55 x 22 mm.Bam, finished, export to slicer and print! I hope this small explanation can help somebody to try it out for themselves, since small modifications to existing models are really not that hard to do.Thanks for reading my long ramblings, I also added the f3d file hopefully with the history of what I did
With this file you will be able to print Cubicle Hook Tesa Power Strip Mod with your 3D printer. Click on the button and save the file on your computer to work, edit or customize your design. You can also find more 3D designs for printers on Cubicle Hook Tesa Power Strip Mod.
