Cubex Cleaning the wipe III
thingiverse
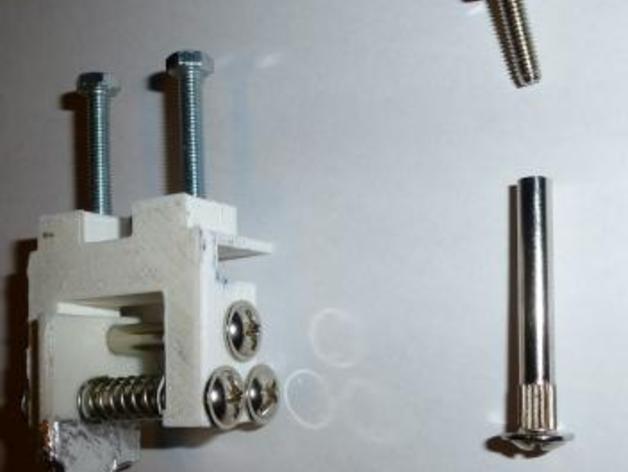
Instructions to Set Up Cubex Cleaning System Version III: First, carefully install the printed parts into service mode. You must test the system numerous times in manual operation before launching a new print session. For best results, print all components using PLA filament. Follow these specific instructions for each component: 1. Print Abanador_parte_61.stl with the z-axis inverted - supports are optional. 2. For Abanador_parte_102.stl, print with supports in ABS or a compatible material. 3. Print empurrador05.stl without support materials. 4. Rotate Suporte_nas_guias_parte_01.stl before printing to ensure optimal results. 5. Secure the aluminum tape on Abanador_parte_61.stl according to design specifications. 6. Procure the necessary shaft component from an external source. 7. Source a weak spring, possibly found in stencils - this might be the most challenging part of assembly. 8. Attach empurrador05.stl securely to the rear fan fastener with great care. Ensure you have the required fasteners (2 M4 screws) and nuts to complete the installation. Verify the wipe / offset settings for precise calibration
With this file you will be able to print Cubex Cleaning the wipe III with your 3D printer. Click on the button and save the file on your computer to work, edit or customize your design. You can also find more 3D designs for printers on Cubex Cleaning the wipe III.