Cube Printer (2nd Generation) Filament Chip Carrier
thingiverse
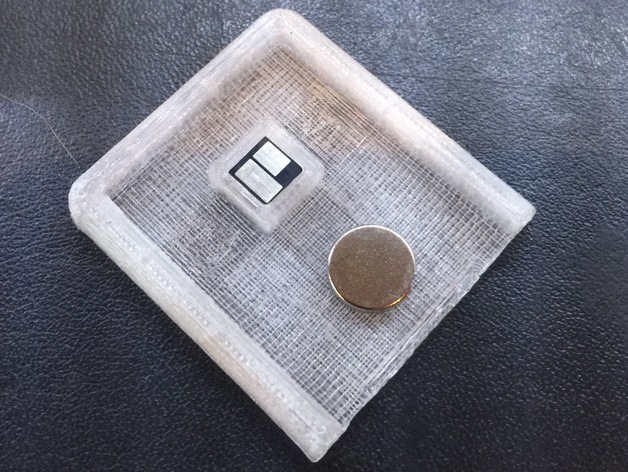
I have employed this model to mount an unmarked chip. This approach is adopted when utilizing non-proprietary bulk spool filament. When the printer demands the chip's presentation, I apply the chip directly onto the reader pins. As soon as the print begins, I press the 'Stop' button on the touchscreen and then remove the chip. The printer will continue to print using the bulk filament. The image shows that I positioned the device face-down adjacent to the reader, and then slid it onto the reader pins when necessary. After the chip has been read, and Stop was pressed, I slipped it back into its channel to disconnect the chip, thus preventing any updates to filament usage. I produced this using transparent filament so that I could visually confirm that the placement of the chip was accurate. Unfortunately, this resulted in challenging photos to decipher due to visibility concerns. Moreover, within these images you might notice a magnet secured to the device; this modification allowed me to secure the device onto the printer between uses. Two carriers were produced - one for PLA and another for an ABS chip.
With this file you will be able to print Cube Printer (2nd Generation) Filament Chip Carrier with your 3D printer. Click on the button and save the file on your computer to work, edit or customize your design. You can also find more 3D designs for printers on Cube Printer (2nd Generation) Filament Chip Carrier.