CTC new X Axis
thingiverse
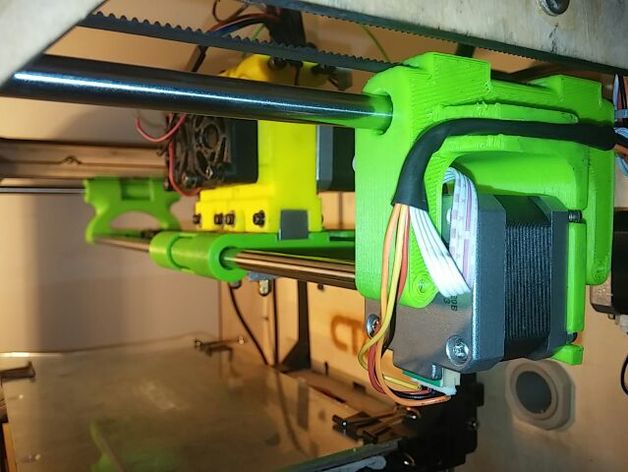
I've Decided to Give My Printer a Major Facelift! My goal is to swap out the noisy LM8UU and try new alternatives. I opted for the nylon bushings instead of regular LM8UU bearings - this requires some modifications to accommodate the size, which I can provide in an IGS file if needed. I've Printed Several Parts with This New Setting, and Everything is Quiet and Smooth Now! I made adjustments to my X carriage after installing it to protect the GT2 belt. Instructions You can print these files using *.x3g or use the STL file with your own settings - just be cautious with the speed. * Nylon Bushings Require Corkscrew Settings, While Other Parts Need 20-30% Infill, Three Perimeters, and 0.3 Layer Height. The Support Density Should Be At Least 40%, but I Use a 0.5 Nozzle. Once Printed, Extract the Center Cylinders in Your X Carriage - They Were Designed for Simple Support Removal. Then, Clean Everything, Test the Bushings, and If Needed, Soak Them in Water to Relax Their Tightness. Place One Bushing in Each Hole of the Carriages and Secure with Adapters - These Allow Easy Extraction for Worn-Out Bushings.
With this file you will be able to print CTC new X Axis with your 3D printer. Click on the button and save the file on your computer to work, edit or customize your design. You can also find more 3D designs for printers on CTC new X Axis.