Crocodile Prusa Edition
cults3d
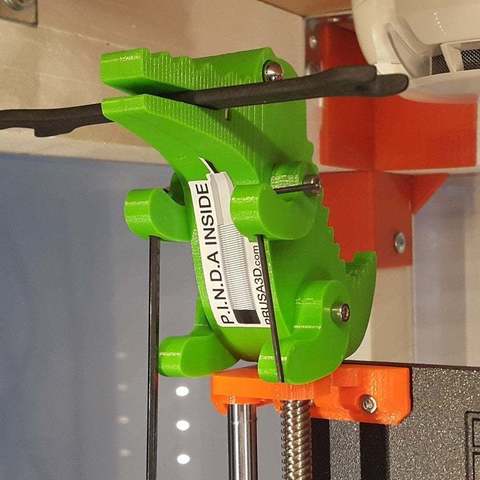
The Partner for Your Printer Assembly Step 1 - Tools Required for This Chapter * Needle-nose Pliers for Magnets * 2.5mm Allen Key for M3 Screws Step 2 - Preparing Components * Prepare Following Parts to Build the Crocodile: * Printed Parts (6x), Use PET-G, 0.2mm, 15% Infill, No Supports * M3x40 Screw (2x) * M3n Nut (2x) * 10x6x2mm Magnet (2x, Optional) * 20x6x2mm Magnet (1x, Optional) * 8mm Steel Ball (2x, Optional) Step 3 * Insert Two M3n Nuts into the Crocodile's Right Hand and Leg * Connect Two Body Parts and Secure via Hands and Legs with M3x40 Screws, Don't Use Excessive Force * Don't Mix Left and Right Hands and Legs, Otherwise You'll Have One Ugly Crocodile * Insert 20x6x2mm Magnet into the Slot as Shown, Use Allen Key to Align the Magnet Inside the Slot * Insert Two (Eye)Balls into Holes, They Will Be Held by Magnets Installation Place the Crocodile onto the Top of One of the Z-axis-tops Using Existing Hex Hole It's Haribo Time! Usage * Store Some Frequently Used Tools into Jaws, Hands and Maybe on the Tail of the Crocodile * Enjoy!
With this file you will be able to print Crocodile Prusa Edition with your 3D printer. Click on the button and save the file on your computer to work, edit or customize your design. You can also find more 3D designs for printers on Crocodile Prusa Edition.