Cricut Tool Holder Organizer
prusaprinters
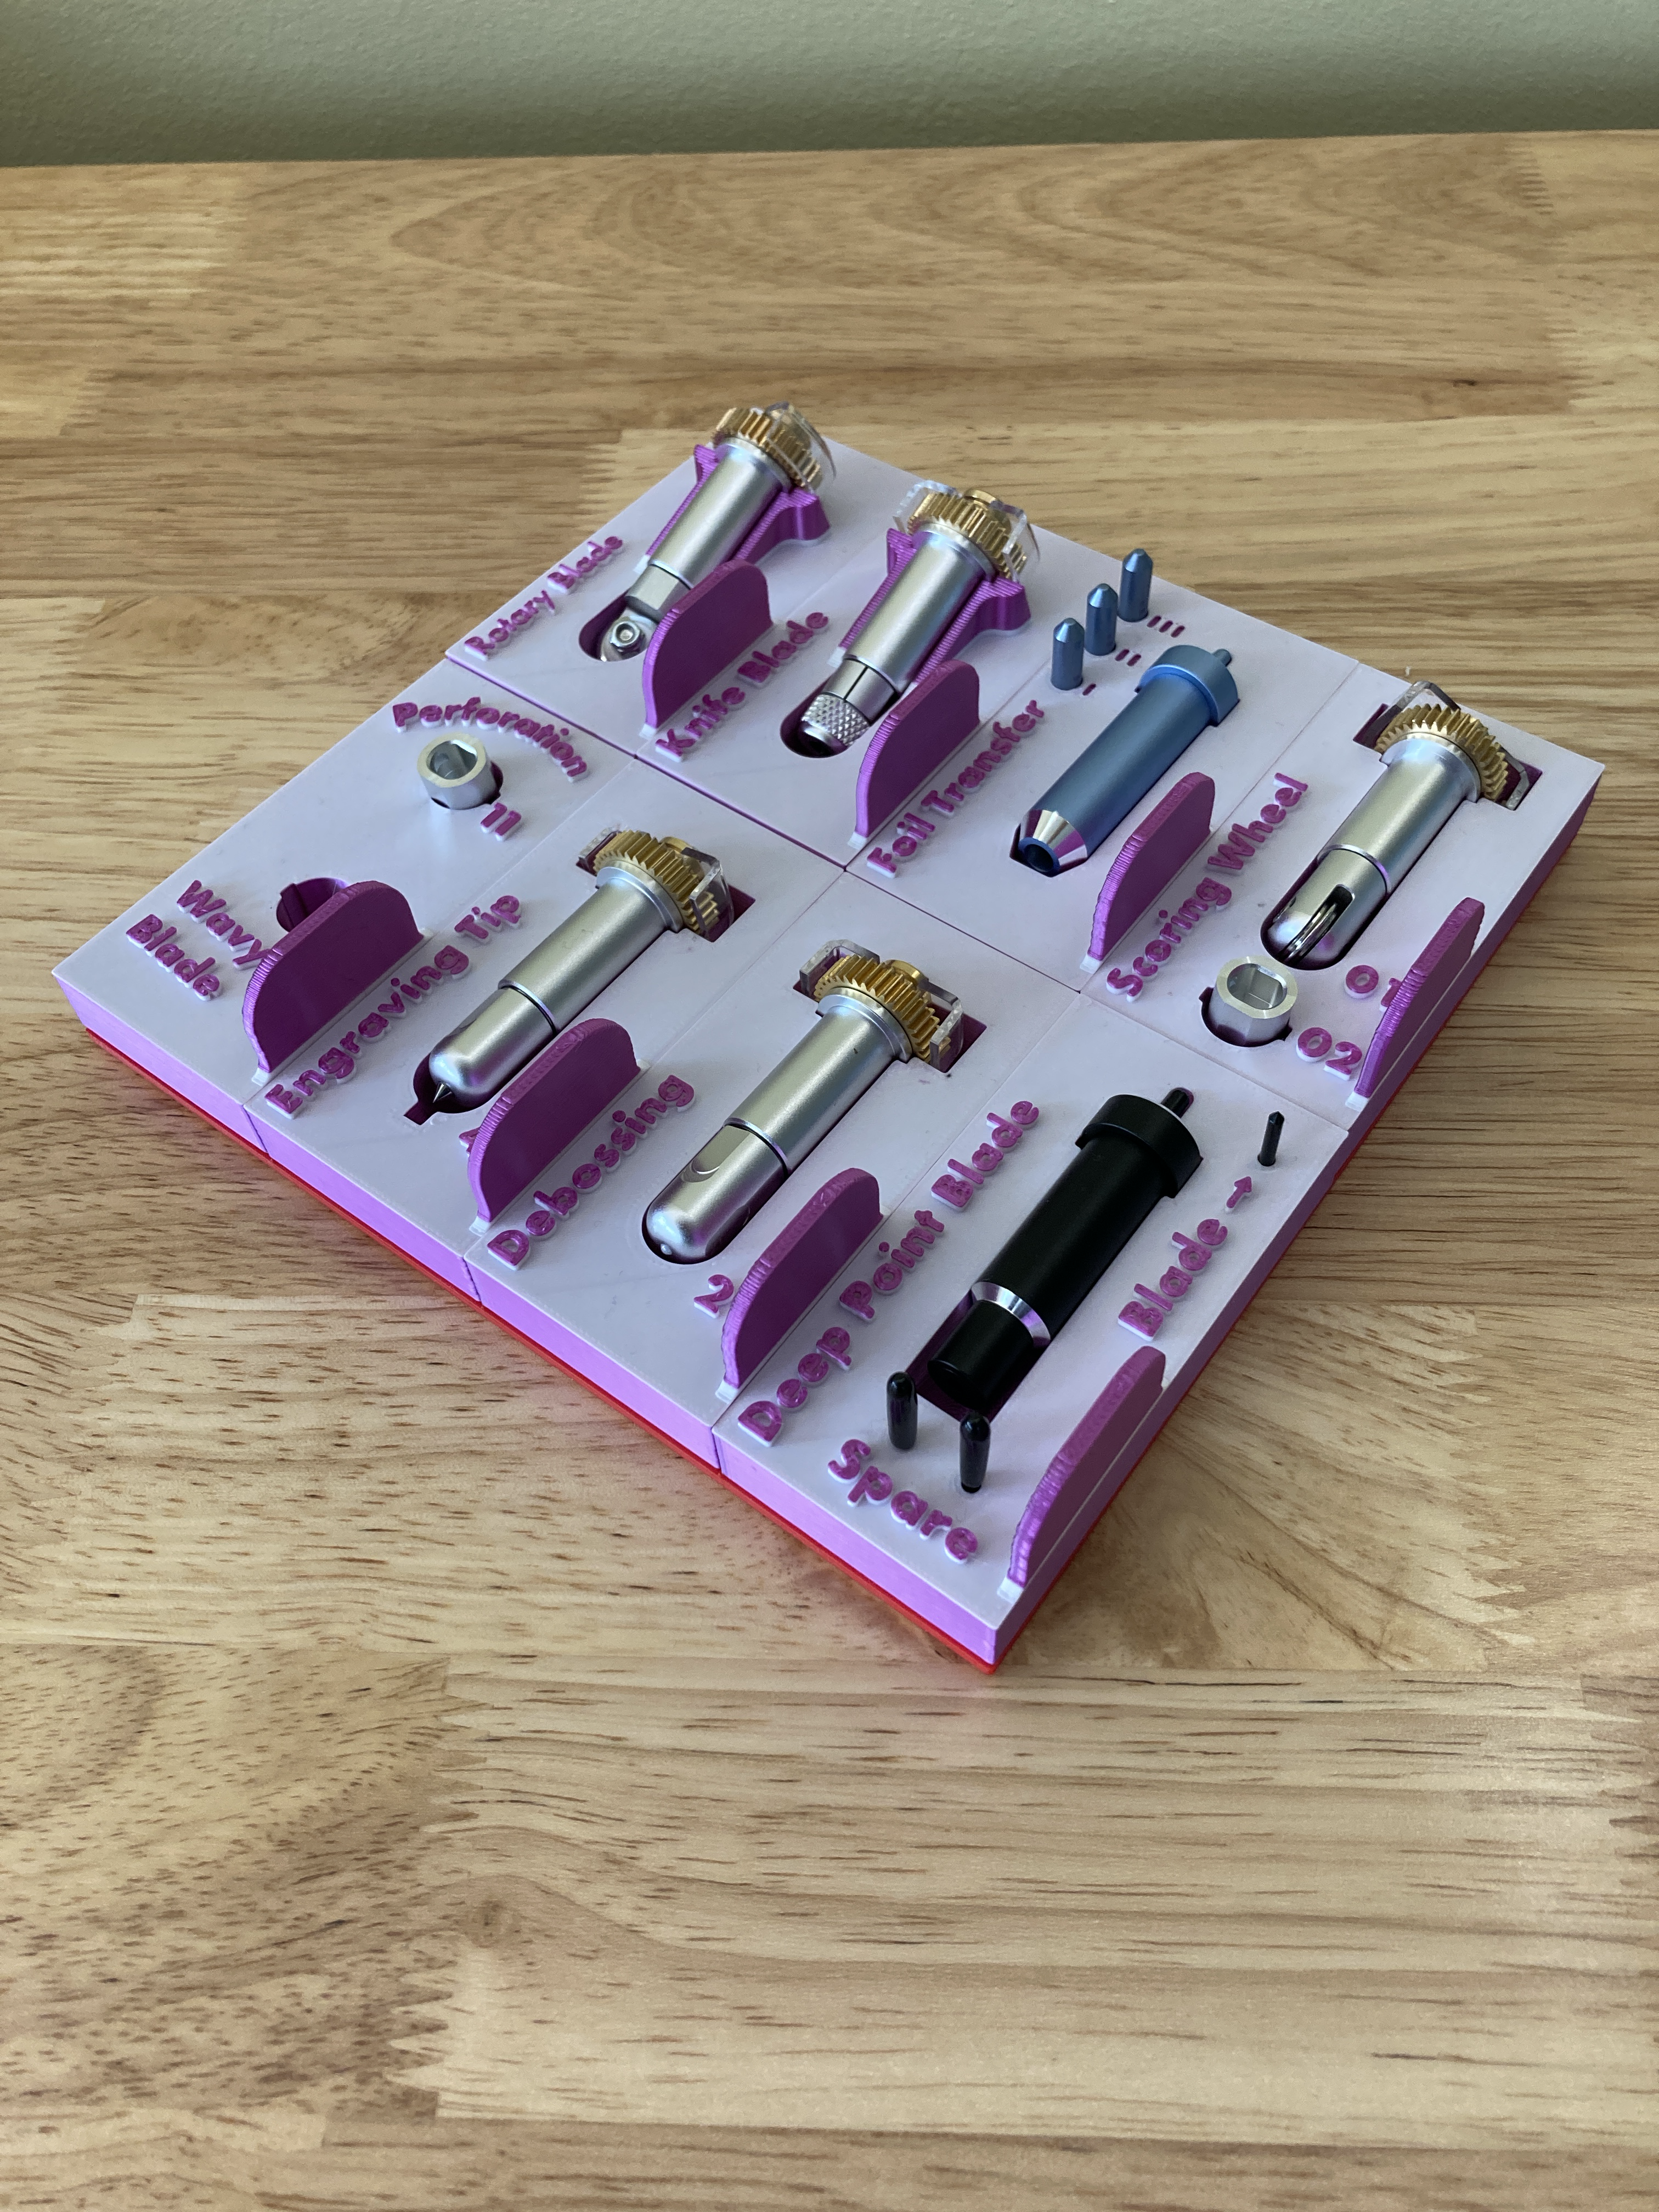
<h4>Cricut Tool Organizer</h4><p>This is an organizational system for the Cricut paper / vinyl cutting system. The Cricut uses different blades and rollers and such for cutting different materials. For a given project, you rarely need more than one or two tools, so I don't like the current systems which hang all of your tools and take up space on the tabletop. So, I designed this system to fit in a drawer from which individual tools can easily be removed for a particular project.</p><h5>The System</h5><p>I used an idea from Alexandre Chappele's YouTube channel. Alexandre built lots (and lots) of bins with an underlying grid system to hold them into a drawer or container. I used a grid, which is attached to the drawer bottom. The individual tool holders have indentations on the bottom, which fit into the grid. They can be easily removed and replaced in any spot on the grid.</p><h5>The Tool Holders</h5><p>Each tool holder was individually modeled, using Fusion360, in order to hold the tool and any associated extra bits (blades, extra tips, etc). Each holder then got a label, created from extruded text, and perhaps an identifying number. This number can help me identify the tool, which sometimes looks pretty similar to other tools.</p><p>Each tool holder has a grip on the lower right side, which makes it easy to lift away from the grid.</p><p>Many of the tools have an extra indentation at the lower end, which means I can easily push down on one end of the tool and have the other end pop up for easy removal from the holder. See the picture (the one with my finger) for an illustration of how this works. It was a bit difficult to model, but the implementation works amazingly well.</p><p>The Rotary Blade tool and Knife Blade Tool have sharp pointy ends (that is, after all, their job). I made elevated inclines for these tools to rest on. By doing so, the sharp bit is below the surface of the holder and safe from sticking into my fingers. The elevation also serves as a warning to me to indicate that I need to be careful with these tools.</p><h5>The Print</h5><p>I printed these in PLA with .2mm layer height. I used Hatchbox Red PLA for the grid. I used some generic “Silky Magenta” PLA for most of the print.</p><p>However, in a touch of mad genius, I did a filament change just below the surface of the deck of these holders. There are two layers of white PLA on the entire deck, which give it a solid white coating. I again switched filament back to the Magenta, just below the top of the text. The text looks awesome and is extremely readable. I'm a Genius!</p><p>I printed them on my Prusa MK3S. Each holder took about 2:05 and consumed about 22g of filament.</p><h5>Conclusions</h5><p>This project took a solid weekend, but I'm very proud of it. The CAD was fun, and occasionally maddening (rotation of the cutter body to get the lower indentation was really frustrating). But, that's par for the CAD course. I was able to model each part in about the time it took to print the previous one. </p><p>It is extremely satisfying when using my Cricut. I simply reach into the drawer, pull out the tools I need, and snap them back into place when done.</p><p>Please contact me if you have any questions or would like to make your own!</p><p><strong>Fusion360</strong></p><p>I have included a .f3d file, which is the export raw file from Fusion360. Enjoy!</p>
With this file you will be able to print Cricut Tool Holder Organizer with your 3D printer. Click on the button and save the file on your computer to work, edit or customize your design. You can also find more 3D designs for printers on Cricut Tool Holder Organizer.