
Creality Ender 3 4010/4020/5015 Fan Mount and Duct
thingiverse
# Ender 3 4010/4020/5015 Fan Mount and Duct ### Main Cooling Fan Mount 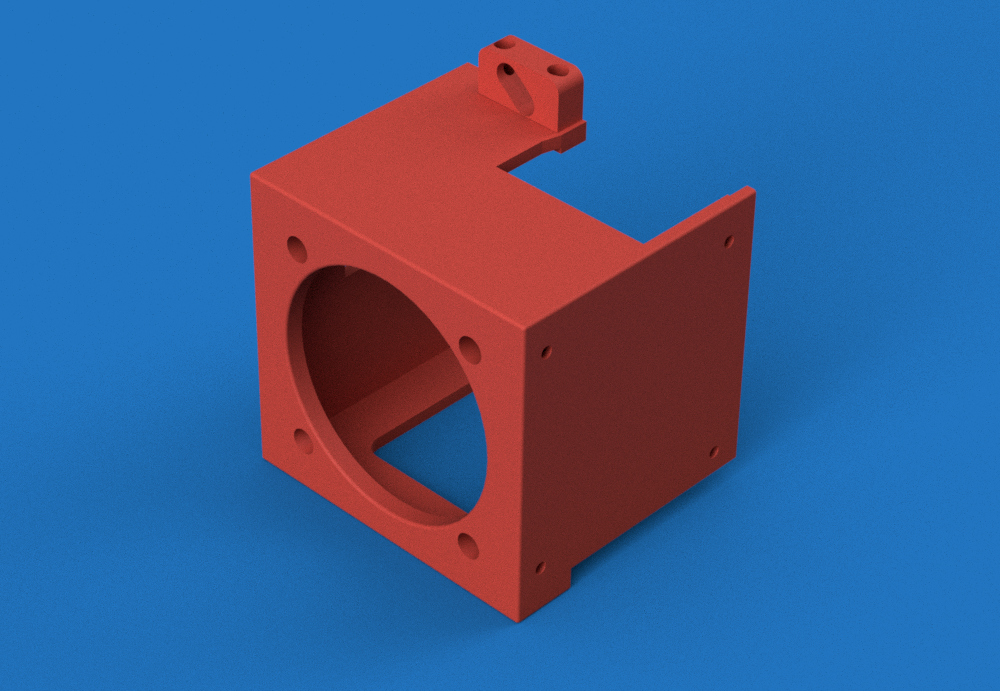 This part is designed to utilize a 4020 axial fan on Ender 3 and other Creality printers for heatsink cooling. A 4010 fan should work mounted inside, but I haven't tried it. You can use the stock part cooler or the 5015 bracket and duct with this part. Parts needed: * The stock heat sink cooling fan or another 4010 or 4020 axial fan. * 2-4 M4 x 15-25mm screws for mounting the fan. * 4 M3 x 8-10MM screws. * The original 2 M3 fan cover mounting screws or 2 more M3 x 6mm. * The original 4 part cooling fan screws or 4 M2 socket cap screws. Parts to print: <ul> <li>plenum_v2.stl</li> <li>bracket_left_v2.stl</li> <li>bracket_top_v2.stl or bracket_top_no_slot_v2.stl</li> </ul> I designed this in multiple parts to avoid the need for supports. Print with the fan intake hole down. Be sure to print the left bracket with a flat side down. Assembly: 1. Mount the top bracket to the fan housing using 2 M3 screws. 2. Mount the left bracket to the fan housing using the 2 stock M3 cover mounting screws or your own M3 screws. 3. If the screw holes are tight, you may get bulges around them where the housing mounts to the metal bracket. Trim them and any other bumps using a razor or a file, so that the housing will mount flush with the metal plate. 4. Do the following 2 steps in whatever order works best for you. 5. Mount the fan to the fan housing. Make sure it is oriented so that it blows inward. 6. Mount the stock part cooling fan (don't forget its 90° duct) or the 5015 fan duct to the right side of the fan housing. 7. Mount the fan housing using M3 screws. ### 5015 Bracket and Duct 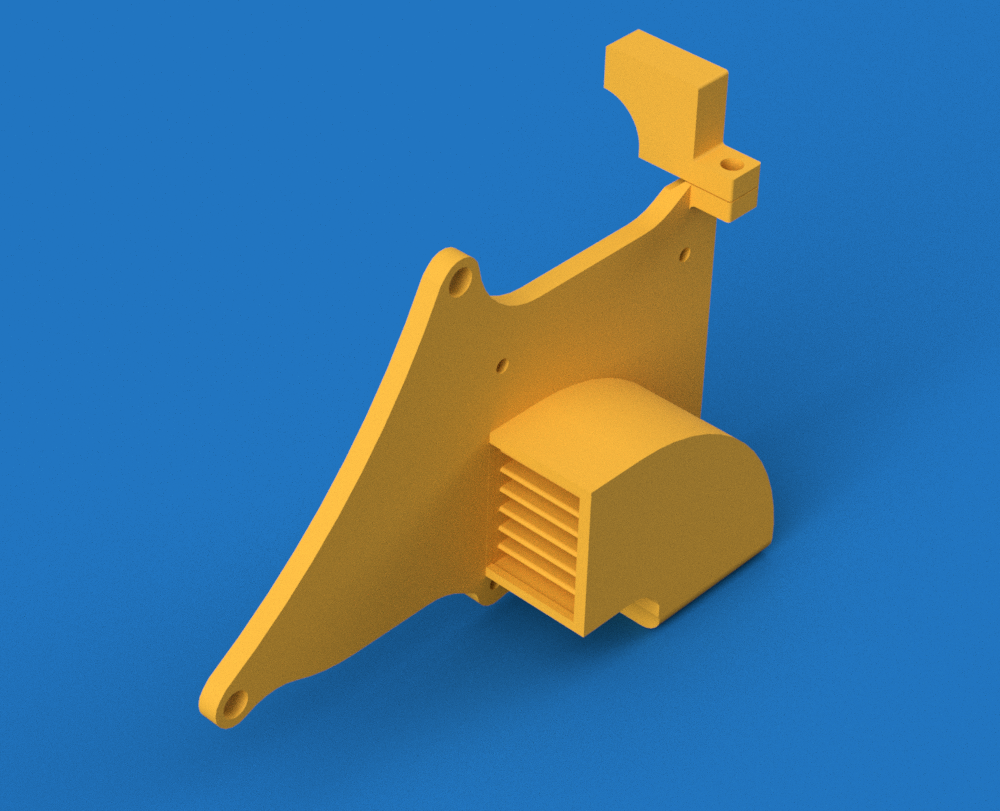 This part should also work with the stock metal fan cover. Parts needed: * A 5015 centrifugal fan. * 3 M2 screws. * 1 M3 x 6-8mm screw if using the optional bracket. Parts to print: <ul> <li>5015_duct_v2.stl or 5015_duct_v3.stl</li> <li>5015_lower_duct_v3.stl or 5015_lower_duct_v3_mod.stl if using duct v3</li> <li>duct_bracket_v2.stl</li> </ul> No supports are needed for the main part. The optional small bracket should be printed with supports and oriented with the slot facing upwards. Assembly: 1. If you are using the printed main cooling fan mount, assemble it first as per above, but do not mount it to the printer. 2. Mount the duct to the right side of the main cooling fan box using 3 M2 screws. 3. Mount the entire assembly to the printer. ### Optional Items 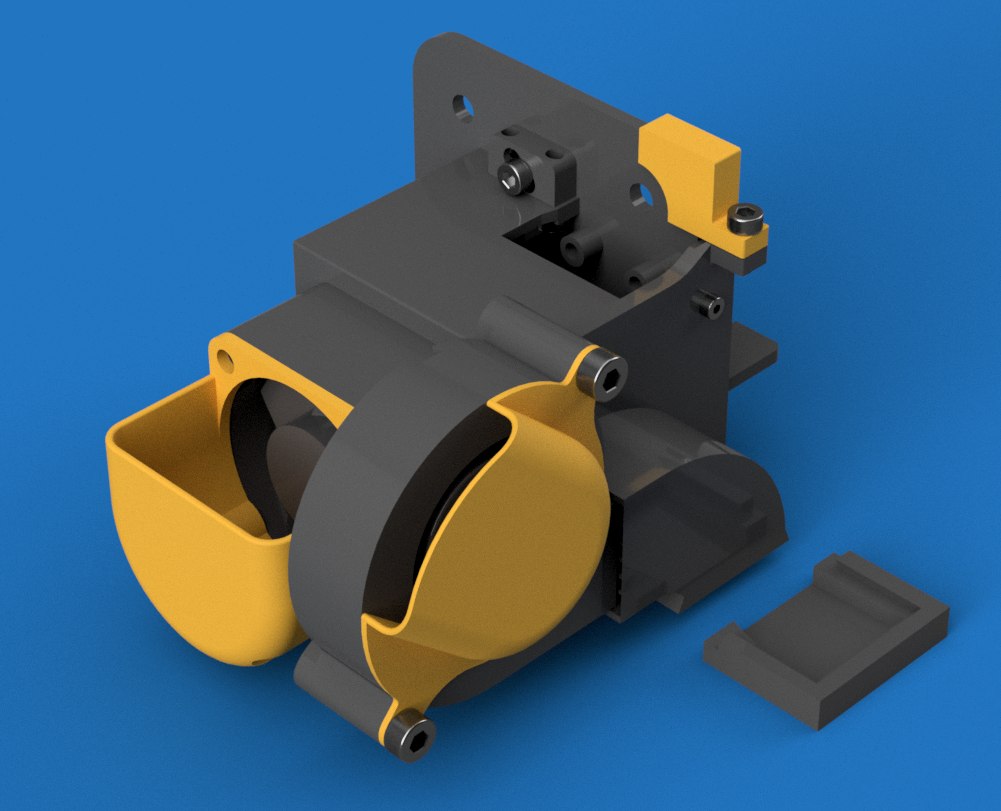 duct_bracket_v2.stl is an optional bracket that hooks to the hot end mounting plate, giving the entire assembly a bit more stiffness. It won't work with the stock metal fan housing and would probably offer little to no benefit anyway. 40_intake.stl and 50_intake.stl are optional intake ducts, which may reduce the amount of random plastic scrap getting sucked into the fans. ### Version 3 Duct 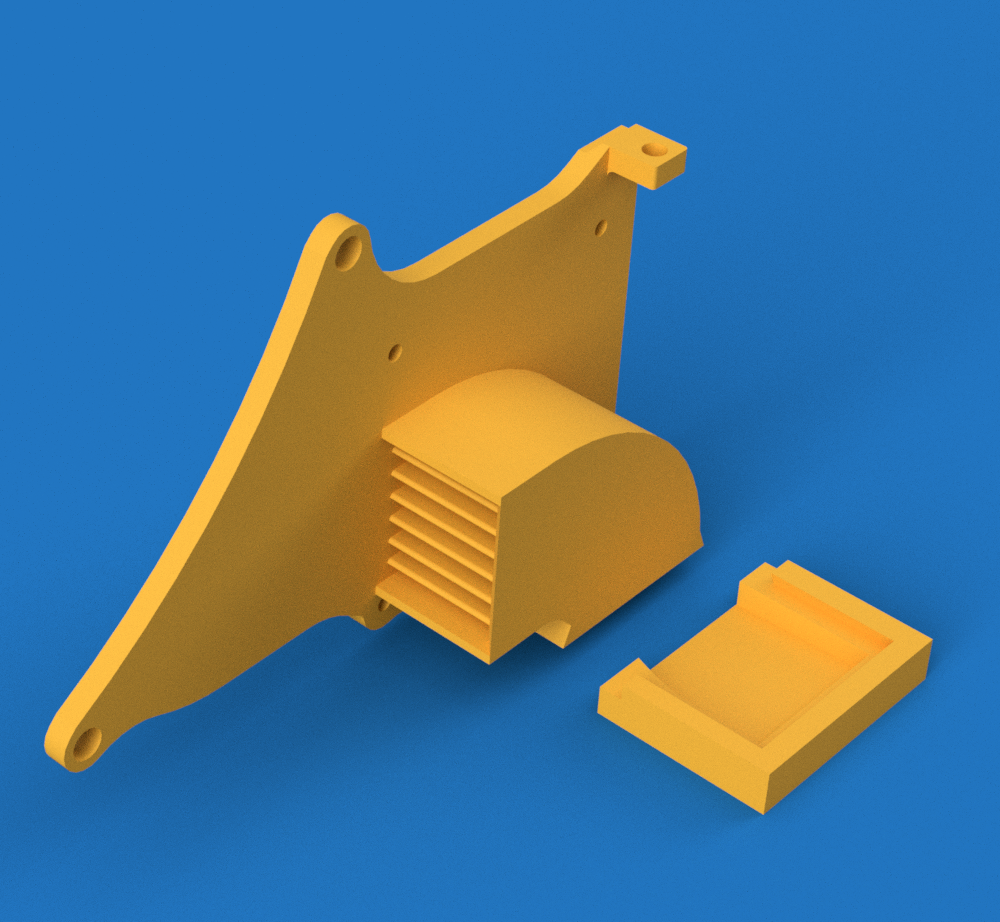 Version 3 of the 5015 mount and duct uses a separate lower duct that snaps in using a dovetail joint, which may provide better airflow. Step files are included if you'd like to make your own modifications.
With this file you will be able to print Creality Ender 3 4010/4020/5015 Fan Mount and Duct with your 3D printer. Click on the button and save the file on your computer to work, edit or customize your design. You can also find more 3D designs for printers on Creality Ender 3 4010/4020/5015 Fan Mount and Duct.