CReality CR-10 / CR-10S Z axis stabilizer brace, including OpenSCAD sources
prusaprinters
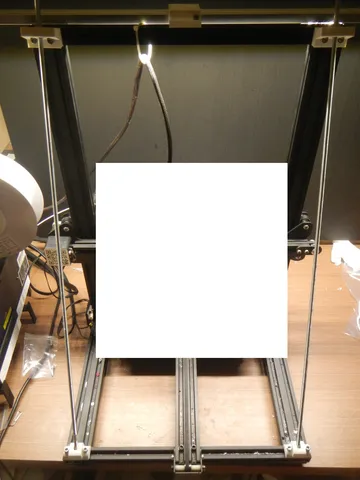
Three parts to add bracing to your older CR-10 printer's Z axis. (Some of the newer CR-10 models already have these.)Print two bases, a regular top piece, and an offset top piece for the left side (where the X-axis zeroing microswitch is located).Requires two threaded rods of about 65 to 70mm (depending on printer height) and four to eight nuts. I used the cylindrical anchors shown in the fourth photo in the bases, and ordinary hex nuts at the tops. Optionally, you can cover the threaded rods with some tubing, either plastic or metal, for appearances and protection. Stainless threaded rods are recommended.The offset top piece is necessary to prevent the fan assembly on the gantry from hitting the left threaded rod when near the top of the Z-axis range. You could also either not print anything tall, or give up X-axis width on the left of the bed by installing something to trip the microswitch sooner.OpenSCAD sources are included so that you can modify these for whatever anchoring nuts you use, and can change the angles on the top parts to match the angles the threaded rods make.
With this file you will be able to print CReality CR-10 / CR-10S Z axis stabilizer brace, including OpenSCAD sources with your 3D printer. Click on the button and save the file on your computer to work, edit or customize your design. You can also find more 3D designs for printers on CReality CR-10 / CR-10S Z axis stabilizer brace, including OpenSCAD sources.
