Creality cooling + drag knife + EZ leveling
prusaprinters
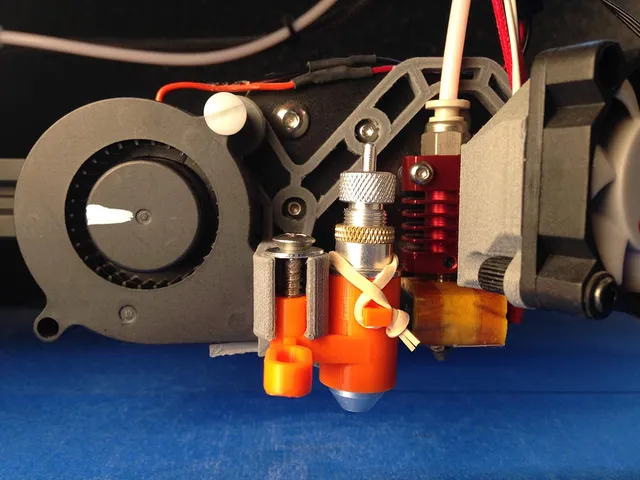
Upgrade your cooling + drag knife + dial indicator mount. The 4010 fan swings out of the way when the dial indicator is used or when you need to work on the hotend. This is made for the CR-10 but should work with Creality printers with the same X carriage. You can make a test fit template by stopping the print after 1mm of height. What you need:5015 fan4010 fanDial indicator with a 8mm stem3 M3 nuts and bolts1 M4 nut and bolt for the 5015 fan*WARNING* if your print bed is smaller than 300x300mm you will need to modify the gcode file before use!Leveling the bed:-heat the bed up to normal operating temperature-swing the fan over and press fit the dial indicator into the mount-run the included level.gcode-after homing there is a 10 second pause for zeroing the indicator-there is a 5 second pause at each corner for adjustment-it goes around twice-tweak the gcode to match your workflow***remove dial indicator and swing fan back before printingThis process levels the bed but does not set the correct distance between the nozzle and the bed. Test print to get the right height. Try using thingiverse.com/thing:2425796 for easy adjustment. Turn each knob an equal number of teeth to maintain a level bed.Turn your 3D printer into a vinyl cutter for <$15.What you need:Drag knife from Amazon/eBay search 'vinyl cutter blade holder Roland'rubber bandscrew and washerFollow this tutorial: https://www.instructables.com/id/Use-3D-Printer-As-a-Plottercutter/Additional notes:-It's a good idea to smooth the bottom edge of the blade holder so it doesn't snag on cut parts-The Inkscape extension needs strokes to create gcode. When saving, the error "no points" means you have no strokes [only fill]. Text needs to be converted to paths. Make it easy to see the cuts by turning off fill and turning on strokes (set width to .1mm) for each object. Print SettingsNotes:.24 layer height [.4 nozzle]4 top, 5 bottom10 walls [perimeters]0 infill0 supportsThe drag knife mount needs supports.Post-PrintingThe hinge bolt should be tight. Use a nyloc nut or loctite to keep it from loosening.
With this file you will be able to print Creality cooling + drag knife + EZ leveling with your 3D printer. Click on the button and save the file on your computer to work, edit or customize your design. You can also find more 3D designs for printers on Creality cooling + drag knife + EZ leveling.