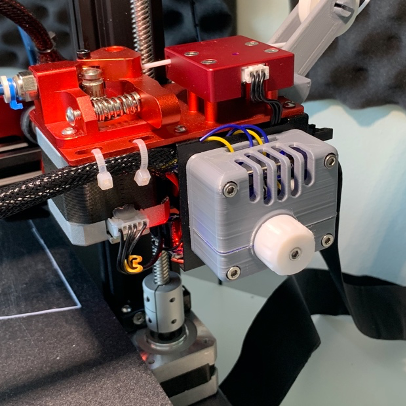
CR10S Pro 'Parts Cooling Fan' Speed Controller Upgrade w/ Instructions
thingiverse
This project comes with a detailed step-by-step guide to assemble components using common tools and parts. An optional step includes adding sprung BBs to create an indexable dial. This module will house a Buck Converter circuit board that allows the fixed 24V output voltage to the CR10S Pro's parts cooling fan to be adjusted between 3-24V. The speed of the fan can then be selected and controlled from print to print. If all fans have been upgraded to quieter 12V alternatives in your printer, this solution offers a controllable parts cooling fan that can be run at much slower RPMs, greatly reducing noise levels. This project comes with a Fusion360 project file, allowing you to modify the printable parts for use with components on hand. To complete the project, you will need: 8x M3 x 8mm socket head screws 3x M3 nuts 1x bobby pin (available at https://www.ebay.co.uk/itm/Brown-hair-grips-pins-6cm-long-waved-kirby-slides-grips/323950382448) 1x LM2596 DC-DC Adjustable Power Supply / Buck Converter (available at https://www.ebay.co.uk/itm/LM2596-DC-DC-Adjustable-Power-Supply-Step-Down-Module-Buck-Converter-3V-35V/283630220212) 1x 8x16x4mm ball bearing (available at https://www.ebay.co.uk/sch/i.html?_from=R40&_trksid=p2380057.m570.l1313.TR10.TRC0.A0.H0.X8x16x4+ball+bearing.TRS0&_nkw=8x16x4+ball+bearing&_sacat=0)
With this file you will be able to print CR10S Pro 'Parts Cooling Fan' Speed Controller Upgrade w/ Instructions with your 3D printer. Click on the button and save the file on your computer to work, edit or customize your design. You can also find more 3D designs for printers on CR10S Pro 'Parts Cooling Fan' Speed Controller Upgrade w/ Instructions .
