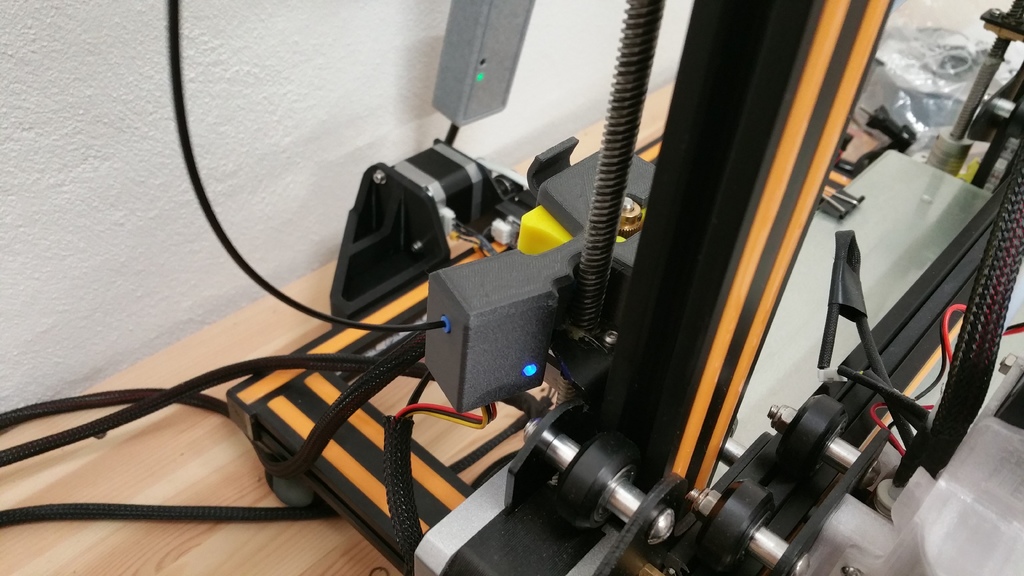
Cr-10 Cr-10s Filament Sensor Bracket
thingiverse
This design isn't mine, but a remix from bmonnin - https://www.thingiverse.com/thing:2651501.\ If you found this design super helpful or want to buy me a cup of coffee (it helps keep the brain active for new stuff), consider using this link: <a href="https://www.buymeacoffee.com/Mb1vZjXUG" target="_blank"><img src="https://bmc-cdn.nyc3.digitaloceanspaces.com/BMC-button-images/custom_images/black_img.png" alt="Buy Me A Coffee" style="height: auto !important;width: auto !important;" ></a>.\ This design can replace the filament sensor box that came with your Cr-10/s. Be aware that it might only fit the first type of filament sensor and extruder motor, my cr-10s model is from late 2017.\ I was tired of the original filament sensor housing slipping when inserting filament; it was only being held on by the housing itself, not by any screws - except this, I have had zero problems with it.\ I stumbled upon bmonnin's version, which I found to be the best of the ones I've been looking for on thingiverse (for my needs). But the filament sensor could use more room because the lever was grinding on the housing causing the sensor not to sense if the filament wasn't there. This is now improved and works really well - no grinding anymore, a reliable sensor.\ The hole for the tiny LED light wasn't placed correctly, causing the light not to be very visible through the hole. I changed this so the hole is exactly over the LED, and furthermore, I designed a small tube over the LED, making the light much more visible. If you have clear PLA/PETG, you can print a little insert that goes into the hole and transmits the light - as you can see in my pictures; this is optional.\ Then, I changed some other small things like chamfers, hole size etc.\ Because the cable holder bracket doesn't have much surface to hold onto the print plate, I designed a little piece into the cable holder to get a bigger surface - it's only one layer high and can be snipped right off.\ To assemble this, you'll need the following:\ 2 small PTFE tubes; insert some PTFE tubes that are longer than you need and then cut off the excess PTFE.\ Reuse the 2 screws that secure the cover from the original sensor housing. If you've chosen to emit the LED light through clear filament, insert this tube from the outside after assembling the sensor housing - just push it in until it reaches the LED light.\ The whole housing is pressed down over the extruder and should sit reasonably well.
With this file you will be able to print Cr-10 Cr-10s Filament Sensor Bracket with your 3D printer. Click on the button and save the file on your computer to work, edit or customize your design. You can also find more 3D designs for printers on Cr-10 Cr-10s Filament Sensor Bracket.
