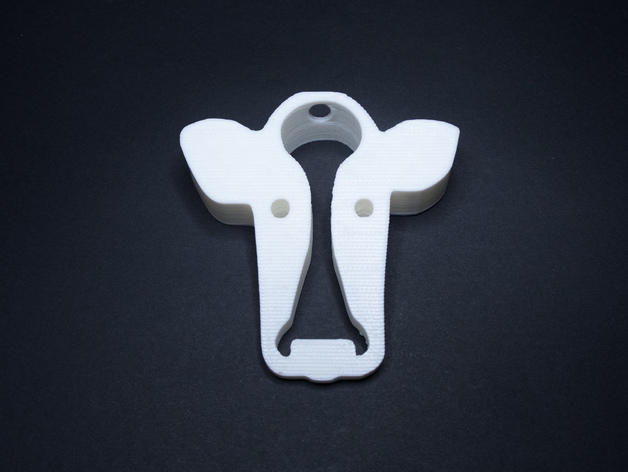
Cow face doorstop
thingiverse
A cute cow face door stop for anyone who loves cows. This object is a creative adaptation from an image created by the talented artist, Gayatri, for The Noun Project. Its dimensions are 70 × 70 × 20 mm or approximately 2¾ × 2¾ × ¾ inches in familiar old-fashioned measurements. Print Settings Rafts: None Supports: None Resolution: A precision of 0.2 layer height with three top/bottom surfaces and two perimeters for crisp printing. Infill: A density of 20 to ensure a sturdy structure. How I Created This Requirements Be shaped like a charming cow's face that instantly captures the heart. Hold my door open effectively, which led me to measure the gap at its widest point and find it was about 14 mm. Therefore, I rounded up to a final height of 20 mm. Must be strong enough to withstand kicking when placing it under the door, meeting the physical requirements for practical use. Should have a convenient lanyard hole that allows users to tie a string, securing it to the door knob. I got the idea for this feature from browsing Thingiverse and stumbling upon KyleLM's design with an attached lanyard. When pulling on the string, users can easily remove the door stop without straining their backs or having to bend down or kick at it. This also offers a way to hang the door stop securely. Let's have fun! First Step: Process the Original Image I used the original image posted by Gayatri on The Noun Project, one of my favorite websites. It features a cow head icon. I downloaded her PNG version because SVGs confuse me due to their complexity. After that, I removed an extra dot from the forehead area and then converted it into an editable SVG format using Online-Convert.com's versatile tool. Next Question: Why Convert a PNG? Since Tinkercad sometimes has issues recognizing valid SVG images directly from The Noun Project as real shapes for creating geometry in designs, I took this alternative path which turned out to be quite effective. So let's see how everything goes from now! Design Process Continued Importing to Tinkercad: Now we have the picture in a digital form that we need, and next is uploading it into an awesome design software called "Tinkercad". Using Tinkercad Ignoring the spaces between each of the things on my page makes for an exciting game I took advantage of its features, which turns all black parts of my design into shapes with solid three-dimensional forms by turning those parts black in Tinkercad and creating it there. Next: Up, Down, Side to side! Using some very simple commands (that I've just written in below) makes for the cow head to grow a bit - now our 20mm thick part is done at this moment in our lives we can proceed! Adding Lanyard Hole: Lastly, let's talk about an oval hole: Cutting an angled opening, with no annoying grinding when pulling the rope or string out through this particular portion of the shape using Tinkercad. The last item to deal with now is adding more depth. The goal was a sturdy door stop so, taking another wedge form which looks like that I wanted but it won't be part of my door stop in order to add it. So it overlaps it all over while we take off one more step: Subtraction (a command that Tinkercad uses frequently.)
With this file you will be able to print Cow face doorstop with your 3D printer. Click on the button and save the file on your computer to work, edit or customize your design. You can also find more 3D designs for printers on Cow face doorstop.
