Covid19 shield stencil tool
prusaprinters
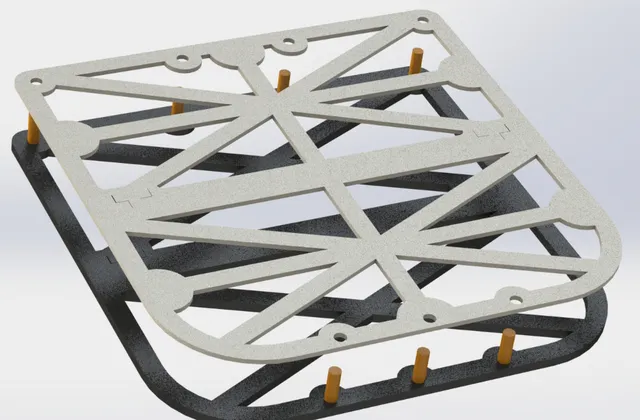
I did not have access to a laser cutter but had the need to make the process of making shields faster and more repeatable. This tool allows for precise and repeatable hole punching and sandwiching of foil so a few pieces can be cut to shape at the same time. It also eliminates the need of sanding rough edges because it shouldn't generate any. Here is the workflow that I'm going with at the moment: Place the stencil on the PETG foil and trace a rough outline. Repeat as many times as possible. Cut out the rough shapes. Place the slim side of the stencil on the foil and clamp it to the stencil using the clamping points so the foil doesn't move in relation to the stencil. Line up the stencil holes with a hole punch Punch 2 holes in opposite corners. Insert 2 pins in the holes to keep the foil from shifting. Punch the rest of the holes. Repeat for all prepared foil pieces. Insert pins in the thicker stencil part. Sandwich 2-4 prepared foil pieces between the thick and slim part of the stencil and clamp it down. Use a scalpel, knife or any other sharp tool to precisely cut the stacked foil pieces to the shape of the stencil. The holes may need to be adjusted a bit when fitting the foil to the band. Extra tools needed for the process: Office hole punch. Some sort of clamps. Laundry clips work well enough. A scalpel or sharp and thin knife. Make sure to never cut towards yourself when using the stencil and don't sandwich too many foil pieces or it will be too hard to cut and increase the risk of injury.
With this file you will be able to print Covid19 shield stencil tool with your 3D printer. Click on the button and save the file on your computer to work, edit or customize your design. You can also find more 3D designs for printers on Covid19 shield stencil tool.