#CountertopChallenge K-cup Ferris Wheel
pinshape
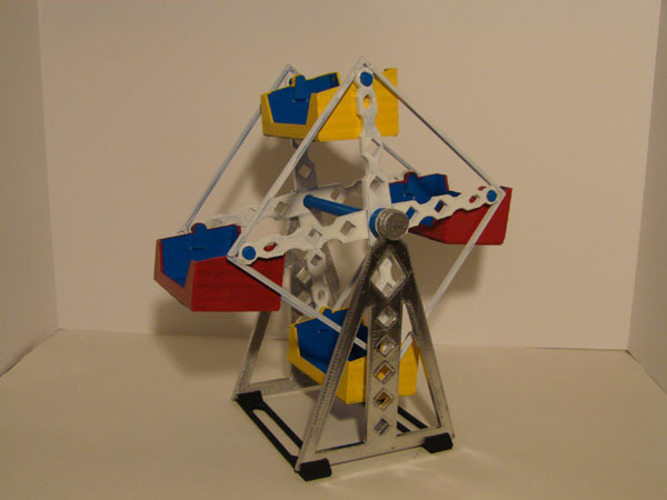
I would recommend using a raft support for the Ferris Wheel K-cup print. To create this print, you will need to use the following print specifications: Object Infill: 20%, Layer Height: 0.27 mm, Shells: 1, Feedrate: 80 mm/s, Travel Feedrate: 150 mm/s, Print Temp: 210 degrees Celsius. To assemble the Ferris Wheel, start by gluing the pivot arms together. Next, attach the braces to the pivot arms and then glue them to the ferris seat. Once you have completed this step, glue the two parts of the seatPivet2 together and then attach one end to the center peg. Insert the apex bases into the apexes and then attach the other end of the center peg through the other side of the ferrisArms and through the centerPegSpacer. Finally, insert the ferris seats and glue the other centerPegEnd to the centerPeg.
With this file you will be able to print #CountertopChallenge K-cup Ferris Wheel with your 3D printer. Click on the button and save the file on your computer to work, edit or customize your design. You can also find more 3D designs for printers on #CountertopChallenge K-cup Ferris Wheel.