Cosplay light up ring
pinshape
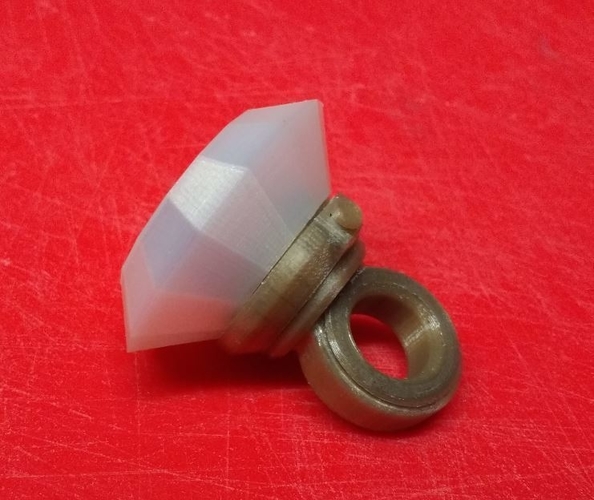
This project was designed specifically for a Panto in the UK. The hollow gem has enough space inside to accommodate two LEDs in series. I salvaged some white LEDs from an old flashlight and used them for this project. All of the parts should fit together as shown in the pictures. The switch stopper, labeled on one of the diagrams, is optional and serves a simple purpose: preventing the switch from pushing back into the ring body when the button is pressed. The battery contacts are made from capacitor legs that are quite thick - 0.8mm or 0.03in to be precise. These should be bent to fit snugly, with a slight hump where they make contact with the battery. The wires can be super glued in place along with the non-contact parts of the battery contacts. I found it best to orient the batteries with the positive side facing downwards and wired accordingly. However, please ignore the orientation of the batteries in one of the pictures showing the ring with IKEA on top - they should actually be positioned with the IKEA side facing down. I used a switch salvaged from an old monitor control panel for this project, but you may need to find something similar. The printed power button simply glues onto the switch when it's in place. Note that the printed layer immediately above the switch might not print at all due to its very thin nature - but it's not crucial. The ring takes two CR 2032 batteries in a slide-out tray, with a small angled groove on top for easy access. I accidentally put the batteries in backwards once, and surprisingly, it didn't harm the LEDs. I covered my LEDs with a see-through red sweet wrapper to give them some protection. If you choose to use colored LEDs, be sure not to overload them if they can't handle 3 volts each. A critical note: the battery assembly will provide 6 volts, so ensure that the combination of LEDs you use can handle this voltage without any issues. I used natural PLA filament for the gem and gold for most of the rest of the parts. I recommend using a 0.1mm layer height for most parts - but feel free to experiment with other settings as you see fit. This ring is quite large, and the switch I used was originally intended for manual operation. If desired, you could feed wires into the ring through the switch hole to use an external battery supply.
With this file you will be able to print Cosplay light up ring with your 3D printer. Click on the button and save the file on your computer to work, edit or customize your design. You can also find more 3D designs for printers on Cosplay light up ring.