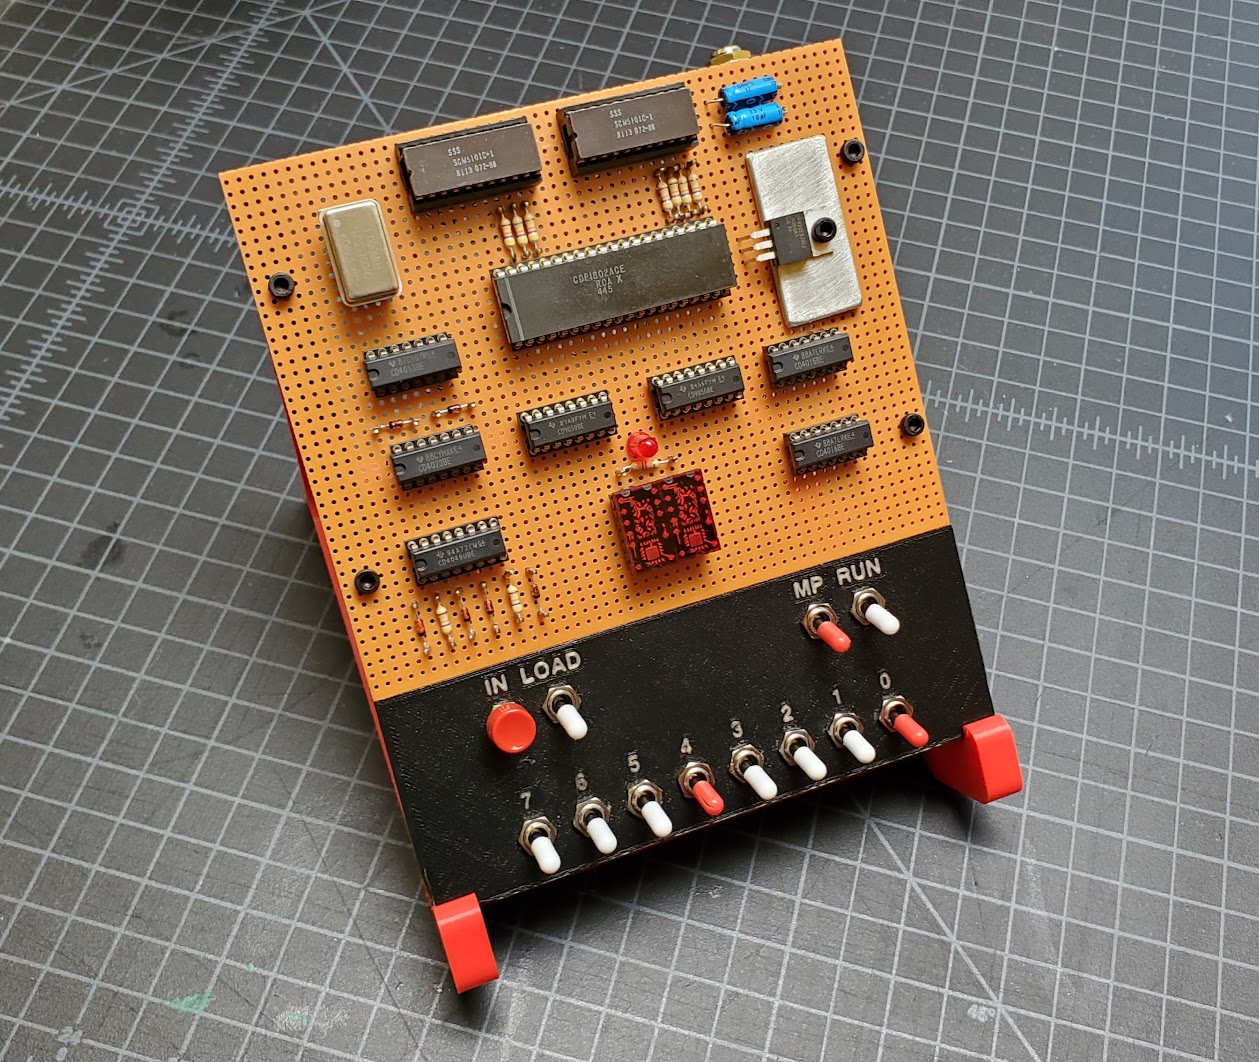
COSMAC ELF Frame and Stand
prusaprinters
<p>I decided to build a 1976 computer just for the fun of building a computer from scratch using wire wrap techniques, the ELF was a simple choice and there are a number of well documented builds out there with modern part sources that made it easy. </p><p>Originally I was just going to 3D print the face plate since it would be cheaper than having a metal one made, and nicer than one I could make by hand. I was still going to use the original wooden frame design from the 1976 article, but I didn't have any suitable wood laying around so decided why not just print the whole thing. </p><p>The frame includes recessed holes on the back for the locator pins to keep the switches from rotating. There is also a 2nd hole on the back sized to mount a 1/8" (3.5mm) audio jack - I haven't added the circuit for this yet on mine but it's ready for it when I do.</p><p>It's all designed around m3 hardware. You'll need 4 m3x20 screws and hex nuts to attach the perfboard to the frame. To assemble the stand you'll need 6 m3x12 screws and hex nuts - NOTE - I left off the top cross bar of the stand since it got in the way when using the stand for assembly. </p><p>The stand will support the ELF both face up and face down (I included holes in the stand for the screws that hold the perfboard on so it can lay flat when face down - extra bonus those screws kind of lock it in when it's face down making for a very stable assembly stand.) The stand can be used for display and for assembly. If you use it for assembly (Highly recommended) then you will probably want to leave off the top crossbar as it will interfere with the two 2 sockets where the RAM goes. I found the frame to be sturdy enough without it that I haven't added it back after assembly.</p><p>For the actual computer build itself I found this video to be indespensible:</p><figure class="media"><oembed url="https://www.youtube.com/watch?v=MHYn_NBKsfU&"></oembed></figure><p> </p><p>Paul Schmidt did a wonderful job documenting his museum quality build and sourcing as many period correct parts as possible. I ordered my parts in 2019 and found that the sources he provided were still good - not sure if they still are now in 2022 as I slacked off on completing the build for a few years after buying parts. The one exception was the source I used for my 1802 chip which is now out of business. (Which was actually how I learned about the ELF in the first place when someone on a mailing list shared a sale on the chips from a surplus dealer and a bunch of people shared their memories of computers they had build around it in the 70's and 80's.)</p><p>The build instructions I followed are also available from cosmacelf.com here: <a href="http://www.cosmacelf.com/publications/books/cosmac_elf_build_details.zip">http://www.cosmacelf.com/publications/books/cosmac_elf_build_details.zip</a></p><p>Printing is pretty straightforward. I just printed at 0.30 layer height for speed. The faceplate was printed face down on my textured bed to give a nice textured finish. I used my MMU to print the labels in white - but you could always paint them on, use rub on labels like the original, or just exclude those objects in the slicer to create embossed labels. </p><p>The frame does need support when printed face down - if printing face up you could probably get away without support but may not get as nice of a finish on the faceplate (though now that ironing is available it may come out better than was possible when I printed it 3 years ago.) The frame I printed without support - but in the files I did provide support enforcers to add support inside the recessed screw holes. It printed without support but I did have to clean those up a little so I really should have used some support there. All the nuts are captured - on the frame they are recessed into the back - on the stand there are slots to hold them.</p><p>I considered adding a back to it as well - but I chose to leave it open so I can show off the rats next of wires that is my first attempt at wire wrapping a circuit.</p>
With this file you will be able to print COSMAC ELF Frame and Stand with your 3D printer. Click on the button and save the file on your computer to work, edit or customize your design. You can also find more 3D designs for printers on COSMAC ELF Frame and Stand.
