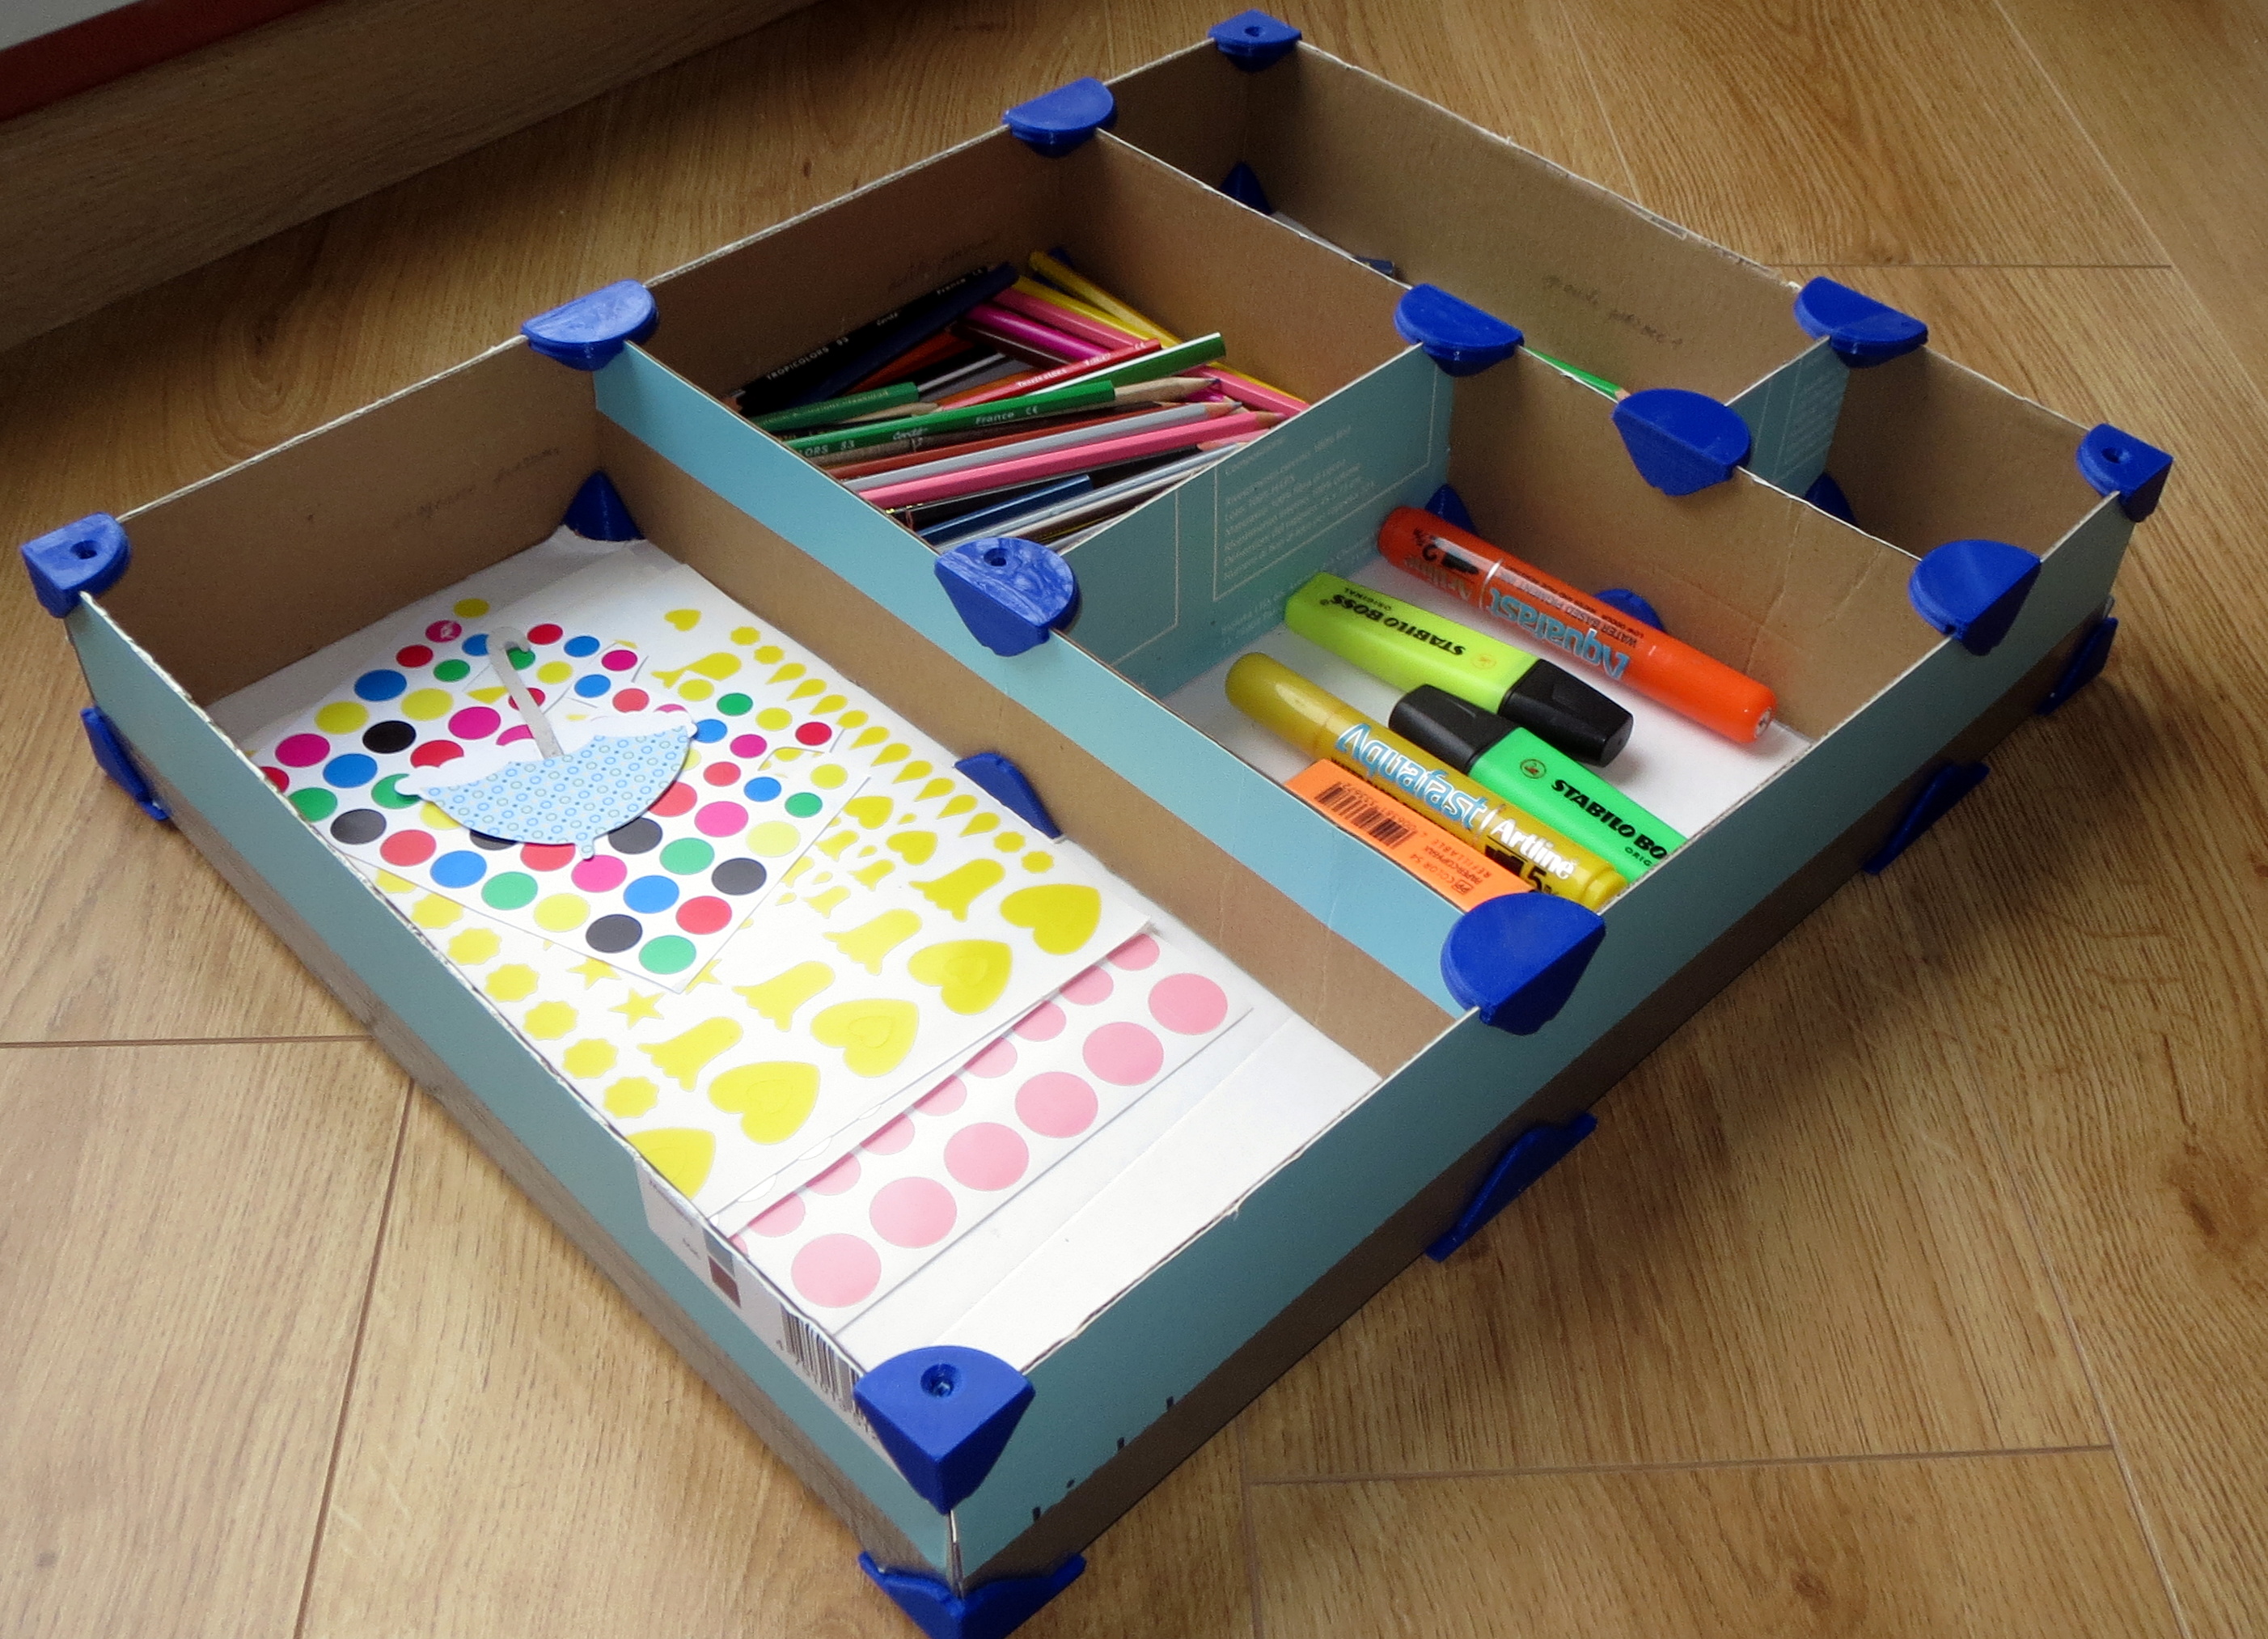
Corners for compartmented box
myminifactory
People use files here made for 2mm thick walls in the box, but you can change the global scale of each part to adjust that. It's mostly made for cardboard walls, but other soft materials could work too. The assembly cohesion is created by ribs that fit into the walls, so it needs to be softer than the plastic corners. Top caps might be a little hard to remove, so it's better to sand them before pushing them in the first time. Sand the end sphere until you can't see the printing stripes on it. You'll also have to cut all the walls down to your desired dimensions and cut extra holes in the bottom "wall". Those holes are circles of 40mm diameter for 2mm thick walls. If you have access to a lasercutter, that would be a huge help. Otherwise, use scissors and I'd advise you to first cut all the outer walls and assemble them together, then the inner walls by aiming a little too long to minimize gaps. Finally, do the bottom and top. Printing these with an Ultimaker 2 takes about one hour per corner.
With this file you will be able to print Corners for compartmented box with your 3D printer. Click on the button and save the file on your computer to work, edit or customize your design. You can also find more 3D designs for printers on Corners for compartmented box.