Corne Mini Choc Case
prusaprinters
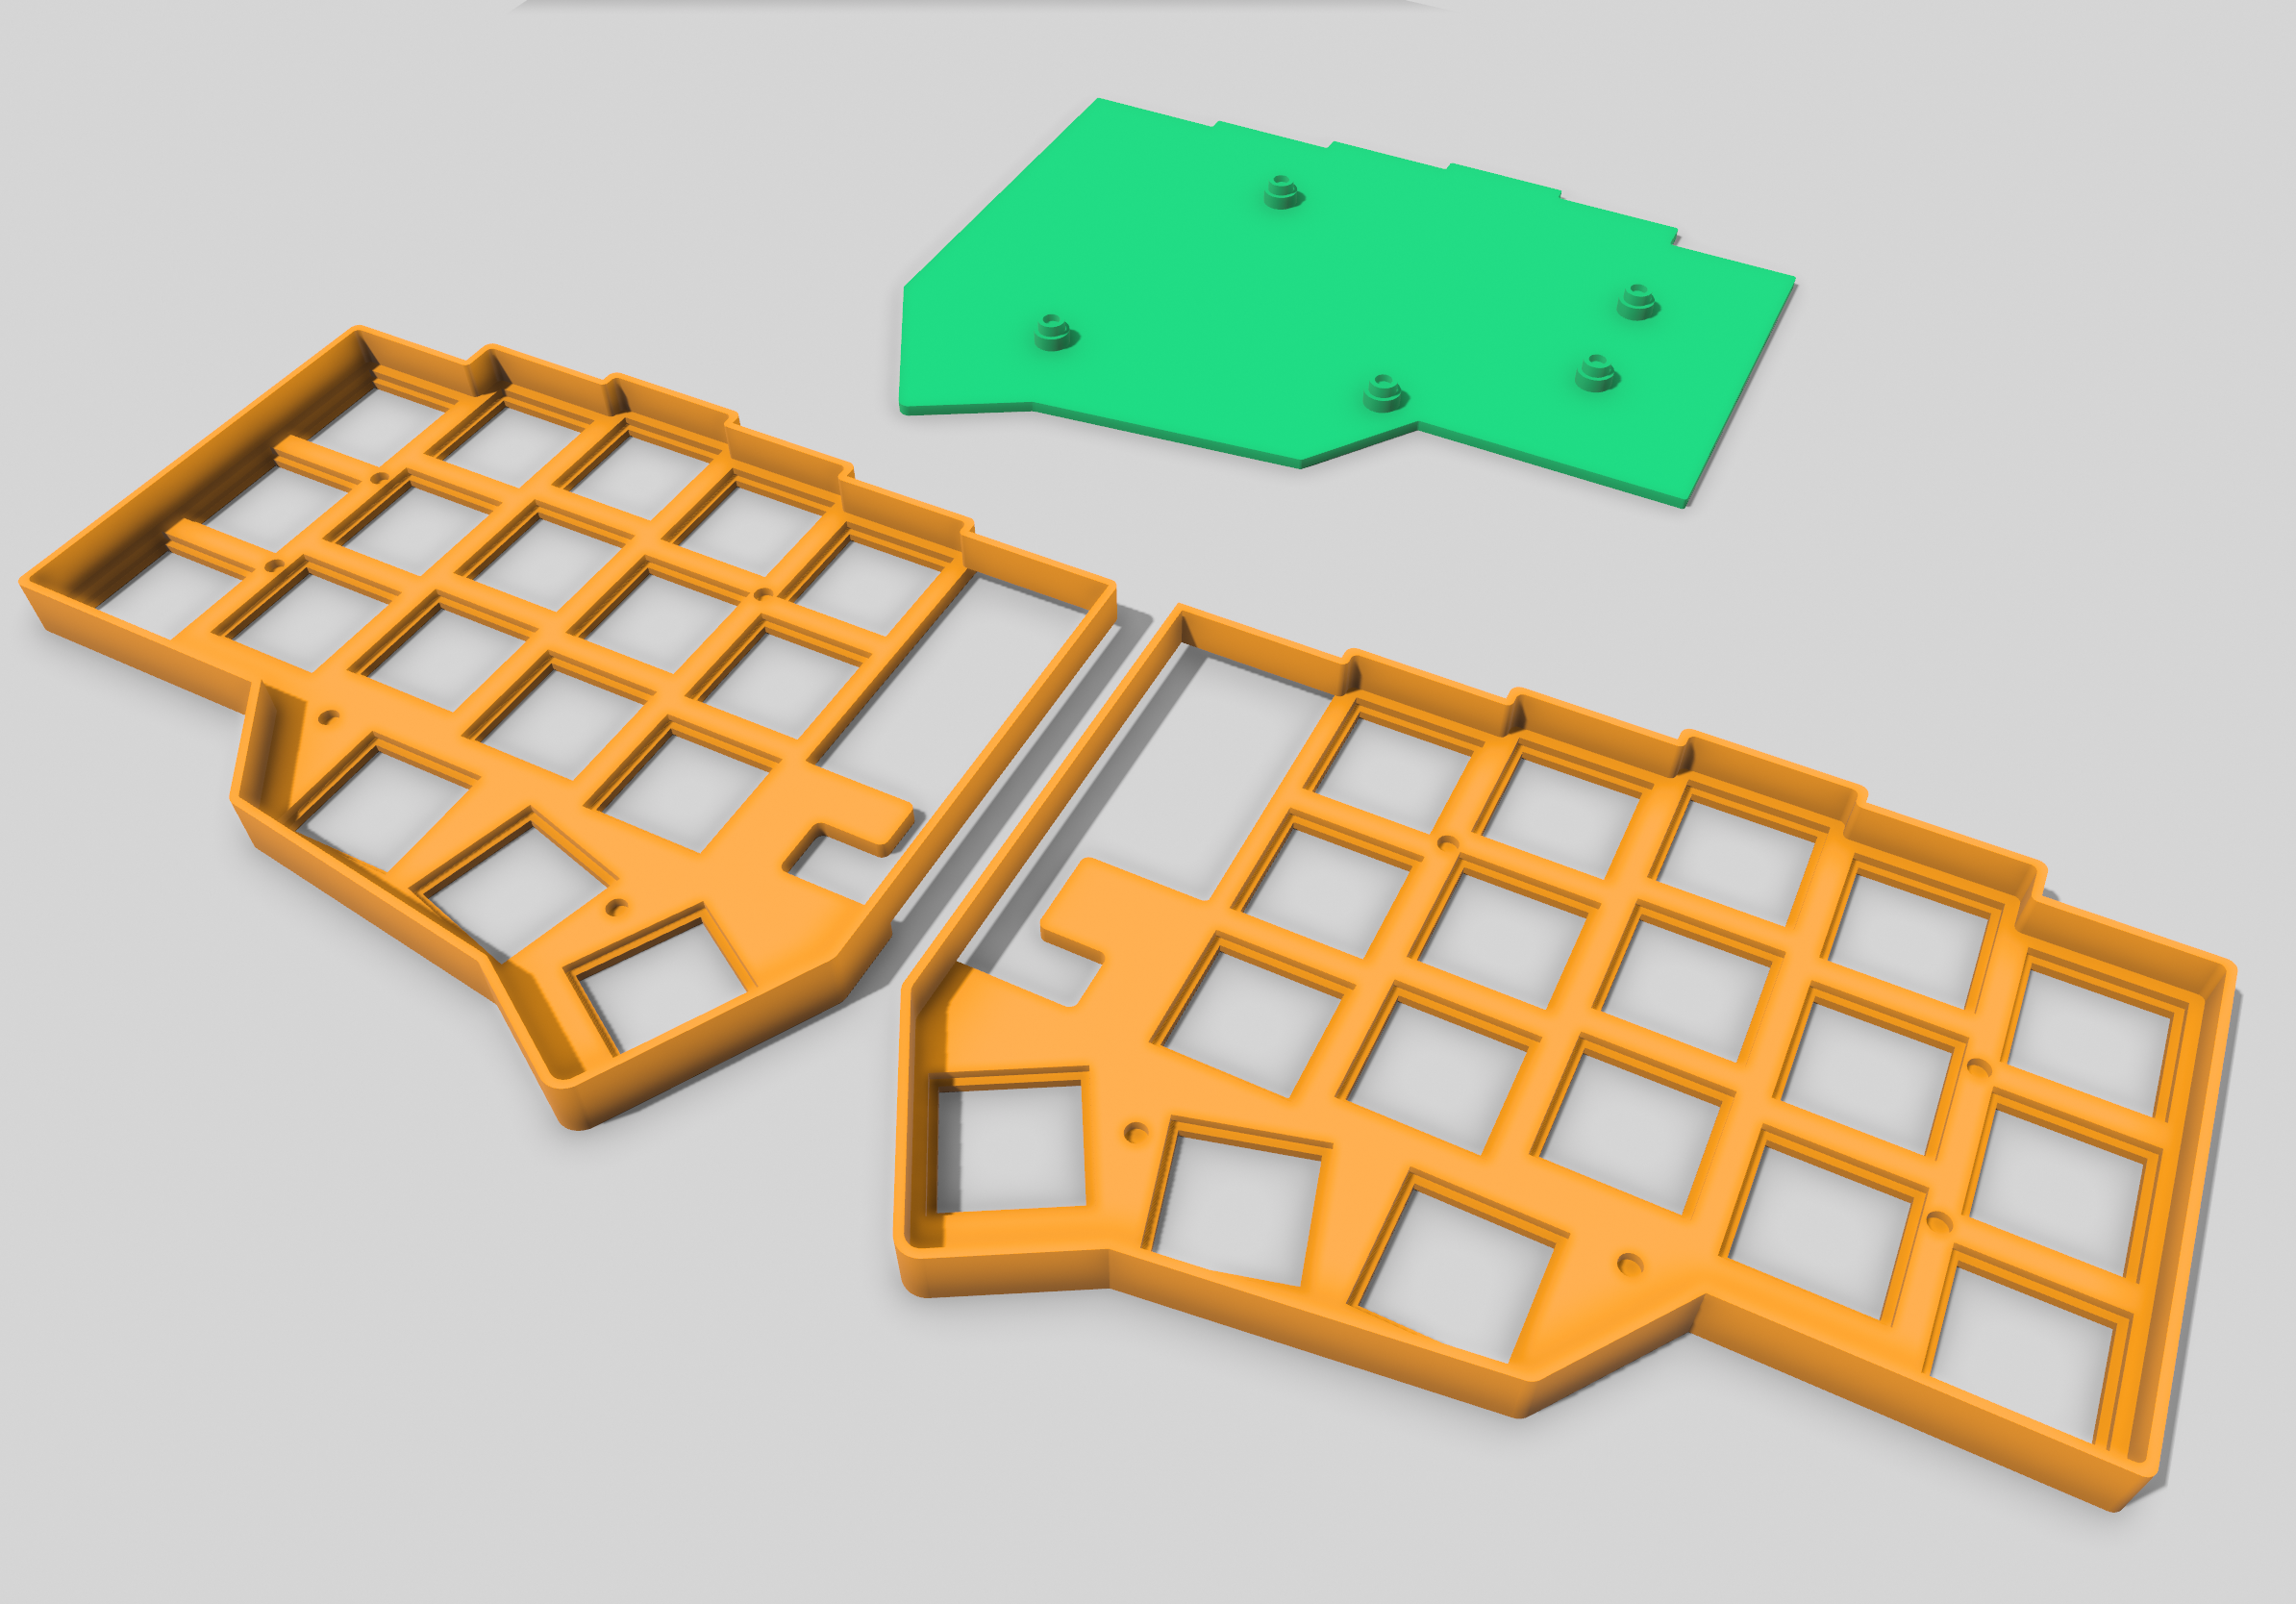
<h3>Corne Keyboard (crkbd) Mini Case</h3><p>A simple case for a crkbd mini with Kailh Chocs and a TRRS connected. I couldn't find another case out there that met all the features I was looking for so I made this.</p><h4>Features</h4><ul><li>included top plate for Kailh chocs, with a cutout for the tabs so they lock in place</li><li>cutouts for the microcontroller, reset switch, and TRRS jack.</li><li>magnetically attached bottom</li></ul><h4>Hardware needed</h4><ul><li>2mm (D) x 1mm (H) magnets (<a href="https://www.amazon.com/dp/B07BHKJJFM?psc=1&ref=ppx_yo2ov_dt_b_product_details">amazon link</a>)</li><li>¼" rubber cabinet bumpers to use as feet (<a href="https://www.amazon.com/dp/B07R17T68B?psc=1&ref=ppx_yo2ov_dt_b_product_details">amazon link</a>)</li></ul><h4>Print Settings</h4><ul><li>0.2mm layer height</li><li>0.4mm nozzle width</li><li>Supports enabled</li></ul><p>The layer height here is important, it ensures dimensional accuracy with the PCB height. Supports are mandatory as well, a portion of the perimeter does not touch the bed so that the TRRS jack will not be obstructed.</p><h4>Post Print Instructions</h4><p>You will need to glue the magnets into place, I've made sure they have plenty of clearance to sit correctly but it probably will not be a tight enough fit to just let pressure keep them in place.</p><p>I found it was easiest to do the lower side first, then set a magnet on top of each of the glued down ones so you can check the polarity. Mark the bottom with a sharpie and then glue them into the top. </p><p>A toothpick is a great tool for getting glue into the cutouts, and for pressing the magnet down into place.</p>
With this file you will be able to print Corne Mini Choc Case with your 3D printer. Click on the button and save the file on your computer to work, edit or customize your design. You can also find more 3D designs for printers on Corne Mini Choc Case.