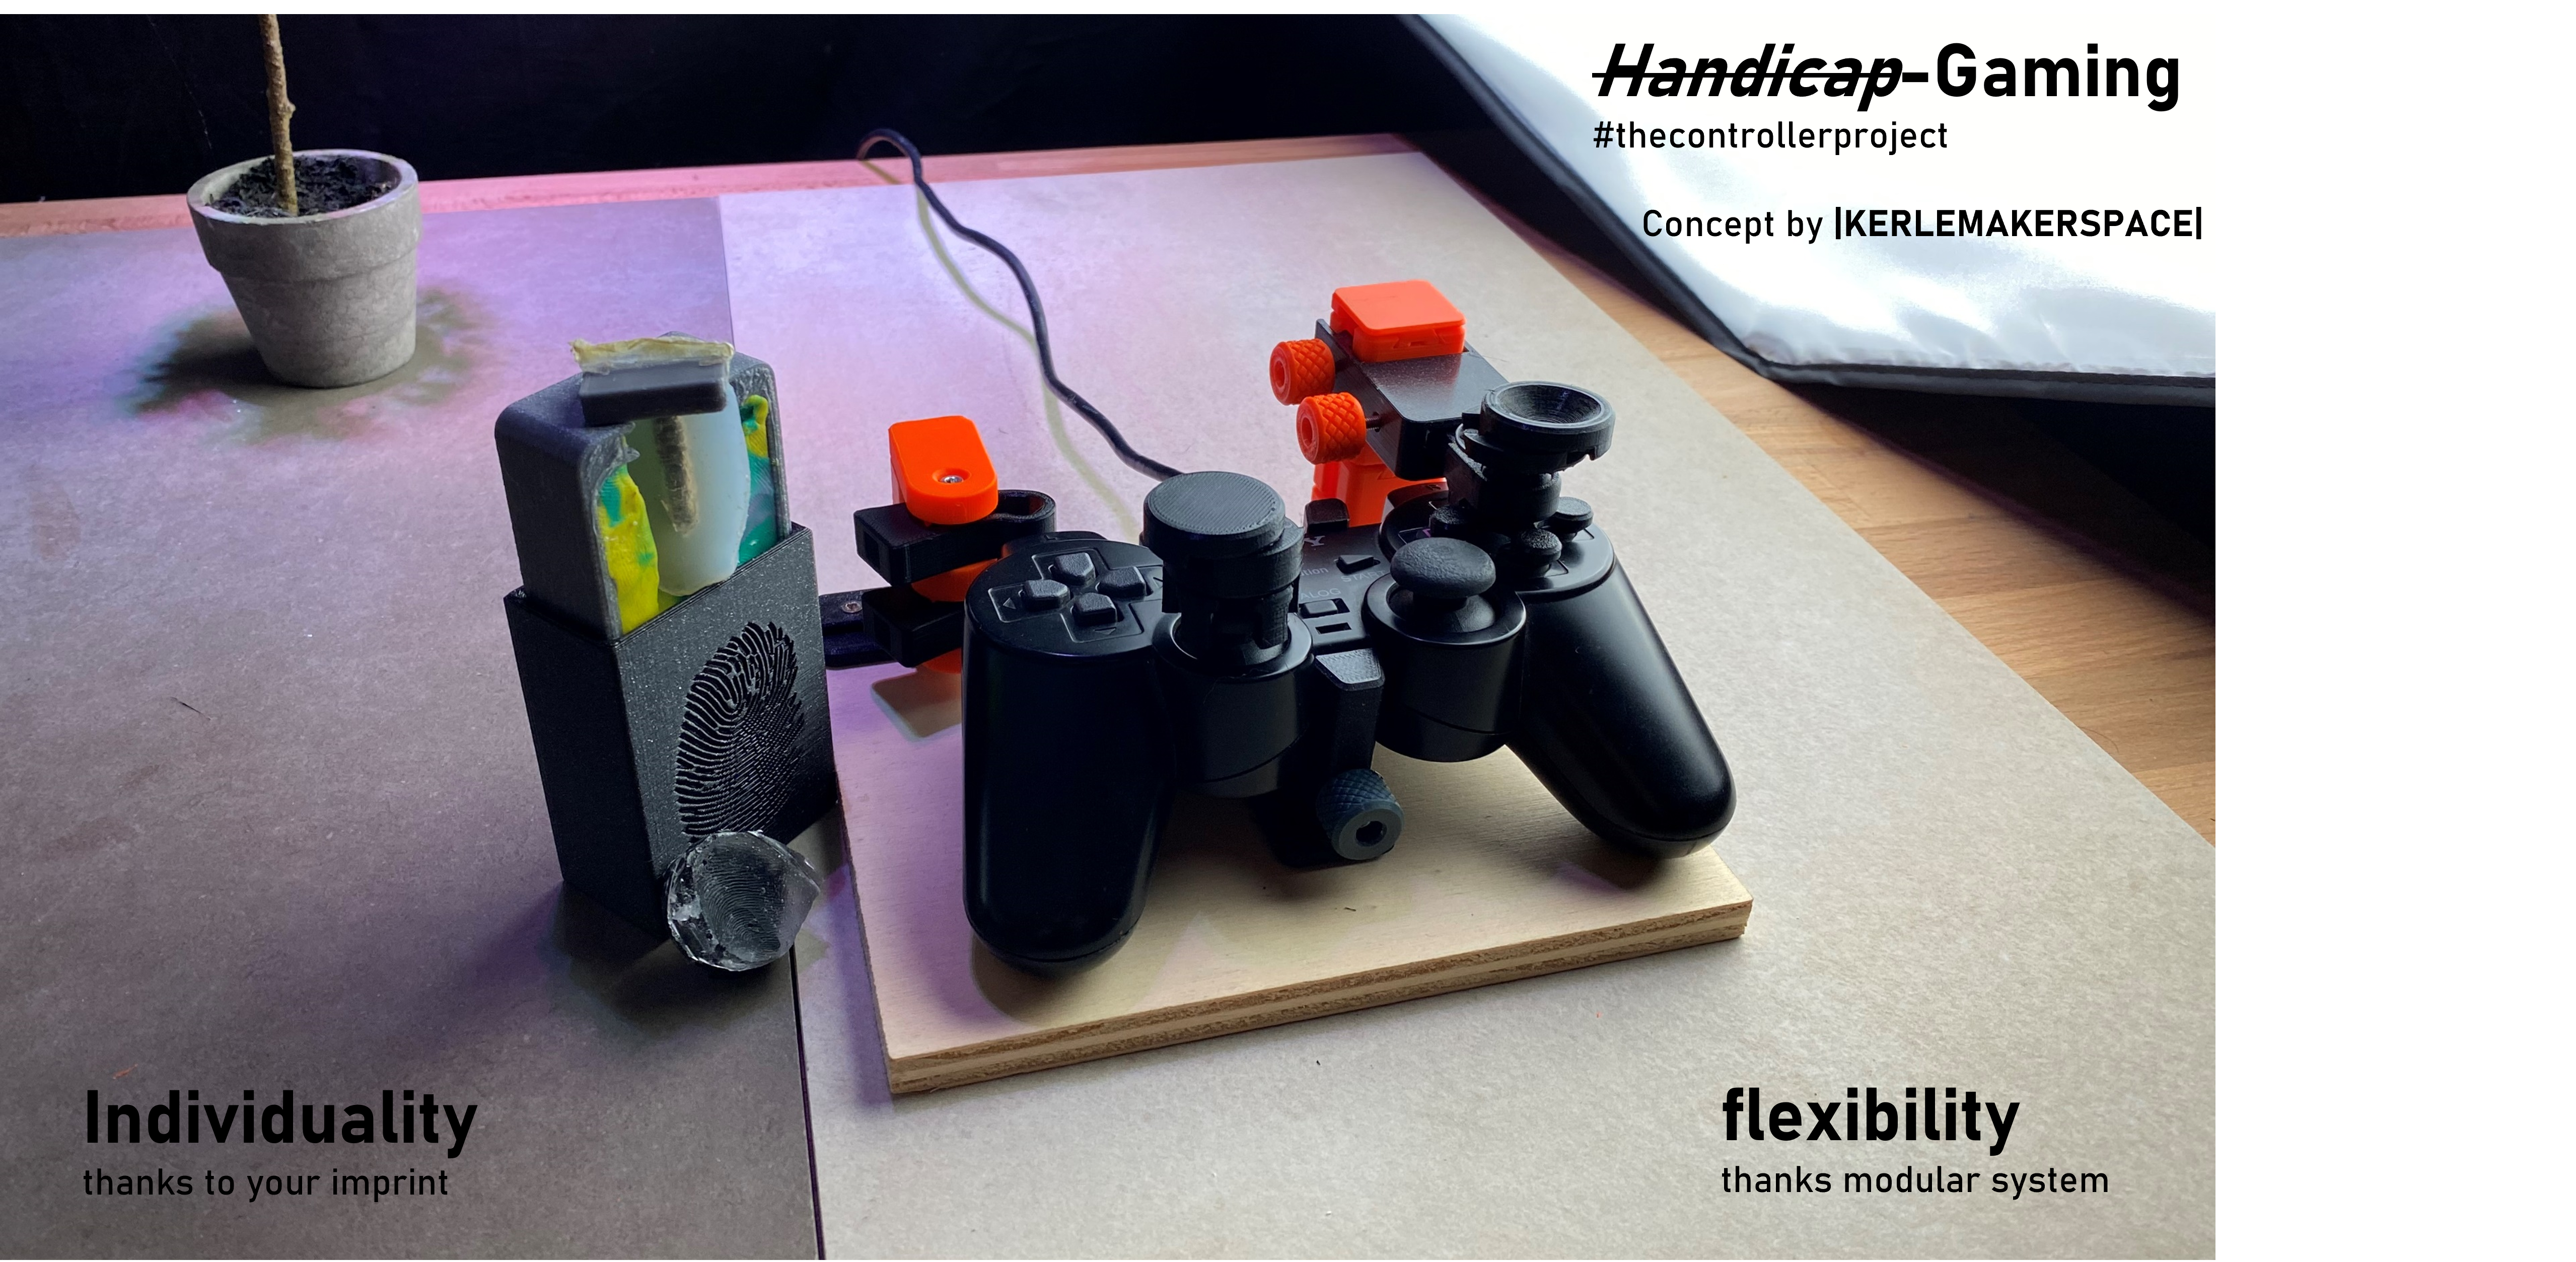
Controllerassistance - Your imprint in the modular system
prusaprinters
<h3><strong>Thoughts:</strong></h3><figure class="image image_resized" style="width:50%;"><img src="https://media.prusaprinters.org/media/prints/105946/rich_content/49fa16ff-41d6-4a79-bea6-fee21568b4bb/screenshot-2022-01-03-211815.png#%7B%22uuid%22%3A%225afce7a4-01f8-4fdc-94b8-d5bcbf3bcf0c%22%2C%22w%22%3A878%2C%22h%22%3A672%7D"></figure><p>I initially started this project with a different thought process. I took the PS2 controller and started to remodel it to get a nice match. I also started to design different grip shapes. The problem?.. :</p><ol><li>The system would only fit on a certain PS2 controller. If I change the console or have another controller I can't use the adapters anymore.</li><li>One handle for all?</li></ol><p>The final idea for the implementation came to me after I watched the Paralympics 2012. </p><p><i>What do all the participants have in common? </i></p><p>They are handicapped athletes who have an individual solution so that they are just athletes. An they are amazing! Just watch a video on youtube :D</p><h4> </h4><p><strong>Goals of the Design:</strong></p><ul><li>Create a <strong>modular </strong>system that can be <strong>expanded </strong>and <strong>adjusted </strong>in many ways.</li><li>The controller should be<strong> quickly converted</strong>, so that you can also share a controller. Playing together is more fun anyway!</li><li>As <strong>individual </strong>as possible. A handle or button that adapts to my shape.</li></ul><h3> </h3><h3><strong>The results:</strong></h3><h4>Achieving modularity and adjustibility: </h4><h5> </h5><h5>Octopus-System:</h5><figure class="image"><img src="https://media.prusaprinters.org/media/prints/105946/rich_content/a2d1fd48-b26c-4117-b548-d8fda8895267/octopussystem.png#%7B%22uuid%22%3A%22c2fc31aa-e813-419c-8209-33f486c7d9c7%22%2C%22w%22%3A4476%2C%22h%22%3A2521%7D"></figure><p>With the Octupus system (named because of the octopus-like arms) adapters can be connected to a variety of joysticks. The modular system with a standard interface allows a variety of customization options (height and end connection) and expansion possibilities. The individual parts are pushed into each other and with a “<i>satisfactory click”</i> the system is secured. The casting cap allows you to cast your own adapter and be connected to the system.</p><figure class="image image_resized" style="width:75%;"><img src="https://media.prusaprinters.org/media/prints/105946/rich_content/89afbce9-3873-4339-ad72-28cf5b59fc8e/bild5.jpg#%7B%22uuid%22%3A%22cd2a82e9-b135-4fd0-947a-12d9489bc32f%22%2C%22w%22%3A2906%2C%22h%22%3A1938%7D"></figure><h5> </h5><h5>SliderSystem:</h5><figure class="image"><img src="https://media.prusaprinters.org/media/prints/105946/rich_content/767e36c9-4ac7-4406-8e1b-e8e2349cc687/slider.png#%7B%22uuid%22%3A%22bd8727ec-9a0f-417e-ac8d-158efd6f2cef%22%2C%22w%22%3A4400%2C%22h%22%3A2475%7D"></figure><p>The rail system is designed to make it easier to quickly fit new controller shapes without having to change a large number of components. The system can be adjusted x,y,z. Uniform interfaces allow the implementation of a kit system. I have chosen the dovetail as the interface. </p><figure class="image image_resized" style="width:50%;"><img src="https://media.prusaprinters.org/media/prints/105946/rich_content/1a4bfa28-ccdd-48aa-9742-239034d5a6a4/bildtower.jpeg#%7B%22uuid%22%3A%220b52389f-fc76-4e2d-88a2-4229857be9d2%22%2C%22w%22%3A4032%2C%22h%22%3A3024%7D"></figure><p>The coupling is closed by means of the knob and prevents unintentional loosening of the connection ("listen for the satisfying click"). However, the connection can be undone again with force. </p><figure class="image image-style-align-center image_resized" style="width:30.69%;"><img src="https://media.prusaprinters.org/media/prints/105946/rich_content/94af53eb-8757-404e-ab13-6b0616d921b4/bildjpeg-1.jpg#%7B%22uuid%22%3A%225b5f495a-0865-4e90-a440-d71d3e1a84ec%22%2C%22w%22%3A1200%2C%22h%22%3A1600%7D"></figure><p>Sometimes you only have one controller, so you have to share it. With the quick release, you can remove the controller completely or with the slide with one screw.</p><h4>As individual as possible:</h4><p>How do I optimally adapt a shape ? You make an impression. That's why I made a simple system to make individualized surfaces. In two steps, an optimal shape is created:</p><figure class="image image-style-align-center image_resized" style="width:75%;"><img src="https://media.prusaprinters.org/media/prints/105946/rich_content/3af14bc0-a2f4-434e-9606-8bd4e7d77ef4/castingrounds.png#%7B%22uuid%22%3A%22ed3e5515-30d0-4d7a-99cc-8e02c1036125%22%2C%22w%22%3A2261%2C%22h%22%3A1443%7D"></figure><ol><li>The first step is to pour the core. I used silicone for this. </li><li>In the second step, the core and an adapter are positioned in another mold and poured with resin. (Make sure there is no leak ;P thats why i used extra tape)</li><li>After curing, the adapter can be attached to the existing system.</li></ol><p>For me it was the first time with resin or silicone. In the future, you can certainly take medical resins or silicones (eg mouthpieces.), so the idea. </p><figure class="image image-style-align-left image_resized" style="width:50%;"><img src="https://media.prusaprinters.org/media/prints/105946/rich_content/4350a948-ab6a-4cba-a69e-8ae5bf47f409/erstabdruck-v13.png#%7B%22uuid%22%3A%22fa249b27-4eea-414a-ab16-54511e2f5901%22%2C%22w%22%3A1288%2C%22h%22%3A725%7D"></figure><p> </p><p>The first mold designed to be shipped for pouring after the impression is made. Here, for example, use play-doh so that the impression is preserved until the place of delivery. </p><p> </p><p> </p><p> </p><figure class="image image-style-align-center image_resized" style="width:50%;"><img src="https://media.prusaprinters.org/media/prints/105946/rich_content/4d9984a3-74e9-406b-b576-e8beb67efd8f/auschnittgiessform.png#%7B%22uuid%22%3A%221301afc7-779c-41b6-a52e-44d9157c0b22%22%2C%22w%22%3A2467%2C%22h%22%3A1632%7D"></figure><p>After 24h demold (Here it is best to provide the mold with silicone spray, then you have it easier when demolding. I casted twice :P) and cut out the footprint roughly on the outline of the adapter. Let it harden and then grind the final contour. (There is a follow-up, because my resin is not fully cured yet).</p><p><i>What do you think of the idea or which resins and silicones would you use? Feel free to let me know in the comments.</i></p><p> </p><h3><strong>Conclusion</strong></h3><p>There is no question that the system still needs some development, since feedback from the gamer community is lacking. But it can perhaps serve as input for concepts for the further development of assistive systems. I have also provided all the parts as a step-file. Feel free to tinker and publish different adapters.</p><p>As always feel free to ask away!</p><p>Many thanks to #controlerproject and prusaprinters for hosting the contest. Interesting challenge with a lot of interesting contributions from the community. All the best for 2022 and may all your prints stick :P</p><p>Happy printing and stay tuned :D</p><p>Yours <strong>K</strong>ERLE <strong>M</strong>AKER<strong>S</strong>PACE</p><p><i>PS: Feedback is especially welcome on this project.</i></p><p>Assembly instructions and more info are provided as pdf</p>
With this file you will be able to print Controllerassistance - Your imprint in the modular system with your 3D printer. Click on the button and save the file on your computer to work, edit or customize your design. You can also find more 3D designs for printers on Controllerassistance - Your imprint in the modular system.
