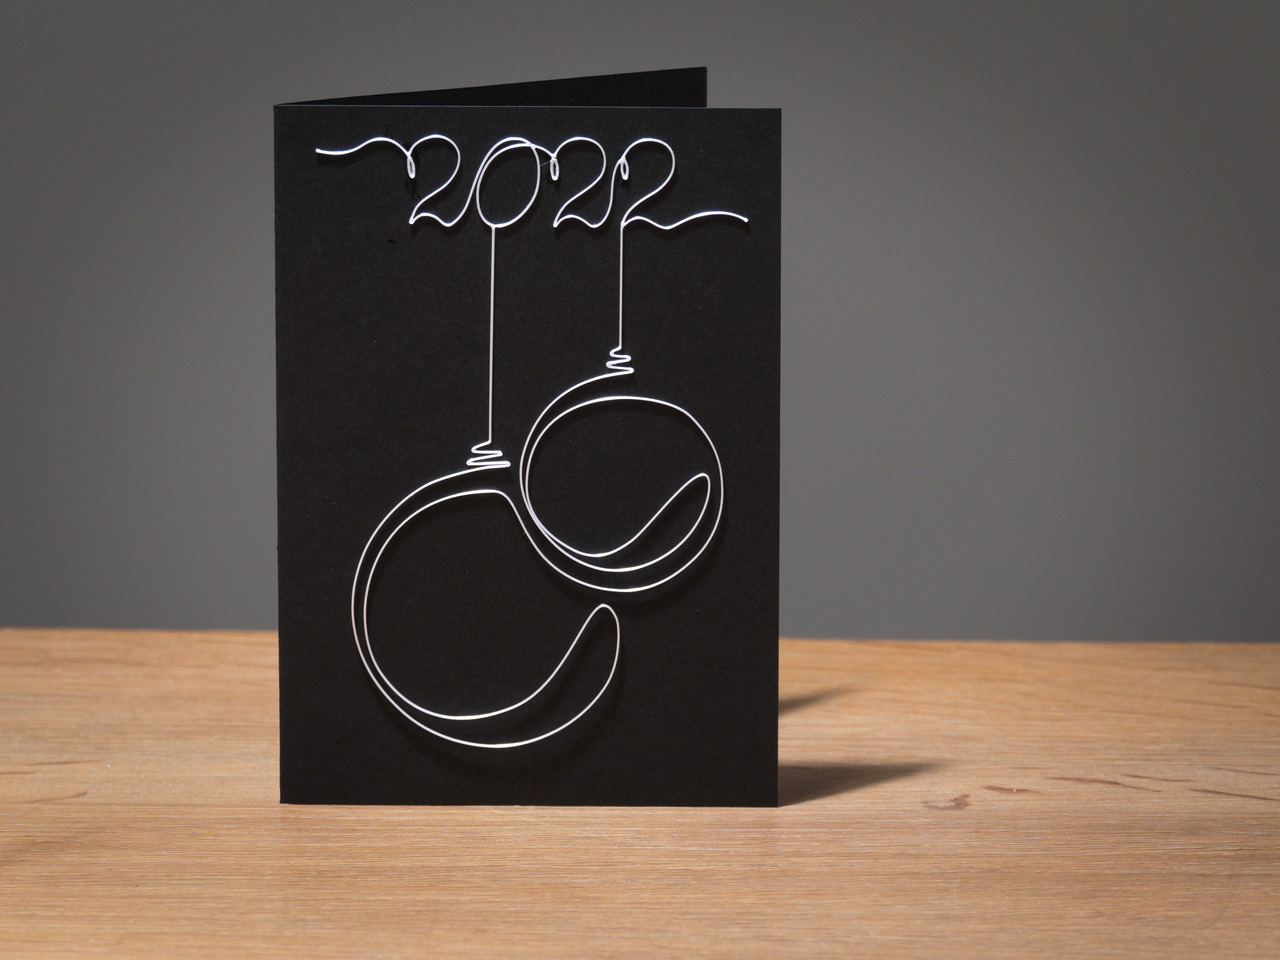
Continous Line Christmas or New Year Card
prusaprinters
<p>Each time I remove the skirt of a 3D print, I am amazed by the “wire bending” capabilities of a 3D printer: after removal, the skirt wire stays in its printed shape and is remarkably strong. I always wonder why I haven't seen any designs that exploit this yet.</p><p>With this Christmas & New Year Card design I hope to start a new trend to exploit this underused capability of 3D printers for some useful purposes.</p><p>The resulting postcard is intriguing and pretty at the same time. If you glue only the top part to the card, the Christmas balls will wiggle a bit when you put down the card. Cute!</p><p>It is a very quick and cheap print. So give it a try. You will be amazed by the result!</p><h3>Printing Instructions</h3><p>It prints very easily if your first layer calibration is done well and the correct parameters for the filament are used. Removing it is the trickiest part: do it very gently!</p><ul><li>Print in PLA on a smooth PEI steel sheet</li><li>Make sure the sheet is very clean (no grease)</li><li>Use 0.20 mm QUALITY profile</li><li>Print Settings > Layers and Perimeters > Quality > Detect thin walls: On</li><li>Filament > Extrusion multiplier: 1.05 to make crossings/junctions stronger</li><li>Very gently remove the print from the steel sheet<ul><li>Let it cool down to room temperature</li><li>Use a spatula to remove it from the steel sheet<br><img class="image_resized" style="width:35.44%;" src="https://media.prusaprinters.org/media/prints/98244/rich_content/7c372b4c-9c12-4e2d-9291-4c268a0574b2/20211219_154221-1.jpg#%7B%22uuid%22%3A%2228333d73-7e5e-46be-bef7-9e50bed06fe5%22%2C%22w%22%3A1280%2C%22h%22%3A960%7D"></li><li>Try from alternating angles to see from which side it goes best</li><li>Be especially careful near the crossings/junctions. </li><li>The small loops of the “2”s are best removed from the bottom in the direction of the longest axis of the loops.</li></ul></li></ul><h3>Assembly Instructions</h3><p>The wire design is meant for an A6-sized card. This means that either two folded cards can be made out of an A4 paper sheet, or four non-folded cards. These cards fit in a regular sized envelope.</p><ul><li>Cut the postcard out of (colored) drawing paper (mine has a weight of 240gr/m2)</li><li>Fold the card, if desired </li><li>Glue the printed wire on the card using Super Glue:<ul><li>Put a bit of super glue on a piece of plastic</li><li>Touch the three little loops of the “2022” at their backside with the glue</li><li>Turn the printed wire over, align it to the top of the card, and press down.</li></ul></li></ul><h3>Design Your Own</h3><p>I encourage you to design a card of your own. Google for “continuous line art” for some inspiration. Here are the different steps, I used:</p><ol><li>Use Inkscape to draw an interesting line<ol><li>Set the page size to the desired size (e.g., A6)</li><li>Draw an interesting curve with the Bezier Curve tool (you can draw over an imported bitmap, if desired).</li><li>Set the stroke width to 0.45 mm</li><li>If you are satisfied with the curve, save it to a file.</li><li>Select Path > Stroke to Path, to generate the outline of your curve</li><li>Set the stroke width to a 0.1 mm to clearly view the outline of your curve</li><li>Save the result to a new file (e.g., add an “_outline” postfix to the previous name). The outline file must be saved to a separate file, to allow modifying the original curve later, if needed.</li></ol></li><li>Use Fusion360 to generate a 3D model of your curve<ol><li>Add a sketch to the X-Y plane</li><li>Select “Insert SVG” from the “Insert” menu, and select your saved “outline” .svg file.</li><li>Check the scale. For some reason, I had to scale the input image with a factor 4 to get the correct size in Fusion360.</li><li>Select all curves and extrude them 0.6 mm (3 layers at 0.20 mm layer height)</li><li>Export mesh (as binary .stl file)</li></ol></li><li>Use PrusaSlicer to generate .gcode file<ol><li>Select appropriate parameters and import the .stl file generated with Fusion360</li><li>Slice the object</li><li>Check that the result is only 1 extrusion line wide.</li><li>Check that the crossings and junctions are clean. <br><img class="image_resized" style="width:34.97%;" src="https://media.prusaprinters.org/media/prints/98244/rich_content/3c025cdd-aa74-4107-8e47-3cc39d39ff61/too_wide_crossing-2-annotated.png#%7B%22uuid%22%3A%22d65d32da-a072-4498-afc1-39356fa49dfa%22%2C%22w%22%3A410%2C%22h%22%3A303%7D"><img class="image_resized" style="width:35.21%;" src="https://media.prusaprinters.org/media/prints/98244/rich_content/4b27dadd-6613-475d-ac51-ee5110bc503a/ok_crossings-2-annotated.png#%7B%22uuid%22%3A%225727f008-7b1f-4a21-9f1e-e2360c65baf6%22%2C%22w%22%3A410%2C%22h%22%3A302%7D"><br><br>If they don't consist of a single line, modify the outline graph of Step 1.7 to make the lines narrower at the crossing.<br>If there are gaps in your lines, make sure that all parts of the outline curves are selected for extrusion in Fusion360. If this is already the case, make the outline graph in Inkscape wider at those points.</li><li>Repeat Step 1.7 to Step 3.4 until the sliced result looks like a single line.</li><li>Save .3mf file and export gcode.</li></ol></li></ol><p> </p><p> </p>
With this file you will be able to print Continous Line Christmas or New Year Card with your 3D printer. Click on the button and save the file on your computer to work, edit or customize your design. You can also find more 3D designs for printers on Continous Line Christmas or New Year Card.
