Constructables
prusaprinters
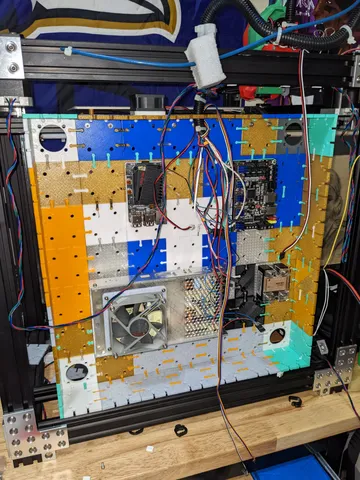
UPDATE: I have changed the walls up quite a bit, and have make the amount of individual pieces smaller. There is now 1 wall piece (instead of 2) and 2 connector pieces (instead of 3). Also on the connector pieces, I have combined 2 together to make them more sturdy. I will also show a picture of the tools that I use to make it easy to install and best ways to put pieces together.---This idea came to me after looking for a test bench to test any board or connections. Think about a computer and how using a test bench, allows you to test all the components and wiring before placing them into the case.That idea evolved into this. It is capable of creating mostly anything. My ideas that I have planned are: A wall for my BLV MGN Cube to place the electronic parts, will box it up once I get hinge and latch walls made.A test bench to test connections and boards before wiring it up into the printer.Trash can for my office.enclosure for my Ender 3 once I install klipper.In the wall pieces, I have 4 holes that are spaced 30mm apart to act as a peg board that allows the mount pieces to have a snug fit to the wall pieces. I am opening these models up for open source because I hope that the community will take this idea and build off of it. I just started learning how to CAD and know that people in the community can create some amazing things that I am not capable of just yet.I am also continuing to developing different modules as I think of it, so stay tuned to for new modules.BTW, The boxed in wall that I have in the pictures is for my BLV MGN Cube, I wanted it to look like it's name… Frankenstein or Franky for short. This was achieved by using the partial rolls of old filament left over.Please leave your feedback if you have printed and applied them. Thanks!---Update Nov 5:Finished testing the hinge, made the pin a bit bigger than the hinge holes. It is easier to just bore the OD of the hinge pieces than risk making the hinge pin too small. Also, to make a perfect 90 with 2 of the full walls, you will need to print the long and short hinge parts. if you want to use one of the shorter walls, you can print both the short hinge pieces.I also plan to make a diagram in the best way to put everything together. I had some frustrations at first until I understood a method to put it together. I will also upload better pictures to show how awesome the wall/box looks with all the same color pieces, or with a nice color scheme.
With this file you will be able to print Constructables with your 3D printer. Click on the button and save the file on your computer to work, edit or customize your design. You can also find more 3D designs for printers on Constructables.
