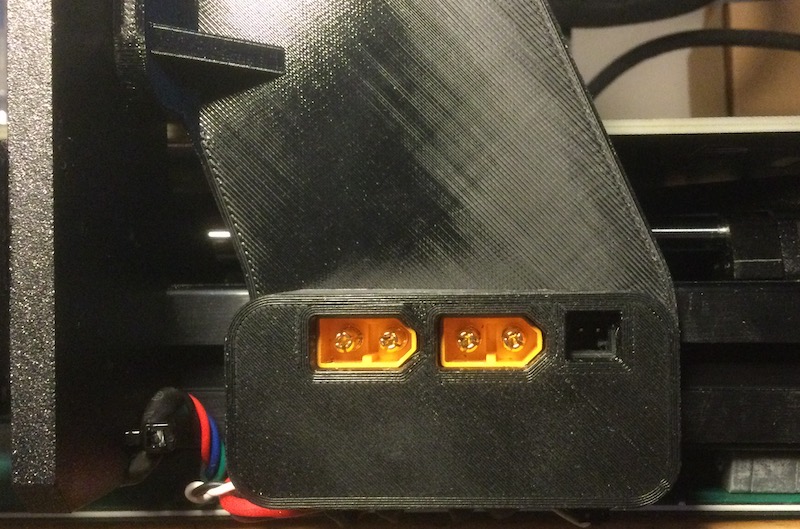
Connection Box with XT60 for placing PSU Black outside the printer/enclosure
prusaprinters
<p>The connection box fits the bottom mounting holes of part: 'prusa_mmu_enclosure_11_black.3mf' in the Prusa Enclosure V2 – MMU2S package (<a href="https://www.printables.com/model/3673-mmu2s-enclosure/files">https://www.printables.com/model/3673-mmu2s-enclosure/files</a>). The cover fits snuggly over the bottom plate, and the same for the XT60 connectors and Molex wire housing holes in the cover. I recommend printing the cover first, placing the connectors through the holes in the cover and the PCB and then solder (just a drop of solder to secure the components to the PCB) to avoid positioning issues. You might also consider adding a spacer (the black plastic of a common PCB header works perfect) for the vertical Molex wire housing, to ensure that the top is +- at the same height as the female XT60s. Afterwards, you can remove the PCB with the components and do some proper soldering. Beware that the pitch of XT60 connectors varies slightly depending on the manufacturer but this should not be a problem with the PCB file provided. I also recommend cutting the blue plastic protection of the crimped terminals and apply some solder and shrink wrap since the connection box sits quite low due to space constraints. Two versions of the bottom plate are provided, both work equally well. If you prefer you can easily create holes in the 3D Model of the cover to tighten the M3 and/or the terminal screws without removing it, but I like it as it is.</p><p>Installed on a Prusa i3 MK3S+. Print parts using your favourite filament and settings.</p>
With this file you will be able to print Connection Box with XT60 for placing PSU Black outside the printer/enclosure with your 3D printer. Click on the button and save the file on your computer to work, edit or customize your design. You can also find more 3D designs for printers on Connection Box with XT60 for placing PSU Black outside the printer/enclosure.
