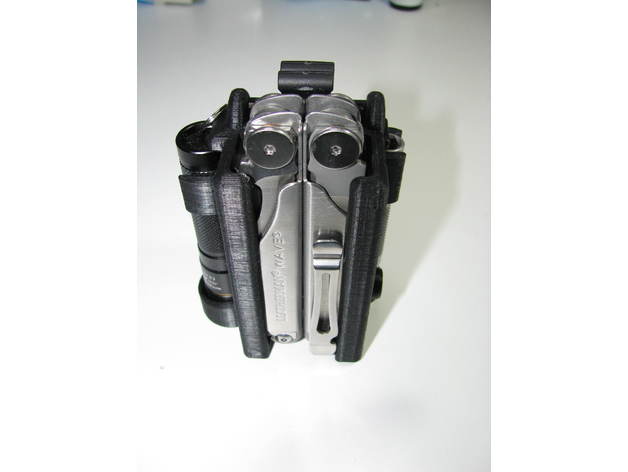
Configurable Leatherman Wave Holster with Anti-lost Lock
thingiverse
Configure the holster for your Leatherman Wave by combining the STLs of the central body with the desired right and left side STLs (see figure 1). Use Freecad, Autodesk Meshmixer, or similar software to merge the parts. To add a flashlight support, use the Nitecore Sens AA model STL. Note that you'll need to redesign it for other flashlights or incorporate additional gadgets. The Blank STL or FreeCad design can be used as a base. The anti-loss lock leverages the Leatherman's built-in locking mechanism. When inserted, it secures the multitool until the button is pressed while pushing up on the tool. This prevents accidental loss due to movement or tilting of the holster. A bonus design includes just the Wave without accessories. Notes: Print the belt clip sideways to present resistance in the correct direction once mounted on the holster. Use PVC cement if printing with ABS. After printing, pass the highest piece of the button (Button_int) through the holster hole and glue it to the small piece (Button_ext). To remove the Bit Driver Extender, use a multitool tip to lever it out (Image 2). It's easier to remove the tip cards when the multitool is not in the holster. Print Settings: Printer Brand: Prusa Printer: Prusa Steel Rafts: No Supports: Yes Resolution: 0.4mm hotend - 0.2mm layer height Infill: 40% Notes: Printed in ABS with a 3.2mm wall thickness. Post-Printing: Insert the belt clip into the holster hole and glue it in place using PVC cement if printed with ABS. Pass the highest piece of the button (Button_int) through the holster hole and fit it to the small piece (Button_ext).
With this file you will be able to print Configurable Leatherman Wave Holster with Anti-lost Lock with your 3D printer. Click on the button and save the file on your computer to work, edit or customize your design. You can also find more 3D designs for printers on Configurable Leatherman Wave Holster with Anti-lost Lock.
