Computer case face
prusaprinters
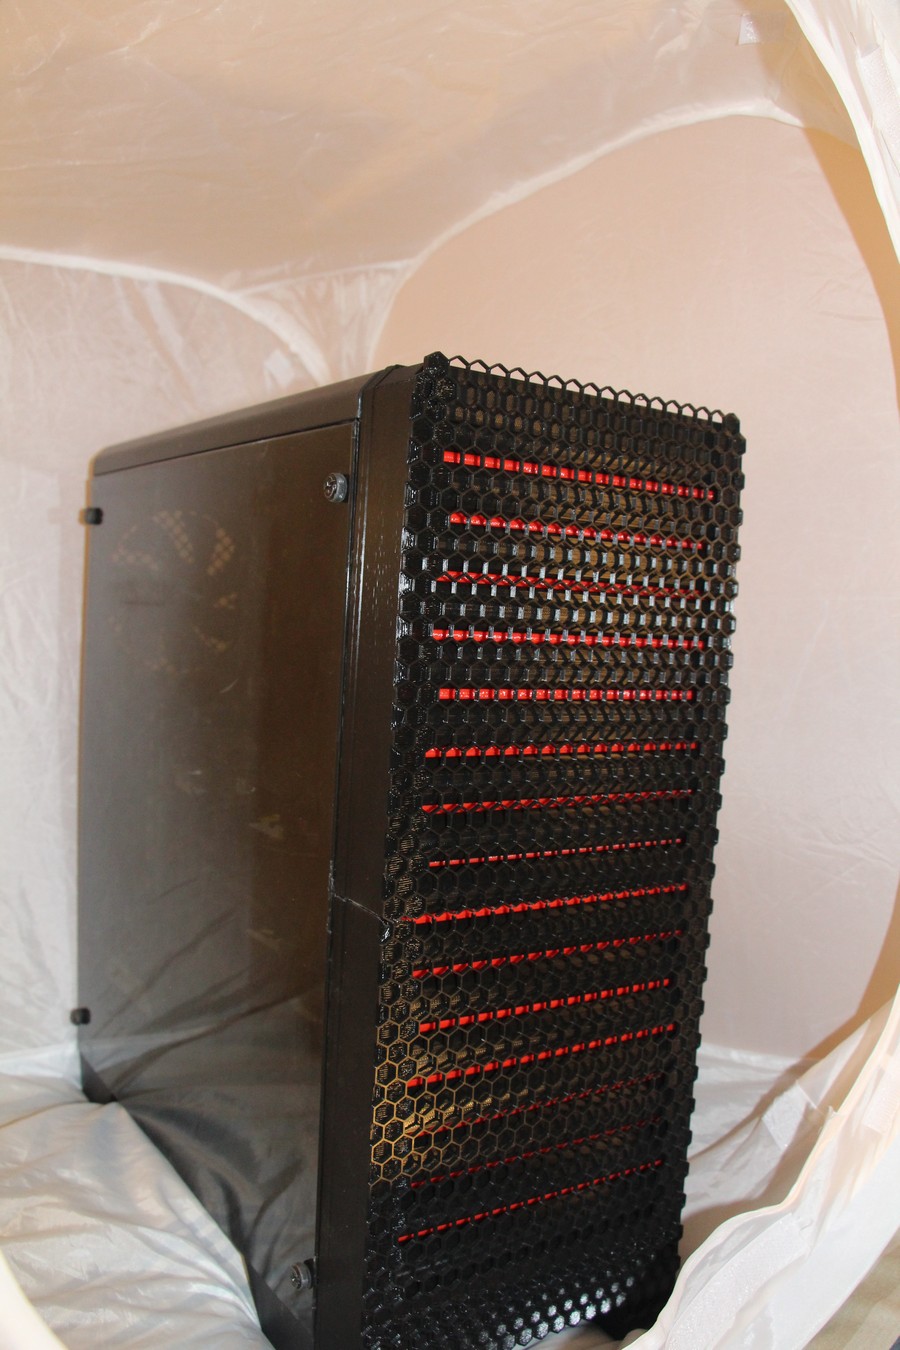
<p>I made this for four reasons.</p><ul><li>One, the RGB was keeping me awake.</li><li>Two, I wanted greater airflow than the factory face seemed capable of.</li><li>Three, I wanted to try my hand at making an inertial separator to keep the dust out of my computer, (and because the piece of foam I had attached to the front wasn't pretty).</li><li>Four, I wanted to design my own computer case face.</li></ul><p>This replaces the front on the AeroCool Cylon case, and probably quite a few other similar cases that are little more than a custom front on a third-party import case.</p><p><a href="https://www.amazon.com/gp/product/B079P1VBDY/ref=ppx_yo_dt_b_asin_title_o06_s00?ie=UTF8&psc=1">https://www.amazon.com/gp/product/B079P1VBDY/ref=ppx_yo_dt_b_asin_title_o06_s00?ie=UTF8&psc=1</a></p><p>I designed it to go together without the need for glue.</p><p> </p><p>I HAVE had some problems with this print. If you're working without multi-material capability, I recommend pausing the print when the large void is reached, and again when the void is finished, and masking out the overhang areas with masking tape and glue stick. (<a href=" https://forum.prusaprinters.org/forum/original-prusa-i3-mk3s-mk3-general-discussion-announcements-and-releases/poor-mans-breakaway-supports-masking-tape-and-gluestick/">See my comment in the message boards for the technique</a>, and yes, this is what I developed it for. ) Also, PLA has proven to be somewhat too brittle for the plugs which hold the front to the computer, and when I print this again, I'll use a more pliable plastic, possibly as a second material in the print just for the plugs.<br/>Once I get myself an MMU2, this is high on the list for another upgrade.</p><p>Also, I strongly recommend NOT printing support material inside the row of peg-holes along the top edge of the bottom half. If you forget, a drill can be used to clean up the holes, but they did seem to shrink in a bit when supports were printed.<br/><br/>Each part needs to be printed separately, and the top and bottom portions BARELY fit on the Prusa Mk3S+ build plate, when turned sideways.</p><p>You need 4 complete sets of the filter parts, and I'd recommend printing only two of each in the same color as the main two parts, as this gives you options to have just a little color peeking out of the grill. I currently have red showing behind black, and I particularly like the look.</p><p> </p><p>I did include the .blend and .3mf files for the sizing plate, which is a cheaper, and faster, way to confirm that the thing will fit your computer than printing out the whole thing and hoping. If it can be made to fit, this is also a good option for making the necessary adjustments, by moving the push-plugs on the sizing plate in Blender, and then re-importing them into the model for the whole thing, which is what I did.</p><p> </p><p>Please note: The .blend files are for EVERYTHING, and the slicer doesn't care. When working with the .blend files, save a backup and erase everything you don't want to send to the slicer when it's time to export. I have attempted to make this a little easier by putting the different parts to print in different collections so you can erase the collections containing the parts you're not exporting. (You don't need but one of each of the two filter cartridges. The other three copies are just there to fill out the model.)</p><p>Also, I left one boolean modifier in place, as it makes editing the model easier. You need to apply the boolean modifier in the bottom plate before you erase the collection of booleans and guides.</p><p> </p><p>Edit. Regrettably, the Prusaprinters.org model viewer shows the support blocker primitives. Those cubic shapes aren't part of the printed model.</p>
With this file you will be able to print Computer case face with your 3D printer. Click on the button and save the file on your computer to work, edit or customize your design. You can also find more 3D designs for printers on Computer case face.