Compact XY Bridging Test 10-100mm
prusaprinters
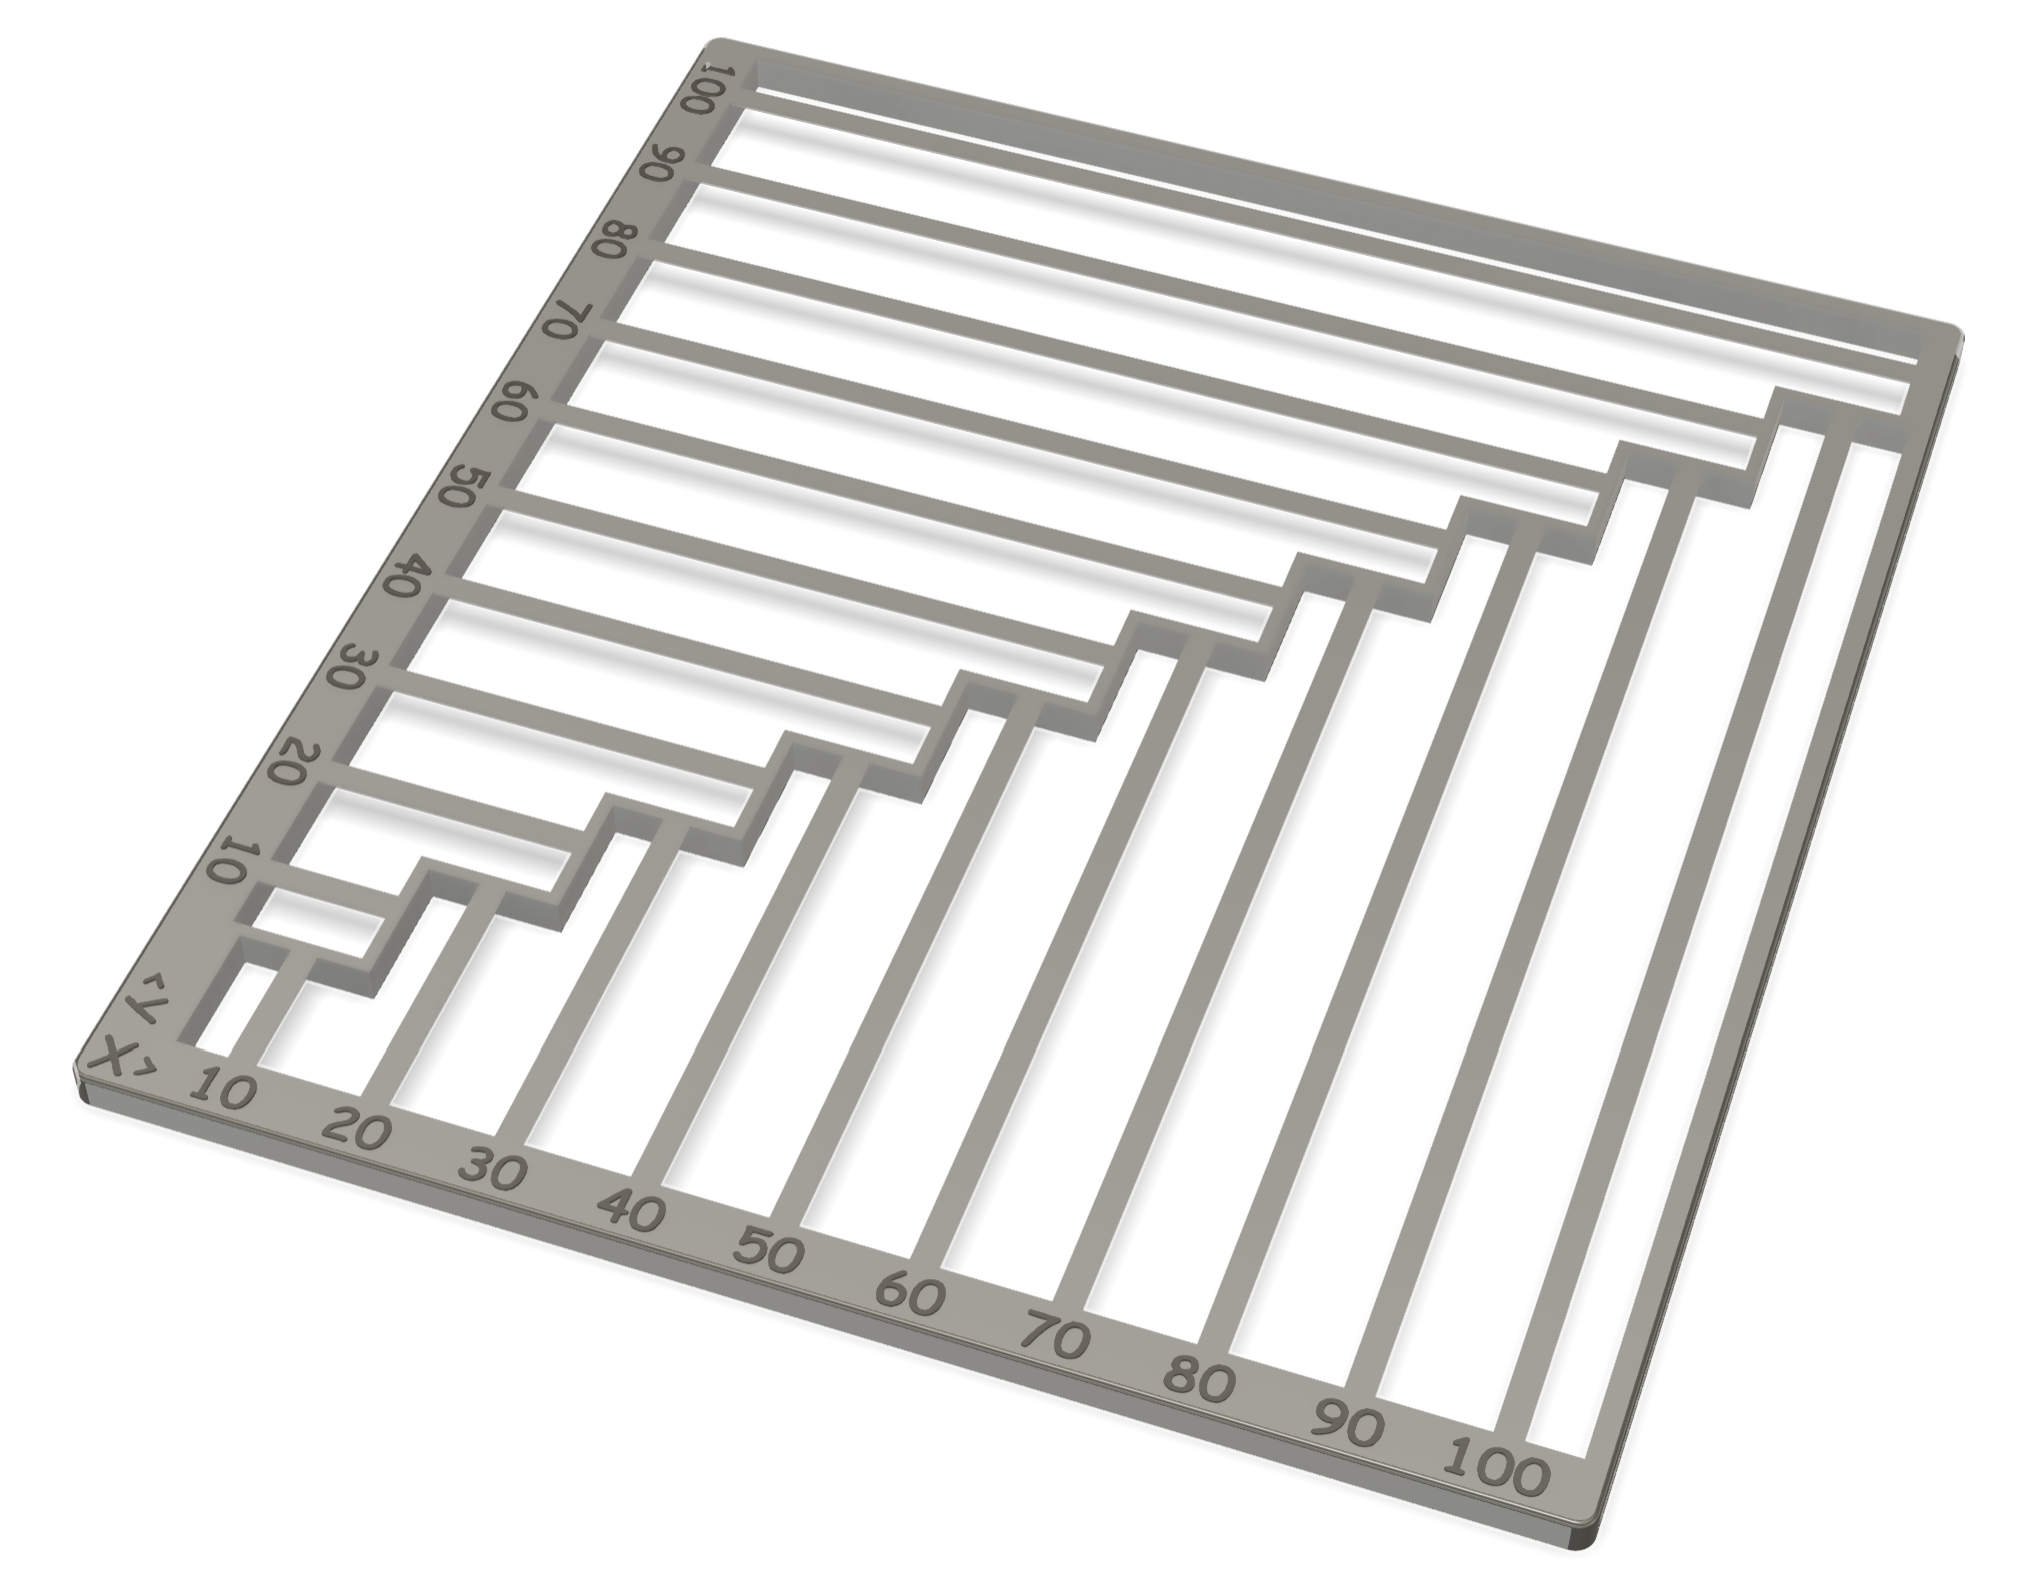
<p>There are so many bridging test models out there already - why did I make another one? I couldn't find one that met all these criteria:</p><ul><li>The model should test bridging in both X and Y directions, testing each axis with the same range of bridge lengths.</li><li>The bridges should all be at the same height above the build plate, so the air temperature and air flow is the same for every bridge.</li><li>The model should come off the build plate in a single piece.</li><li>The model should have a frame so it holds together for later reference.</li><li>The bridge lengths should be labeled for easy reference.</li><li>The local geometry around each bridge should be approximately the same to equalize how each bridge is affected by variations in air flow.</li><li>As little plastic as possible should be used.</li><li>To save time printing the supports, the bridges don't need to be more than a few mm from the build plate.</li><li>The bridges should be only one layer thick because the first layer of the bridge is the most important.</li><li>The model should be parametric so the bridge width and thickness can be tuned to match slicer settings.</li></ul><p>This is what I came up with. A fully parametric Fusion 360 file is included, should you need to tweak any dimensions.</p><p>As exported, the bridges are 2.08mm wide and 0.2mm thick, which works well using a profile with 0.2mm layer height and 0.4mm extrusion width. At these settings and 20% infill, the model uses about 7g of material and takes ~25 minutes to print. With perimeter width at 0.38mm in SuperSlicer, each bridge should have exactly six lines.</p>
With this file you will be able to print Compact XY Bridging Test 10-100mm with your 3D printer. Click on the button and save the file on your computer to work, edit or customize your design. You can also find more 3D designs for printers on Compact XY Bridging Test 10-100mm.
