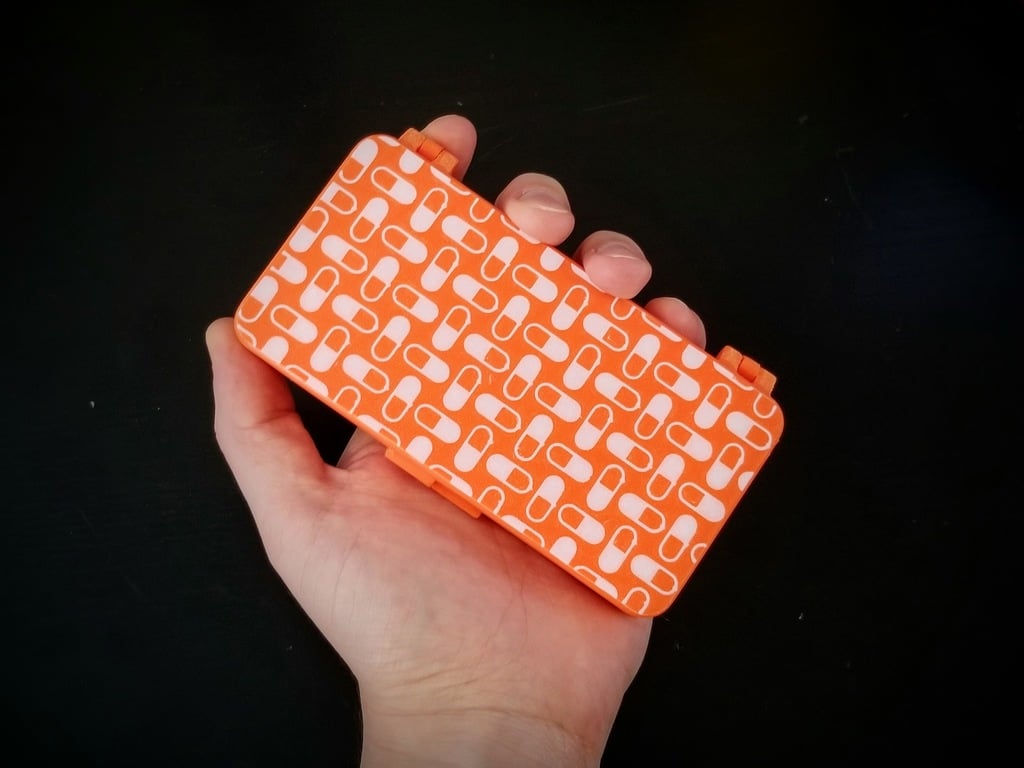
Compact weekly pill box
thingiverse
All of the commercially available weekly pill organizers I found online are pretty cumbersome. The 3D printable ones I discovered didn't quite meet my requirements, either. I was concerned about the box staying securely closed and being able to easily remove the pills from their compartments. So, I designed one that's functional and looks sleek. The box measures 16 x 120 x 60 mm (68.5 mm, including the hinges/latch) (0.63 x 4.73 x 2.36/2.70 inches). Each of the 14 compartments measures (W x H x D) 14.8 x 12.5 x 25.7 mm (0.58 x 0.49 x 1.0 inches). This design has some nice features worth highlighting: - Print-in-place hinge design - 2 compartments per day, labeled with the day of the week - Fillets in the front of each compartment make it easy to remove your pills - Secure latching mechanism - Tight tolerances mean that you can flip and shake the box, and your pills will stay in their compartments - Two versions: a simple single-color version, and a dual-color version with a geometric pill design on top This is also available on Prusa Printers. ## Files There are two versions of the box. For each version, I have included the STL, Prusa Slicer 3mf, and STEP files. - Single-color version, with an indicator on the lid (so you know which side goes up) (pillbox-single-color) - Dual-color version, with a repeated geometric pill design on the lid. You don't need a multi-material printer to print this! See below for instructions, or use the included .3mf file. (pillbox-dual-color-box and pillbox-dual-color-inset) ## Multi-color Printing with Prusa Slicer This technique is taken from Malolo's screw-less / snap fit customizable Raspberry Pi 4 Case & Stands. In Prusa Slicer, do the following: 1. Under Printer Settings > General > Capabilities, set the number of extruders to 2, and check the box for Single Extruder Multi Material 2. For each extruder on the left side of the Printer Settings, change the color so you can tell them apart. In Printer Settings > Custom G-code > Tool change G-code, add M600. That's the code for manual filament change. 3. In Print Settings > Multiple Extruders > Wipe tower, uncheck the enable box. (You don't need a purge block if you're changing the filament manually.) 4. Under Print Settings > Skirt and Brim, set the skirt height to at least 2. 5. Import both STLs at the same time. Because you have multiple extruders selected, you should get a prompt asking if you want to treat it as one multi-material object. Select yes. 6. In the plater, check the right side bar and verify that each part is set to use a different extruder. Hit "Slice Now" and you should see the multi-color g-code preview for printing. 7. You can tell which color will print first by looking at the color of the first layer skirt. If it's not doing it in the order you want, just swap which STL is printed with extruder 1 and 2. I suggest printing the inset part (the pill design) first; it will stand out better in the final part.
With this file you will be able to print Compact weekly pill box with your 3D printer. Click on the button and save the file on your computer to work, edit or customize your design. You can also find more 3D designs for printers on Compact weekly pill box.
