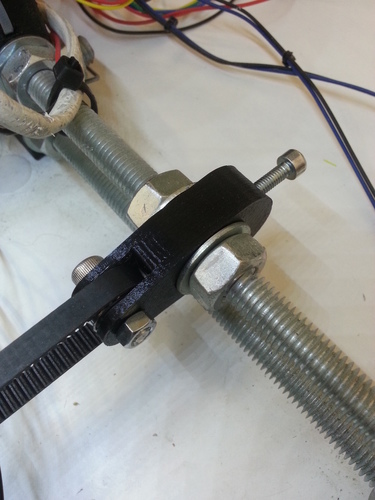
Compact Prusa i3 Y Idler
pinshape
I needed a Y Idler that would make the most of the space available on the Y-axis. I wanted to print a project that pushed against the absolute edges of the build plate. It functions just as effectively as the i3 rework, but is smaller in size and uses a smaller bearing. To assemble this idler, you'll need: 1 x 4mm bolt 1 x 4mm nut 1 x 5mm bolt 1 x 5mm nut 2 x 5mm washers 1 x 605Z bearing Place the bearing between the two washers and then insert it into the idler. Next, screw the 5mm bolt through and secure it with a nut on the opposite side, using threadlocker to ensure that it stays in place. I'm glad you're enjoying this project. Your feedback and suggestions are always welcome! You can find more projects like this at my company's website: http://northernlayers.com.
With this file you will be able to print Compact Prusa i3 Y Idler with your 3D printer. Click on the button and save the file on your computer to work, edit or customize your design. You can also find more 3D designs for printers on Compact Prusa i3 Y Idler.
