Compact Prusa i3 E3D V6 Dual or single Extruder V2
pinshape
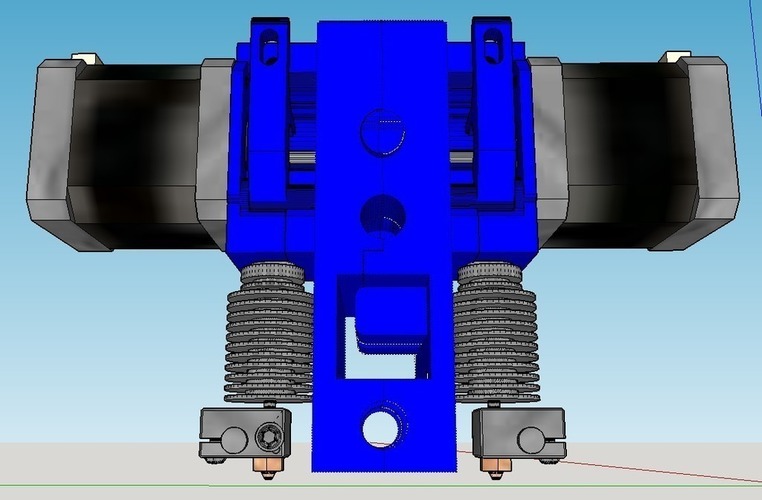
I uploaded a new version of the idlers that support the roller bearing on both sides, so it won't bend towards the idler and stop rolling. Supports are built in, just cut them out after printing. Use TWO washers with this version. If things won't fit you may have to clean up the inside a bit with a Dremel tool or similar. Just wanted to give fair warning to anyone who is going to try this design, everything works fine, but there is no adjustment for the height of each extruder other than screwing the heat brake lower or higher on your cold end. That's really the only flaw I found and can be quite difficult to get both nozzles exactly the same height. In theory you wouldn't need to but nobody can print the parts flawlessly. Just wanted to give you a heads up! See Bobkeyes comment about adding a grub screw to the extruder itself for a really good idea on how to make it adjustable. You'd need to tap a hole you drill into your cold end to do it though. But it's a great idea! If you would like to work with the original SketchUp files you can download them here: http://ow.ly/UUDXx This assembly uses all the same parts as this design, except the screws that hold it together might be different lengths, and some things you'll need two of, of course. Like the idler bearings for example, and the MK8 drive gears. http://www.thingiverse.com/thing:760444 UPDATE! So I installed the newest version of this on my Prusa i3 today. With the 4 linear bearings it's quite sturdy and prints well. I have not worked all the bugs in my software out yet and only printed with one extruder so far. (My thermal sensor on extruder 2 is not working properly. I think I broke a lead off while installing everything) Everything works well and it moves smoothly. Of course the real question is are the two nozzles level with each other. I'll post updates soon. This is my newly designed dual (or single) extruder for the E3D V6. I previously uploaded another model that was wide along the X-axis and thus wasted printable width on the printer. This new version is only 63.5mm (2.5") wide and has the motors mounted facing lengthwise along the Y-axis so it doesn't waste print bed space, except for a small about in the Y direction equal to the distance between the two extruders. If your printer tends to overextrude, or make holes smaller than they should be, use the "looser" version. If your parts come out perfect, use the "tighter" version. Instructions: This uses four LM8UU bearings and one or two MK8 toothed pulleys depending on how many extruders you put on it. All the screws are M3 but varying lengths. The four per motor that screw the motor onto the extruder face will probably have to be trimmed with a dremel or screw cutter. The threaded sockets on the face of the nema 17 motors are shared by the screws that hold the back of the motor casing on. You will also need an M5 screw, low profile nut, and a 5x10x4 ball bearing for each idler. Order of assembly: Insert your extruders into the base of the extruder face pieces. Press on the retaining cap for each. Screw the three M3 screws into the motors through the two seperate carriage pieces. Screw the two M3 screws that go through the carriage
With this file you will be able to print Compact Prusa i3 E3D V6 Dual or single Extruder V2 with your 3D printer. Click on the button and save the file on your computer to work, edit or customize your design. You can also find more 3D designs for printers on Compact Prusa i3 E3D V6 Dual or single Extruder V2.
