Coil Jig for different rod sizes
thingiverse
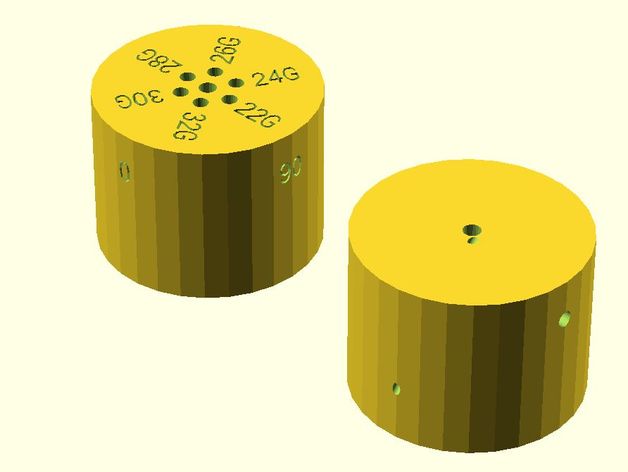
This is a versatile Coil Jig Design upgrade that allows you to effortlessly create coils with Kanthal or Nickle wire. To start, insert an M3 machine screw into one of the designated holes matching your wire gauge size on one cylinder. Next, securely position the center smooth rod and fix it firmly in place with a grub screw on the opposite cylinder. Feed the wire through the adjacent hole next to the rod, holding the end that emerges from the cylinder between your thumb and index finger. Gently rotate the wire around the central rod once to initiate the coil formation process. Then, push the protruding center smooth rod through the second cylinder's axial hole and start rotating it clockwise to create a neat and compact coil. As you work with a stiffer wire, the machine screw will maintain the wire in position, allowing for effortless coil creation. You can easily refer to the pre-marked angles on each cylinder: 0deg, 90deg, 180deg, and 270deg. By beginning your coil at the 0deg reference mark, you can confidently stop at either 0deg or 180deg markers, with the added option of twisting an extra 90 degrees for extra rigidity if needed. Note that the screw holes for machine screws are unthreaded and may require a slight push to install. This design feature intentionally positions the machine screw so it compresses the coil tightly against the central rod, depending on your wire gauge selection through the chosen hole. Please keep in mind that this design is still pending printing and testing – feedback from fellow users is more than welcome for any adjustments needed!
With this file you will be able to print Coil Jig for different rod sizes with your 3D printer. Click on the button and save the file on your computer to work, edit or customize your design. You can also find more 3D designs for printers on Coil Jig for different rod sizes.
