CNC Y Axis Mini Mill X2
thingiverse
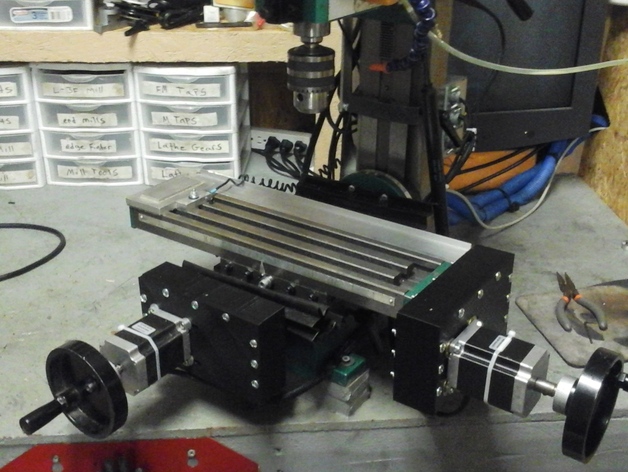
Was not going to publish this, but too many people asked me in forums! So backtracking to make videos since it's been in use for two years now. The Y-axis build video is found below along with the other axis parts! Y AXIS BUILD VIDEO: https://www.youtube.com/watch?v=TweJBoyL9yA All parts were printed in PLA at 0.2 layers and 0.2 head size, with a 30% fill. I use hand cranks on my mini mill to align the parts for CNC operation. You could mill objects with hand cranks fine as long as you're not too rough on it. It's a mini mill, so slow is the game anyhow! I may do a MACH3 setup video also shortly! X AXIS IS LOCATED HERE: http://www.thingiverse.com/thing:1832280 Z AXIS IS LOCATED HERE: http://www.thingiverse.com/thing:1836146 You will need: 9 x 1/4" 6.35mm bolts/nuts/washers to bolt cover to the Y main plate 2 x 6mm hex key cap type bolts, 65mm long 2 x 6mm washers 2 x 6mm lock washers 1 x 28OD x 12mm wide x 12mm center ID bearing 1 x 5/16 or 8mm locking nut One side note: On the top of the bearing block, there is a hole. Use a short screw to plug it! This will be how you can get oil to the bearing without taking it all apart.
With this file you will be able to print CNC Y Axis Mini Mill X2 with your 3D printer. Click on the button and save the file on your computer to work, edit or customize your design. You can also find more 3D designs for printers on CNC Y Axis Mini Mill X2.