Clocks from Blocks
prusaprinters
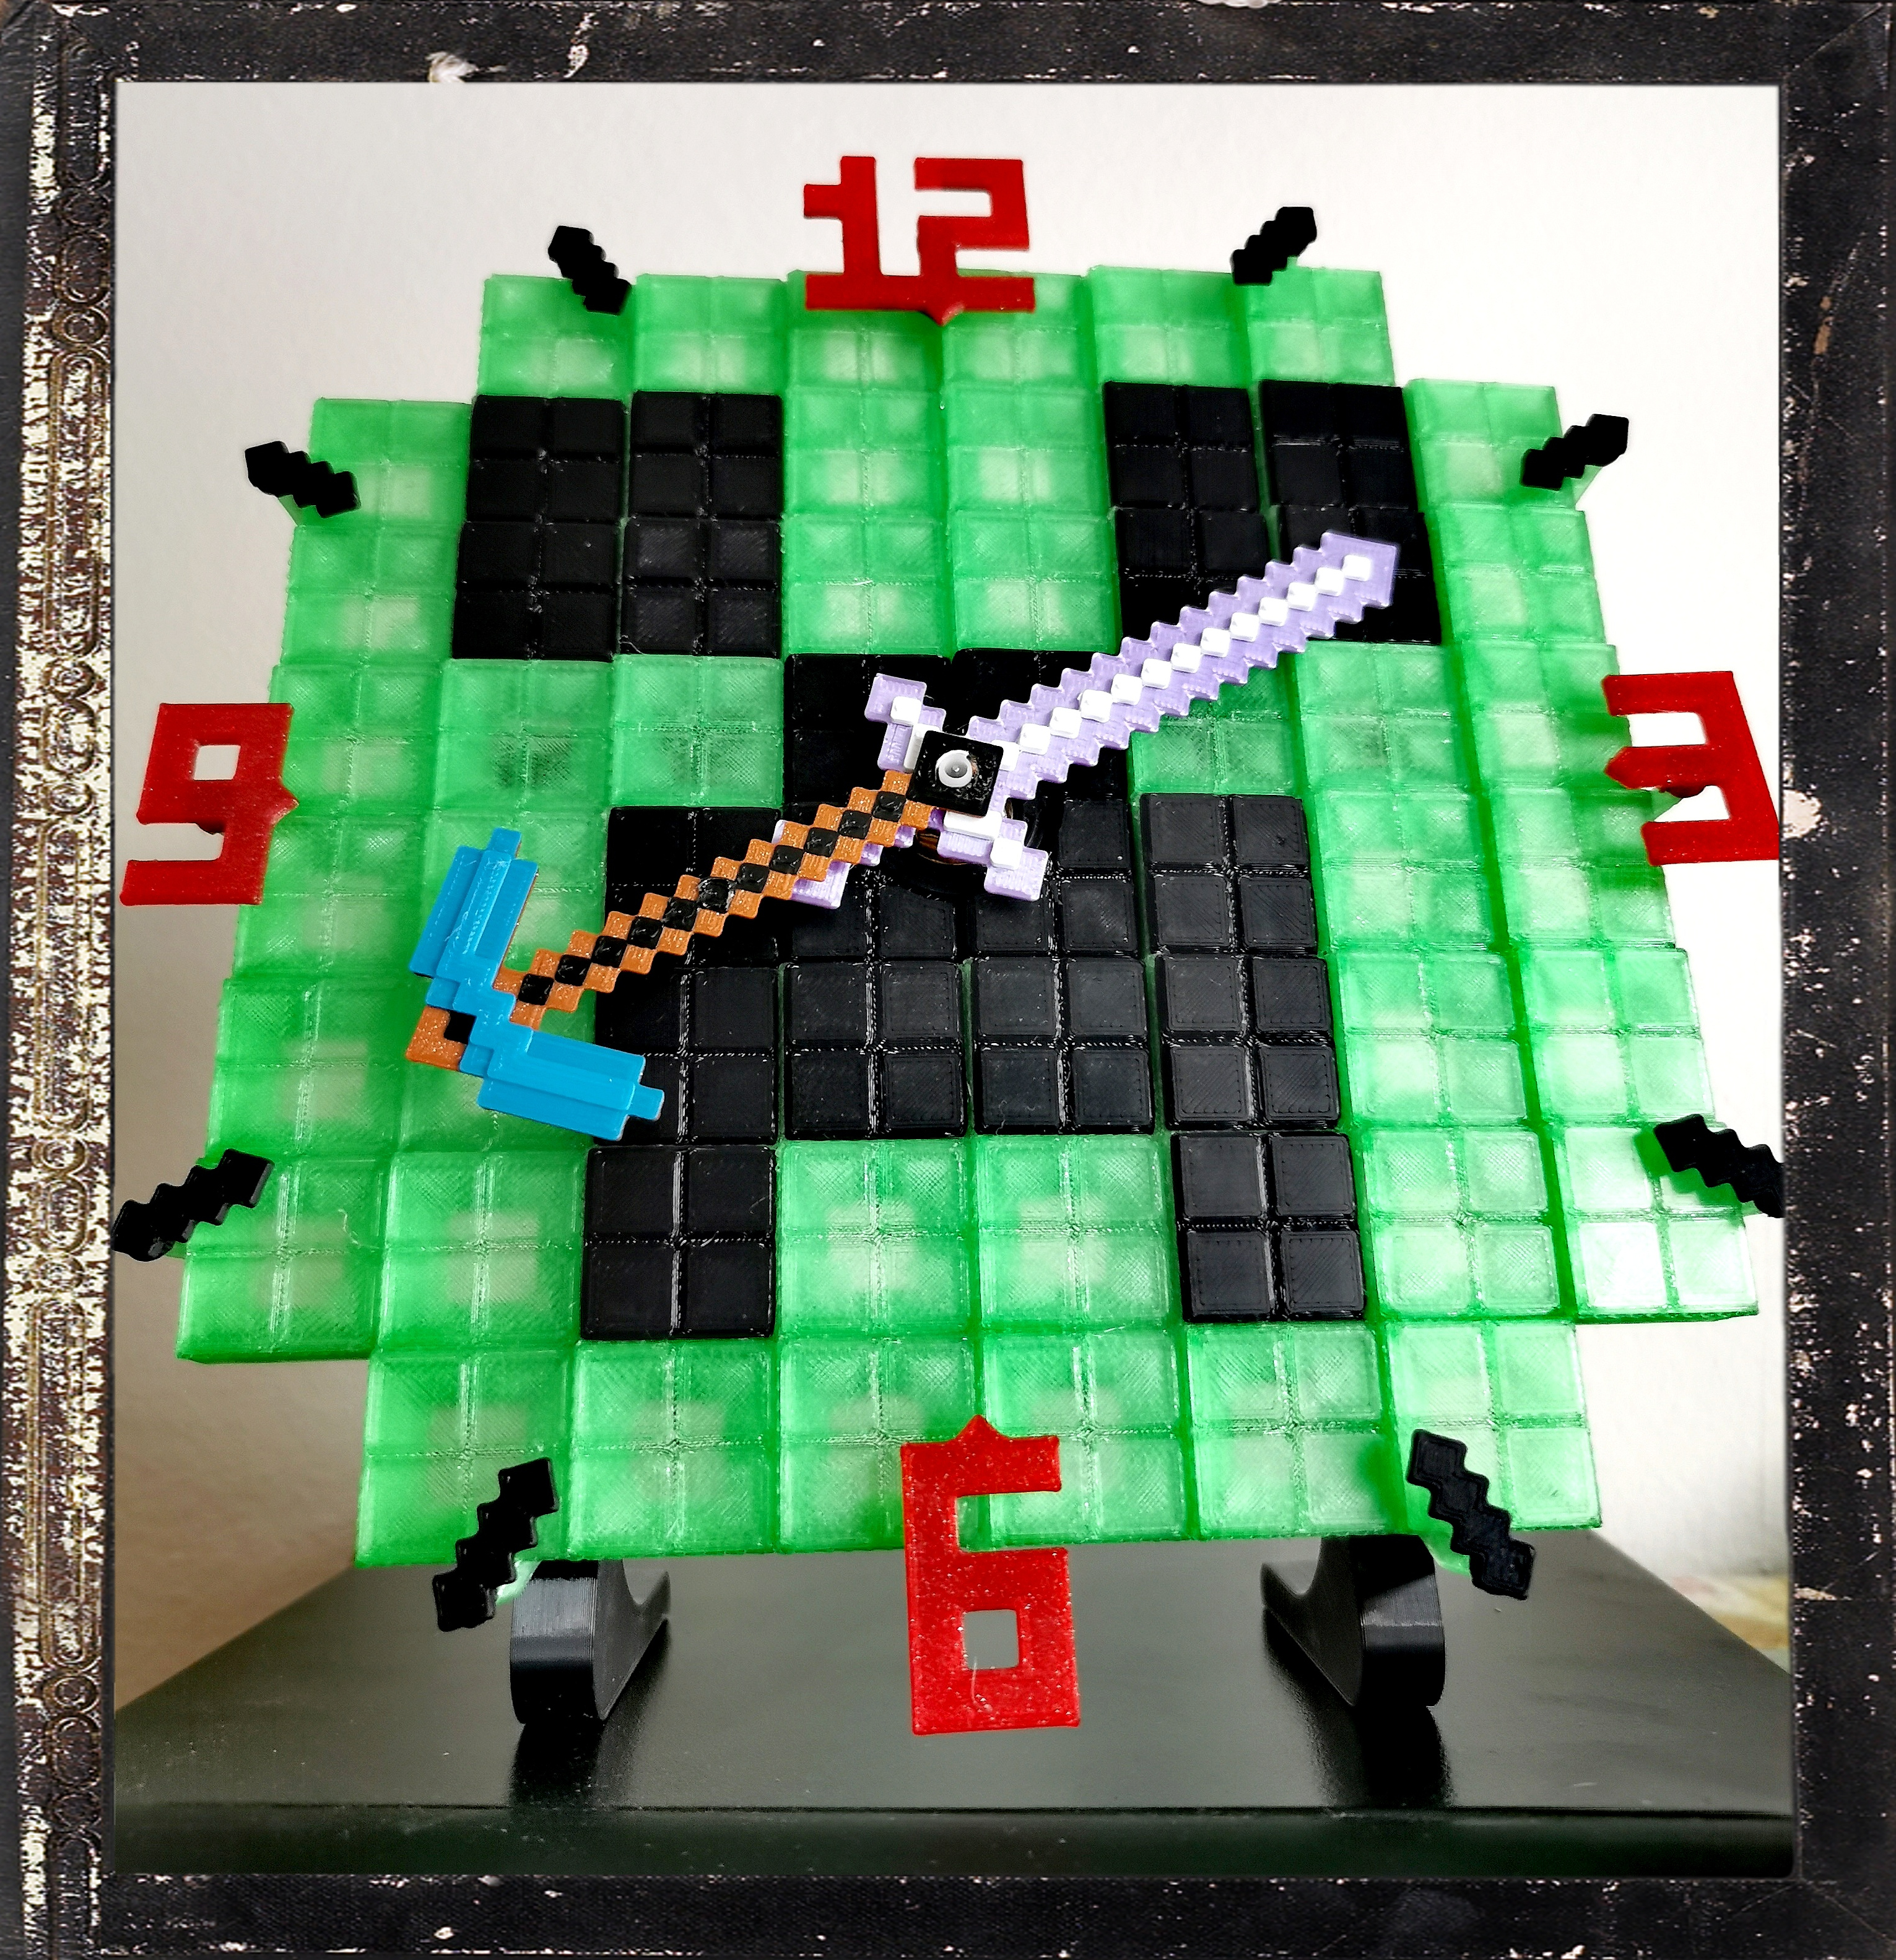
<h3>Description</h3><p>This hours can be used as wall mounted or as a self standing ones. There are two main variations the first is the 8x8 square ("Head") and the 2nd is without four corners ("Head_2") which make it look more like clock. And this heads can be filled with different inserts with any colors to create an image according to your imagination.</p><p>This was designed to fit with the clock motor dimmensions 55.8x55.8 mm and the minimum thread length should be at least 9mm (so after 9+mm the hour hands shoud take place). </p><p>When you want the wall mounting version and like to print a loot, you can also print the body/arms/legs variation and connect it to the head with horizontal and vertical joints.</p><p> </p><h3>Printing information</h3><p><strong>Material: </strong>PLA/PETG</p><p><strong>Layer height:</strong> 0.2mm</p><p><strong>Infill:</strong> 15% </p><p><strong>Supports:</strong> The supports are only needed at the middle of the head where the clock motor should be placed. And also at the Middle_inserts parts. (because all those parts needs to be printed in such orientation)</p><p><strong>Additional information:</strong> For the Sword and PickAxe hours/minutes hands is desirableis to change filament between some layers to have different colors. <br>The Print orientation of all parts is quite obvious, just one small note to the Middle_inserts parts that they should be printed with the looking side at print sheet, and therefore also additinall supports will be needed.</p><p> </p><h3>Testing tolerances</h3><p>if you want to be sure that its fits your tolerances and clock motor has the right dimmensions, just print first the “BC_01_Tests_parts” and an insert plus an clip.</p><p> </p><h3>Assembly</h3><p>Simple insert the color inserts into the head according to your wanted design. There are more inserts types so more creative variation can be done. Also one special insert with other smaller inserts to be able to put even more color block into the clock (16x16). <br>Also notice that there are 3 variations of every insert types based on the positions where they shold be placed around the clock motors. (the edge and the corner) So you will need 4x for the corners, 8x for the edge and 48x/52x of the fully ones.</p><p>After insert the clock motor inside and fasten it with the clip/clips.</p><p>Next step will be to insert the middle inserts on the motor and fasten it.</p><p>Then put the numbers or hour indicators around the head perimeter and also the wanted hours hands. (you can use smaller bigger numbers or just the pixel lines)</p><p>Insert the “Hang” or “Stands” for the wall mounting or self standing hours.</p><p> </p><p>Additinally connect the body/arms/legs with the horizontal and vertical joints. (i did not print this yet, but it should be without problems)</p><p> </p><h3><i><strong>And finally ENJOY your print!</strong></i></h3><p><i>or print another one :-D</i></p>
With this file you will be able to print Clocks from Blocks with your 3D printer. Click on the button and save the file on your computer to work, edit or customize your design. You can also find more 3D designs for printers on Clocks from Blocks.