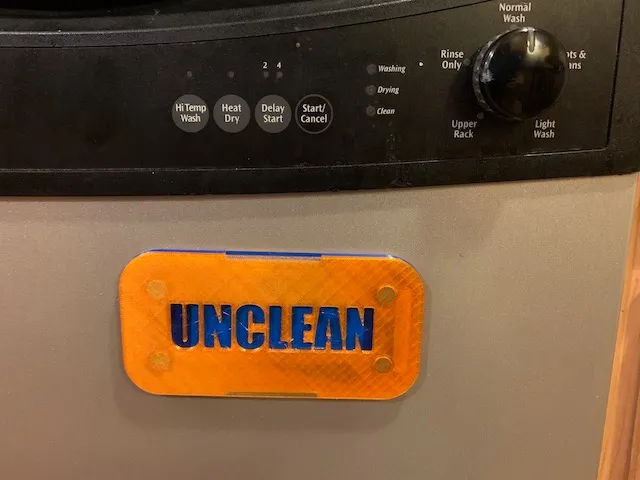
CLEAN/UNCLEAN dishwasher magnet
prusaprinters
There are plenty of dishwasher signs on here, but I wanted a CLEAN/UNCLEAN one. :D[UPDATE Jan 2023: a coworker suggested DIRTY/UNDIRTY, so I've added one of those as well. I couldn't get the stenciled letters to play nicely with the chamfer, though.]This works quite nicely if printed in two contrasting colors (see photos). You could also do a three- or four-color print, of course—just make sure not to skip the “Contrast Test” section, below.This is designed so to be completed in two passes on a Prusa MINI (or in my case, one pass on each of two MINIs). I usually print at 0.25mm layer height because I'm impatient, so all relative heights here are multiples of that. PrintingPrint one each of the CLEAN and UNCLEAN parts, and two of the CONTRAST parts. AssemblyNOTE: The CLEAN part has two tabs on the back. The other parts have slots that should help line everything up.Fit TestBEFORE YOU GLUE ANYTHING, try to snap all the parts together. Check:Does everything fit snugly? The CONTRAST plates will be fairly flexible, so you might have to wiggle them around to get their slots aligned around the tabs.Check the orientation of the letters. The sides fit together in two different orientations, so pick the way that works best for you:If both words are “up”, you'll flip the sign horizontally (around the short axis).If the words are upside down from each other, you'll flip the sign vertically (around the long axis).Contrast TestHolding all the parts together, take the sign into your kitchen. Check:Using your normal lighting, can you actually read the lettering on both sides?If you're using a light color for one of your CONTRAST plates, you may need to put a small scrap of paper or card stock behind it to bounce the light back.Once everything looks good, take it all apart again. Make sure you keep track of the orientation of the CLEAN and UNCLEAN parts!MagnetsPush all eight magnets into their holes, then do another fit test. Put the CLEAN and UNCLEAN sides together face to face (check the orientation again!), and make sure the magnets pull the pieces together.Pro tip: only the two magnets on each corner need to stick together. It might actually be a good idea to use opposite poles on the left and right sides. That way, if you get the orientation wrong, the magnets will push each other away.Glue (AKA “Point of No Return”)If you're using superglue, leave some room around the letters, since superglue can discolor some plastics. (Also, gloves are your friend!)Put the CLEAN part face down. Glue all around the letters and the outer edges.Put the first CONTRAST plate down on top of the CLEAN part. Make sure the slots fit around the tabs on both sides. Press the plate flat and check for glue leaking around the edges.Apply a thin layer of glue to the top of the first CONTRAST plate, then put the second CONTRAST plate down on it. Again, make sure the slots fit around the tabs on both sides, press the plate flat, and check for leaks.Put the UNCLEAN part face down. Glue all around the letters and the outer edges. Then pick it up and check the orientation one last time. Snap it into place on the tabs, push it down (you did check the orientation, right?), check for leaks, and clamp the whole assembly until the glue sets.Enjoy!
With this file you will be able to print CLEAN/UNCLEAN dishwasher magnet with your 3D printer. Click on the button and save the file on your computer to work, edit or customize your design. You can also find more 3D designs for printers on CLEAN/UNCLEAN dishwasher magnet.
