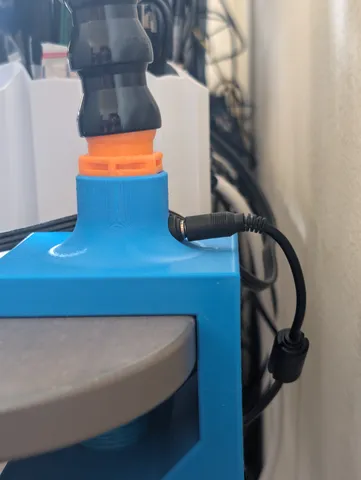
Clamp with 3/4" NPT threads for Loc-Line adapter
prusaprinters
Remixed the clamp portion to have 3/4" female NTP threads so I can use it with an NTP Loc-Line base. Used these 90 degree barrel plug adapter from Amazon and it slots into the hole. https://www.amazon.com/gp/product/B07MJG6NR9/ For assembly, I would recommend to split your Loc-Line 1-2 sections after the threaded base. Run the wires and armature through and make the connection. Then screw in the base, just turning the small section of Loc-Line. Once the 3/4 female threads are all the way in the base, then make the connection. This way you don't need to spin the entire length of Loc-Line and get the wires tangled inside. Here is a picture for reference from a failed print: I also used some adhesive backed cork sheet to give it more grip on my table.I used this to assemble the Adam Savage Workbench Light: Assembly Instructions: Insert all the wires and armature rods. It will be a cramped fit. Also split the Loc-Line so only 1-2 sections are connected to the 3/4 female NTP adapter. Make sure to also plug in the power wire and test to make sure the lights work. Screw in just the female NTP adapter with single piece of Loc-Line. This way you don't need to rotate the entire length and get everything tangled. Now just connect the last piece of Loc-Line and you are good to go. Source in Onshape here: https://cad.onshape.com/documents/b81a374d9e24a3182e1658d4/w/f386df9a7f0c782b09d27337/e/4e97f66cb23088093a553af8?renderMode=0&uiState=65ae89700c1746199f8e759f
With this file you will be able to print Clamp with 3/4" NPT threads for Loc-Line adapter with your 3D printer. Click on the button and save the file on your computer to work, edit or customize your design. You can also find more 3D designs for printers on Clamp with 3/4" NPT threads for Loc-Line adapter.
