Christmas wavy star ball
prusaprinters
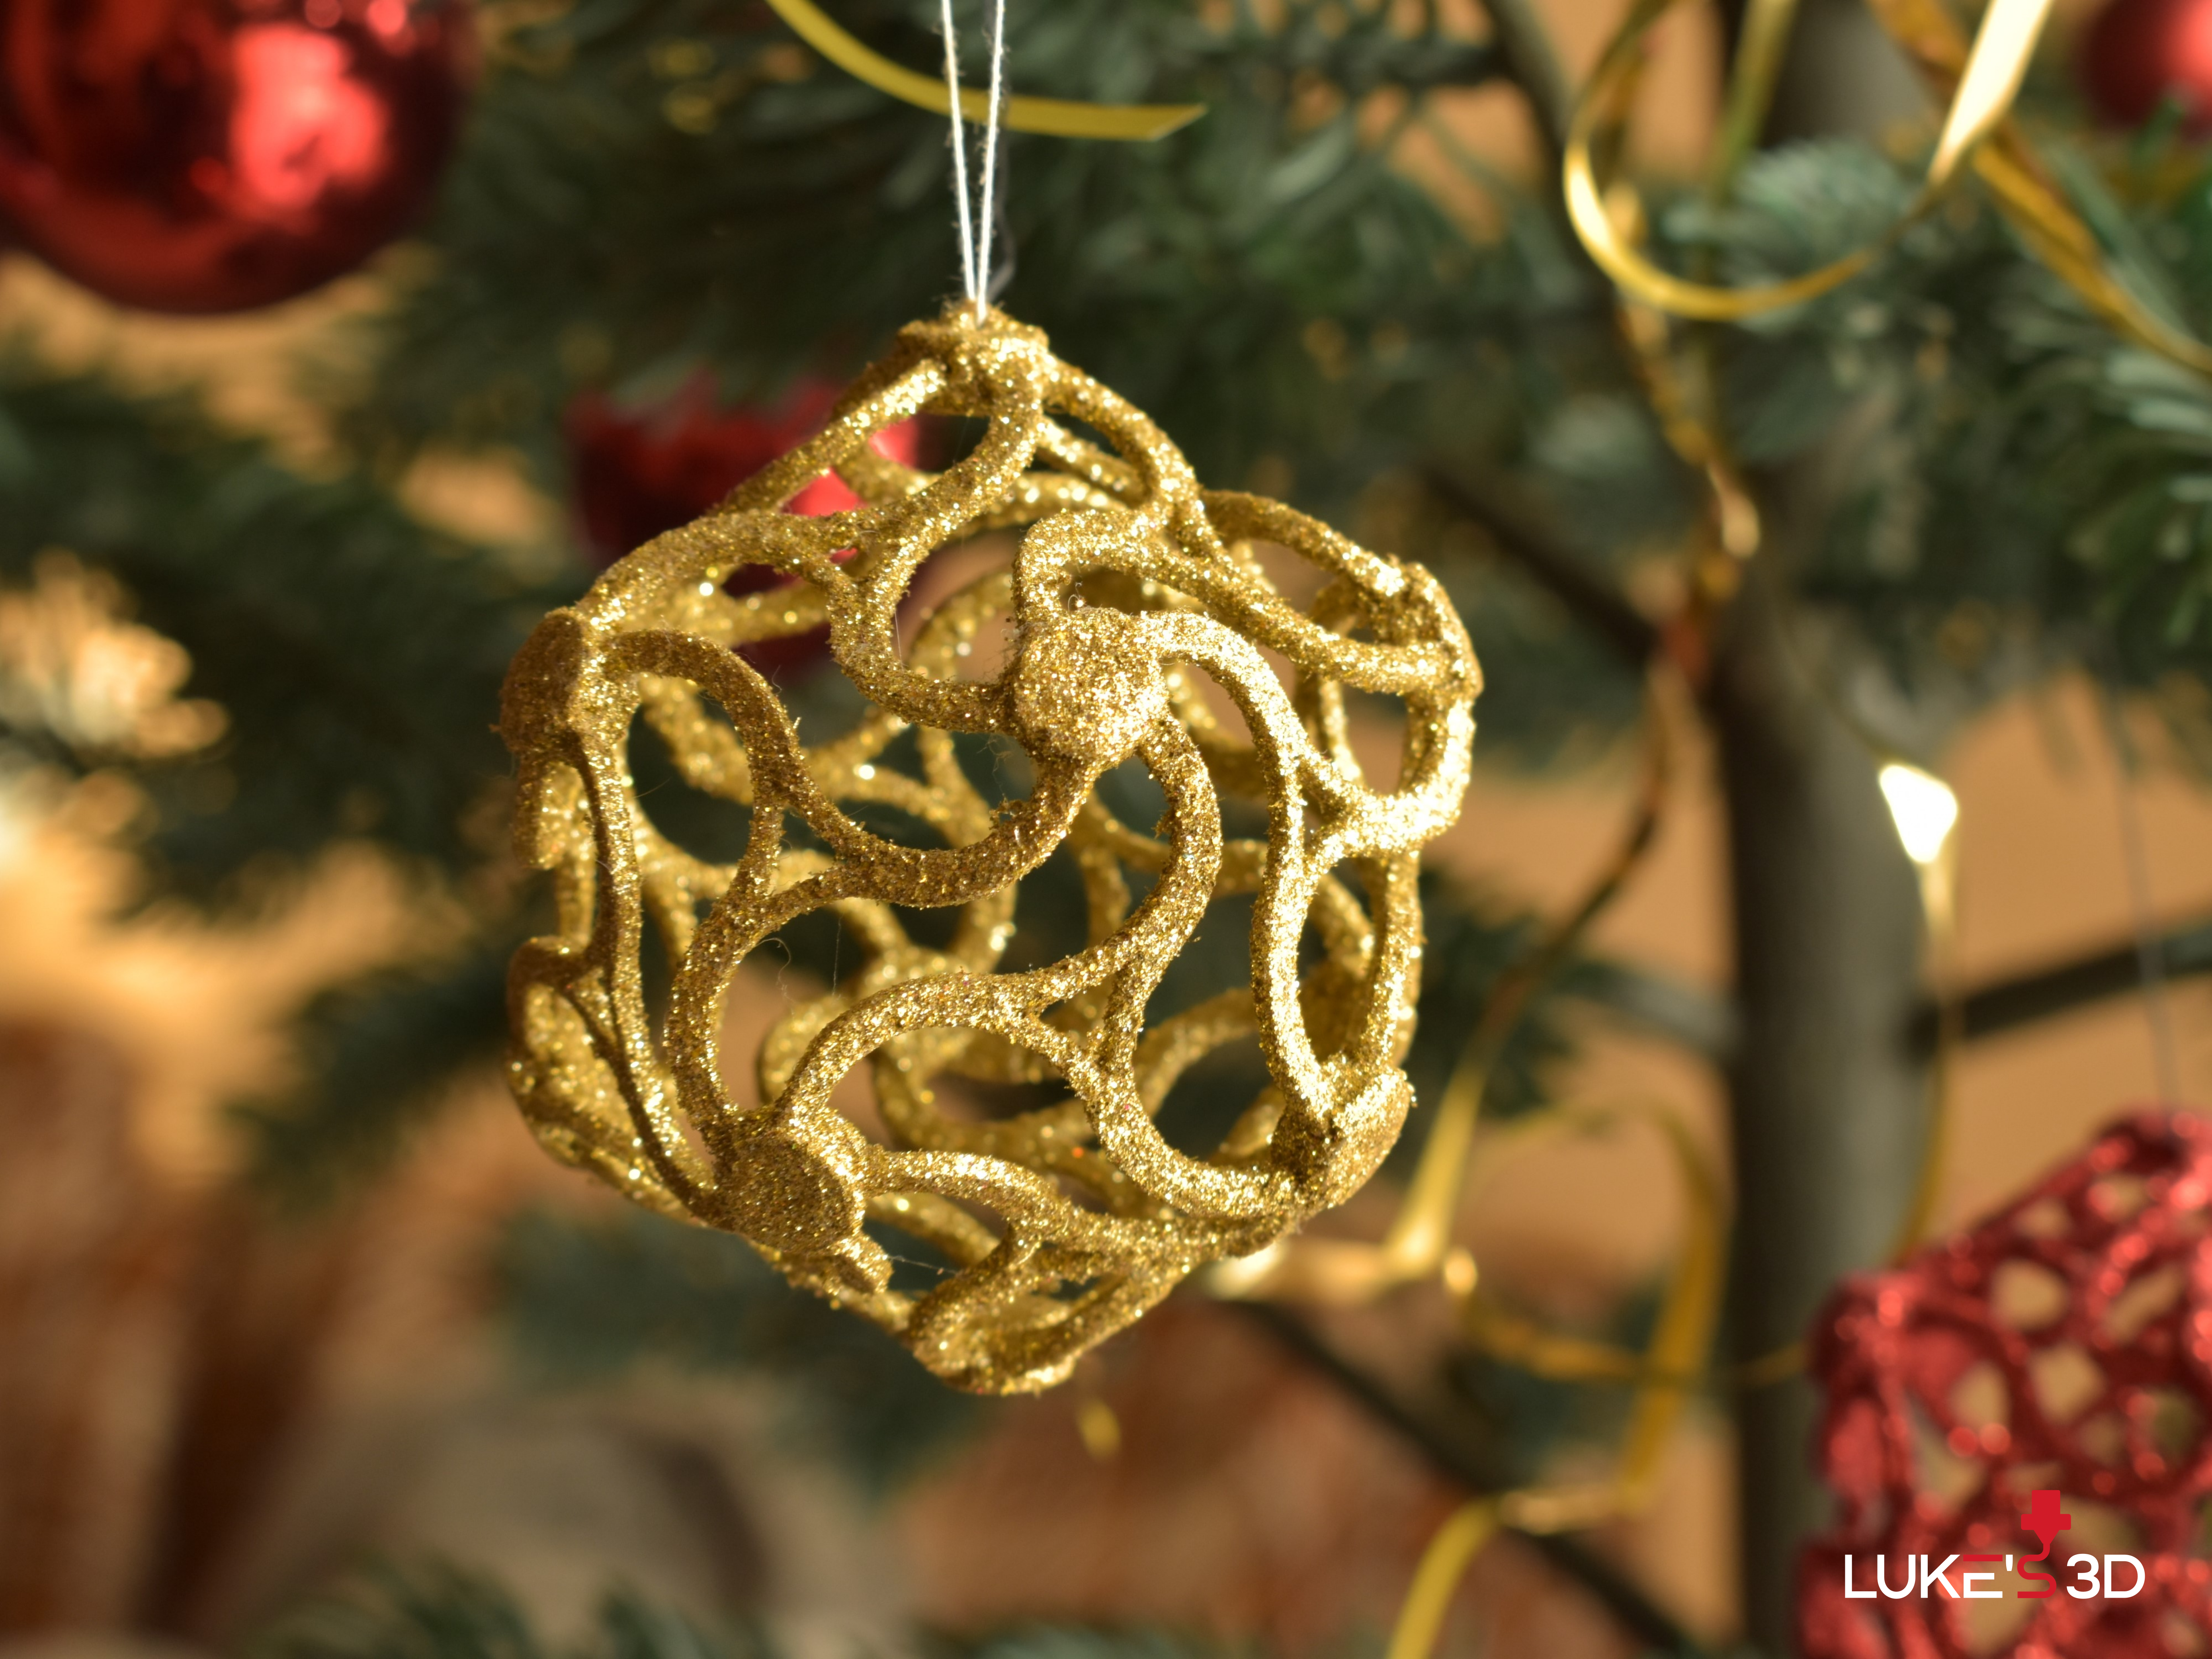
<p>Hello all, </p><p>thank you for having a look at my Christmas wavy star ball. Short history - I wanted to create geometric ornament but the one I thought of just wasn't possible without a ton of supports and support removal would be almost impossible. So I thought of another way to create it - print parts and assemble. I can proudly say that no supports are required, absolutely no waste and I think it looks great, almost like SLS printed when assembled. Want some christmas project? Here you go! Have fun and spend time with your family assembling this beautiful christmas ball.</p><p>Dimensions: 70x70x73 mm</p><h3> </h3><h3><strong>Instructions</strong></h3><p> </p><p>Assembly is pretty straight forward and repetitive, not hard.</p><p>You will need:</p><ul><li>20 x Face</li><li>11 x Connector</li><li>1 x Connector with hook </li><li>glue</li></ul><figure class="image"><img src="https://media.prusaprinters.org/media/prints/94573/rich_content/97cb9942-2cfa-4aae-a686-5469707721d7/dsc_0336.jpg#%7B%22uuid%22%3A%22fdc95cff-9ed6-4f1e-ba5d-85975942dfc0%22%2C%22w%22%3A4496%2C%22h%22%3A3000%7D"></figure><ol><li>We start off with taking one of the connectors applying glue to one of the holes on side:</li></ol><figure class="image"><img src="https://media.prusaprinters.org/media/prints/94573/rich_content/5bf27364-d351-45f1-bc27-e28c9a05b796/dsc_0353.jpg#%7B%22uuid%22%3A%22dcda91b7-10df-4364-893f-b186cc15460c%22%2C%22w%22%3A4496%2C%22h%22%3A3000%7D"></figure><p> 2. Insert face end to the glued hole. Make sure the dot on the connector points to the center of the ball. Insert faces to other 4 holes:</p><figure class="image"><img src="https://media.prusaprinters.org/media/prints/94573/rich_content/1ef6c808-7710-4446-8202-5ea4a12d2746/dsc_0364.jpg#%7B%22uuid%22%3A%22bd4e6d26-dc54-47d1-b167-af692c5ff0ca%22%2C%22w%22%3A4496%2C%22h%22%3A3000%7D"></figure><figure class="image"><img src="https://media.prusaprinters.org/media/prints/94573/rich_content/a1e27998-1131-4099-b08e-f8c9ecb16e1a/dsc_0373.jpg#%7B%22uuid%22%3A%22e9ce45c9-15bf-4707-a1a1-0bc9898a4d4d%22%2C%22w%22%3A4496%2C%22h%22%3A3000%7D"></figure><p> 3. Now take connector and glue two holes. Then insert two face ends. Do this around perimeter. You will need to flex the face a little.</p><figure class="image"><img src="https://media.prusaprinters.org/media/prints/94573/rich_content/215c52b8-df11-4d26-8838-9fa8295b5cc3/dsc_0378bright2.jpg#%7B%22uuid%22%3A%2279a67d28-cca8-4740-9e90-9fc9a63daa35%22%2C%22w%22%3A4496%2C%22h%22%3A3000%7D"></figure><figure class="image"><img src="https://media.prusaprinters.org/media/prints/94573/rich_content/6a48e46d-fba3-42fd-9540-c4efabfea388/dsc_0380.jpg#%7B%22uuid%22%3A%221e381e13-3131-409b-adcd-9b222d4f904d%22%2C%22w%22%3A4496%2C%22h%22%3A3000%7D"></figure><p> 4. Continue to add faces close to the bottom. Again, repeat around the perimeter:</p><figure class="image"><img src="https://media.prusaprinters.org/media/prints/94573/rich_content/525b90f5-4931-4f4d-a6e0-83cc2a97ca12/dsc_0383.jpg#%7B%22uuid%22%3A%22e7babe87-cf0e-42fa-8037-9ce2bfe6c9f0%22%2C%22w%22%3A4496%2C%22h%22%3A3000%7D"></figure><figure class="image"><img src="https://media.prusaprinters.org/media/prints/94573/rich_content/9f686a29-9f1f-4cf6-9259-5c553e5cf1f7/dsc_0386.jpg#%7B%22uuid%22%3A%2262b1b578-679e-4e98-bec3-08ea7e960e82%22%2C%22w%22%3A4496%2C%22h%22%3A3000%7D"></figure><p> 5. Now let's make sure we fill out all connector holes. Continue all around until you have 3 face ends side by side:</p><figure class="image"><img src="https://media.prusaprinters.org/media/prints/94573/rich_content/dd245e04-3034-4c02-9df7-eb0a2f8ff142/dsc_0389.jpg#%7B%22uuid%22%3A%223f1a150f-05ab-4764-baa2-9d61695da532%22%2C%22w%22%3A4496%2C%22h%22%3A3000%7D"></figure><p> 6. As you probably guessed, these face ends are to be connected with connectors. Glue three holes and place them in:</p><figure class="image"><img src="https://media.prusaprinters.org/media/prints/94573/rich_content/59dee5d9-a24b-4a57-a60a-d6dec0b141f6/dsc_0393.jpg#%7B%22uuid%22%3A%22274e2ef3-c08f-4771-89d7-e30403d8ba86%22%2C%22w%22%3A4496%2C%22h%22%3A3000%7D"></figure><p> 7. Almost there! Glue in the last 5 faces:</p><figure class="image"><img src="https://media.prusaprinters.org/media/prints/94573/rich_content/3eab7cc8-00e9-4011-97eb-30a7a588fc06/dsc_0401.jpg#%7B%22uuid%22%3A%2279228bb5-9d5a-4d7f-996a-f0ad909d1742%22%2C%22w%22%3A4496%2C%22h%22%3A3000%7D"></figure><figure class="image"><img src="https://media.prusaprinters.org/media/prints/94573/rich_content/1c04e8ec-ecaf-4f40-99ae-0c34f0fe1cfb/dsc_0402.jpg#%7B%22uuid%22%3A%22c5a79c72-95e4-4d41-adc1-743a48ffdd0f%22%2C%22w%22%3A4496%2C%22h%22%3A3000%7D"></figure><p> 8. Last step! Now take the connector with hook and glue all the remaining face ends together. Well done!</p><figure class="image"><img src="https://media.prusaprinters.org/media/prints/94573/rich_content/aadf46ac-6c06-4f14-becc-b3cdf0065754/dsc_0409.jpg#%7B%22uuid%22%3A%22b853e8f0-5191-472c-a062-378ec52d1c6e%22%2C%22w%22%3A4496%2C%22h%22%3A3000%7D"></figure><h4> </h4><h4>Taking things the extra mile</h4><p> </p><figure class="image"><img src="https://media.prusaprinters.org/media/prints/94573/rich_content/25ce4931-9070-4c4d-a9ef-b48cb2161807/dsc_0421.jpg#%7B%22uuid%22%3A%229abef26b-bdbf-445c-873b-3dad2162bc03%22%2C%22w%22%3A4277%2C%22h%22%3A2856%7D"></figure><p>You will need:</p><ul><li>hair spray (there's a good chance you already have one nearby your printer)</li><li>glass jar big enough to accomodate the ball</li><li>glitter</li></ul><p>It is quite important to have the glitter and filament color synchronised, we don't want the filament color to peak through the glitter in case it is not fully covered.</p><p>Throw the glitter into jar, give the ball generous coat of hair spray (piece of wire to hang it on is great) so even the inside is coated. Lower it into jar, close the lid and shake. Take the ball out, give the ball another coat of hair spray so the glitter doesn't fall of easily. Now just let it dry.</p><figure class="image"><img src="https://media.prusaprinters.org/media/prints/94573/rich_content/4d9daf36-3413-4d54-9057-4565e7f131c8/dsc_0437.jpg#%7B%22uuid%22%3A%22e8c99675-db57-4d7a-b23e-4da3483f88cc%22%2C%22w%22%3A4496%2C%22h%22%3A3000%7D"></figure><figure class="image"><img src="https://media.prusaprinters.org/media/prints/94573/rich_content/6656f63b-1307-466c-a022-ae5072c8315d/dsc_0526.jpg#%7B%22uuid%22%3A%2254a67ef2-cc52-470b-94da-12cc281e9ef9%22%2C%22w%22%3A4496%2C%22h%22%3A3000%7D"></figure><p> </p><p>Happy christmas!</p><p>Luke</p>
With this file you will be able to print Christmas wavy star ball with your 3D printer. Click on the button and save the file on your computer to work, edit or customize your design. You can also find more 3D designs for printers on Christmas wavy star ball.