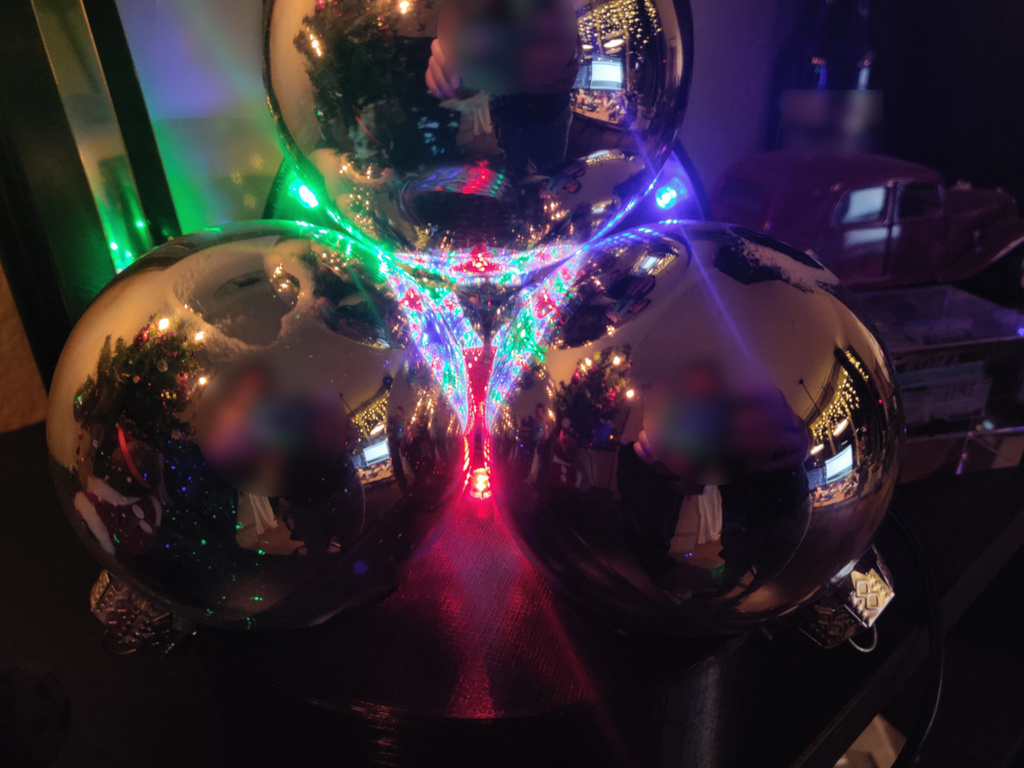
Christmas Fractal Lamp
thingiverse
# Introduction A Christmas lamp with a mathematical twist. Using the same basic principle as a kaleidoscope, the four reflecting surfaces of the Christmas balls together with the three colored LEDs create a fractal pattern of reflections on the Christmas balls. So in the end it looks like a geometric pattern with infinite resolution, or it just looks like a nice sparkling Christmas lamp with multiple colors :) **For this project you need at least some basic soldering skills, or be willing to learn them.** If you just want all LEDs to turn on, you can mount a DC jack socket (for example [this one](https://uk.farnell.com/schurter/4840-2200/socket-dc-power-2-1mm-1a/dp/1137744)) in the circular hole in the base, and directly wire the LEDs to this socket (**don't forget to add >150ohm resistors!**). But if you want more advanced features such as animated lights and wifi-control, you can use the PCB design and an ESP-01 chip to make the lamp 'smart'. I'm still working on [the software](https://github.com/raimund89/PiNet-Satellite), take a look at the github page for the latest version. # Part list **Non-electronics** * 1x the base (3d printed) * 2x the arm (3d printed) * 4x shiny silver Christmas ball, 8cm diameter (or 3") * Superglue to glue the LEDs in place * 4x screw 2.5mm to mount the PCB **Electronics** * 1x printed circuit board (order online) * 1x ESP-01 chip * 1x pin socket, 2x4 pins, 2.54mm pin distance * 1x DC connector, pcb mount, 2.1/5.5mm * 3x JST connector horizontal (e.g. JST S2B-XH-A) * If you want to be able to disassemble the arms for storage, you could use a horizontal pin socket instead and directly insert the wires into these sockets. * 1x LM1117-3.3v, size SOT-223 * 3x BSS138, size SOT-23 * 2x smd tantalum capacitor, size 3528, 10-30uF, 16V * 1x smd ceramic capacitor, size 0805, 100nF, 5V * 3x smd resistor, size 0805, >150ohm, 125mW **Wiring** * 3x JST plugs (e.g. XHP-2) * If you want to be able to disassemble the arms for storage, you don't need those * 3x LED, 5mm diameter, red/green/blue * Insulated electronic wire. I prefer solid core, because it stays in place after it's folded. * Some shrink socket to cover exposed wire. # Notes If you have never soldered SMD before: * Start with the components with the smallest pads. So first the BSS138, then the resistors, capacitors and LM1117. At last all through-hole components. * First connect one pin with solder and align it correct for the other pads. Then soldering the other pads should be easy. * It is nice to have some solder resin laying around, because you can use it to clean up ugly solder. Just apply some resin to the solder and reheat it, it will end up smooth and shiny.
With this file you will be able to print Christmas Fractal Lamp with your 3D printer. Click on the button and save the file on your computer to work, edit or customize your design. You can also find more 3D designs for printers on Christmas Fractal Lamp.
