Chickens Whirligig V2
prusaprinters
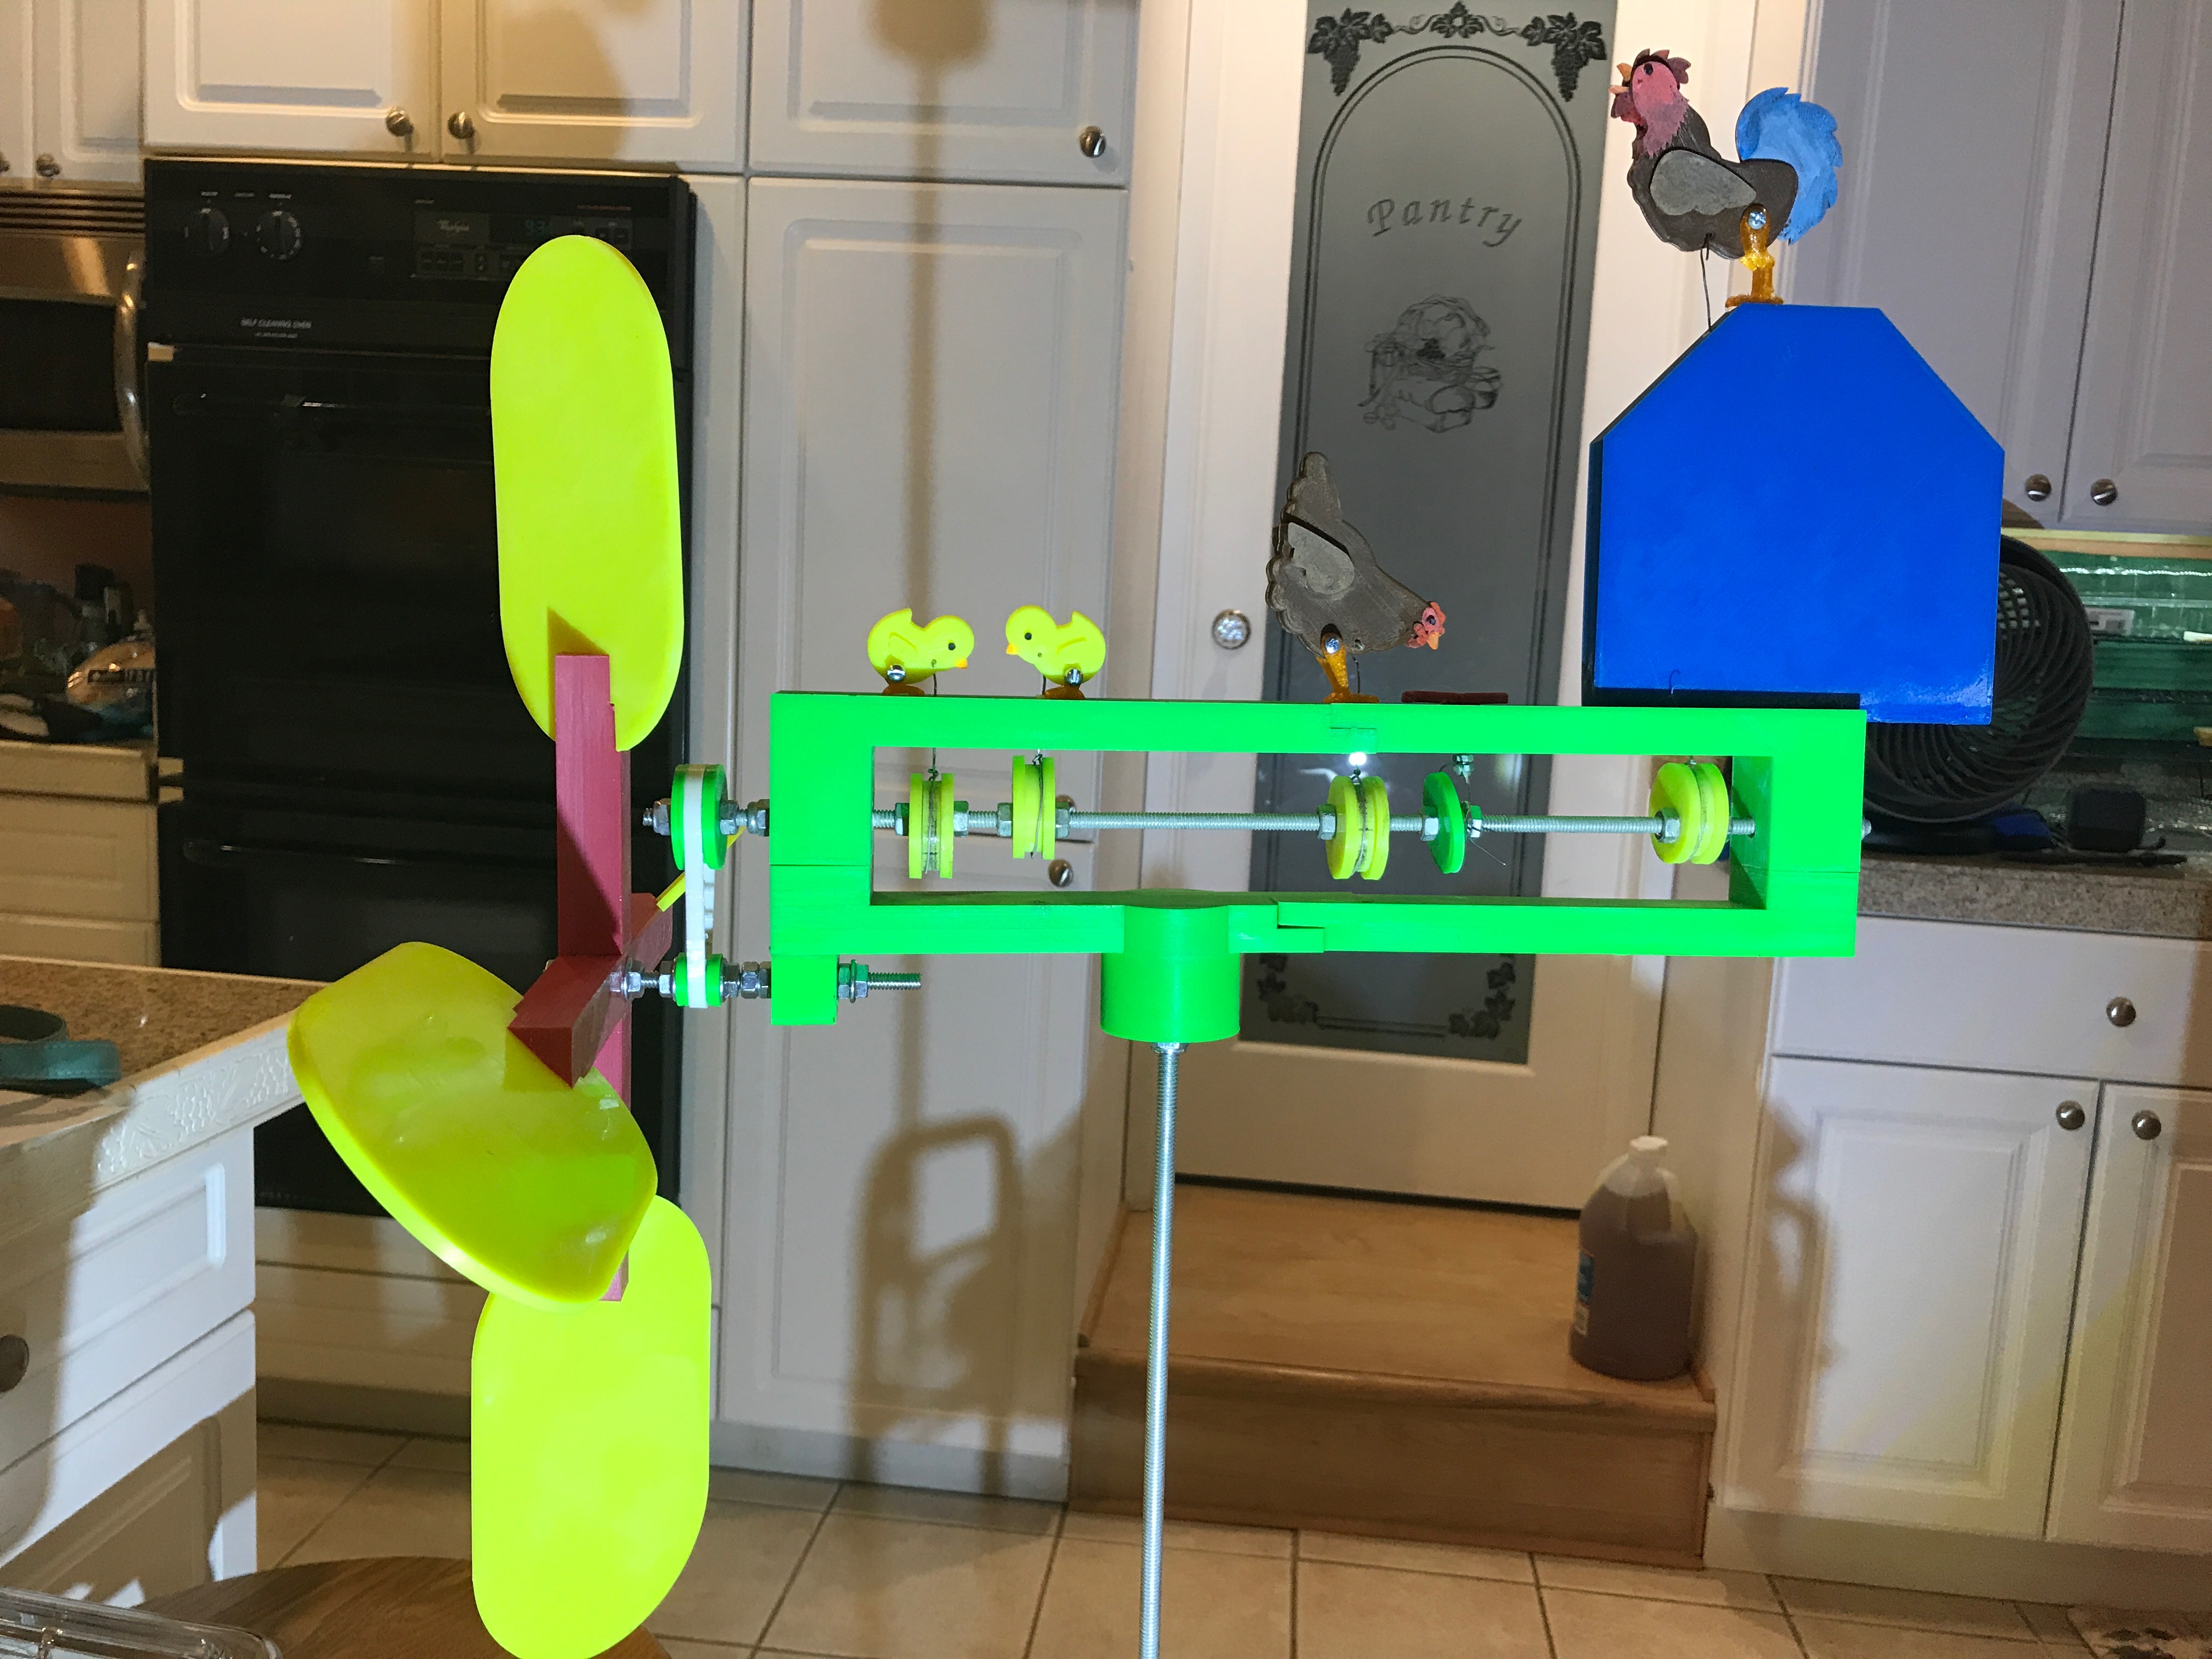
<p>chickens whirligig revisited.</p> <p>In the year since I first posted my Chickens whirligig, some problems have come up. This is my attempt to fix them.</p> <p>The main problem has been that it takes quite a bit of force to get the whirligig spinning. My solution is a set of geared pulleys and a 3-D printed ninjaflex geared belt. The pulleys offer a 2 to 1 ratio, so for each revolution of the propeller, the chicken cams only go through half of a revolution. This has the effect of making it easier to drive the mechanism, slowing down the action and making it smoother.</p> <p>One pulley is mounted to a new bearing block under the front bottom base, while the other is mounted to the original drive shaft. I designed a new bottom front base that incorporates the new bearing block, and also included a design that is just the bearing block for anyone who (like me) just wants to retrofit an existing whirligig. It can just be glued to the front of the existing base.</p> <p>Some other changes I made include moving the pivot point on the hen so she looks more natural and a redesigned and hopefully better worm cam.</p> <p>In an effort to further make the action smoother, I inserted lengths of teflon bowden tube for 1.75mm filament into each of the holes that have chicken movement wires running through them. The tubing has an o/d of 4mm and just fits nicely in the existing holes. This step is not necessary, but I had the tubing, it was cheap, and it fit, so why not?</p> <p>One more thing, after most of a year outside, the ABS plastic I used for this print has gotten brittle. For most of the whirligig, it doesn't matter much, but none of the chicken legs held up very well. The ones that weren't already broken when I started broke while I was working on it. I have replaced the ABS plastic with TPU for the legs. I think this will work out much better. I haven't tried PLA, but doubt it would do any better than ABS.</p> <p><a href="https://www.youtube.com/watch?v=OpM4_1eJkdw">https://www.youtube.com/watch?v=OpM4\_1eJkdw</a></p> <h3>Print instructions</h3><h3>Category: Interactive Art Print Settings</h3> <p><strong>Printer:</strong> Flashforge Creator Pro</p> <p><strong>Rafts:</strong> No</p> <p><strong>Supports:</strong> Yes</p> <p><strong>Resolution:</strong> .2mm</p> <p><strong>Infill:</strong> 25%</p> <h3> Post-Printing</h3> <p><strong>Parts List</strong></p> <p>You will need the following hardware:</p> <p>1 1/4 - 20 threaded rod for the main axle. Cut to length<br/> 1 1/4 - 20 threaded rod for the lower axle<br/> 17 1/4 - 20 nuts<br/> 3 1/4 - 20 nyloc nuts<br/> 2 6-32 X 3/4" machine screws and nuts<br/> 4 4-40 X 3/4" machine screws and nuts<br/> 1 4-40 X 1" machine screw<br/> 2 feet of stiff, fine wire. I used 1/32" (about .8mm) diameter wire I had.<br/> 1 5/16 threaded rod<br/> 2 5/16 nyloc nuts<br/> 2 608zz skateboard bearings<br/> 4 r4-zz skateboard bearings</p> <p>Feel free to substitute the closest metric equivalent.</p> <p>When attaching the wires, keep them loose enough to ride freely around the cam. To keep drag at a minimum, make sure the wire is as straight as possible where it goes through the holes in the base. I wound up testing and adjusting everything with just the wires (no chickens) until everything worked without binding up anywhere. Then I added the chickens.</p> <p>For the worm, I drilled the hole out big enough so that I could thread the 4-40 machine screw into it. The fit was good enough that I didn't have to glue it. The wire that rides on either side of the worm cam is wrapped around the machine screw, then trapped between two nuts. I had better luck printing the worm and getting it to fit by using TPU instead of a harder plastic.</p>
With this file you will be able to print Chickens Whirligig V2 with your 3D printer. Click on the button and save the file on your computer to work, edit or customize your design. You can also find more 3D designs for printers on Chickens Whirligig V2.