Cheshire Cat 8x3mm Magnet Inserts (for parts body_6 & body_7)
prusaprinters
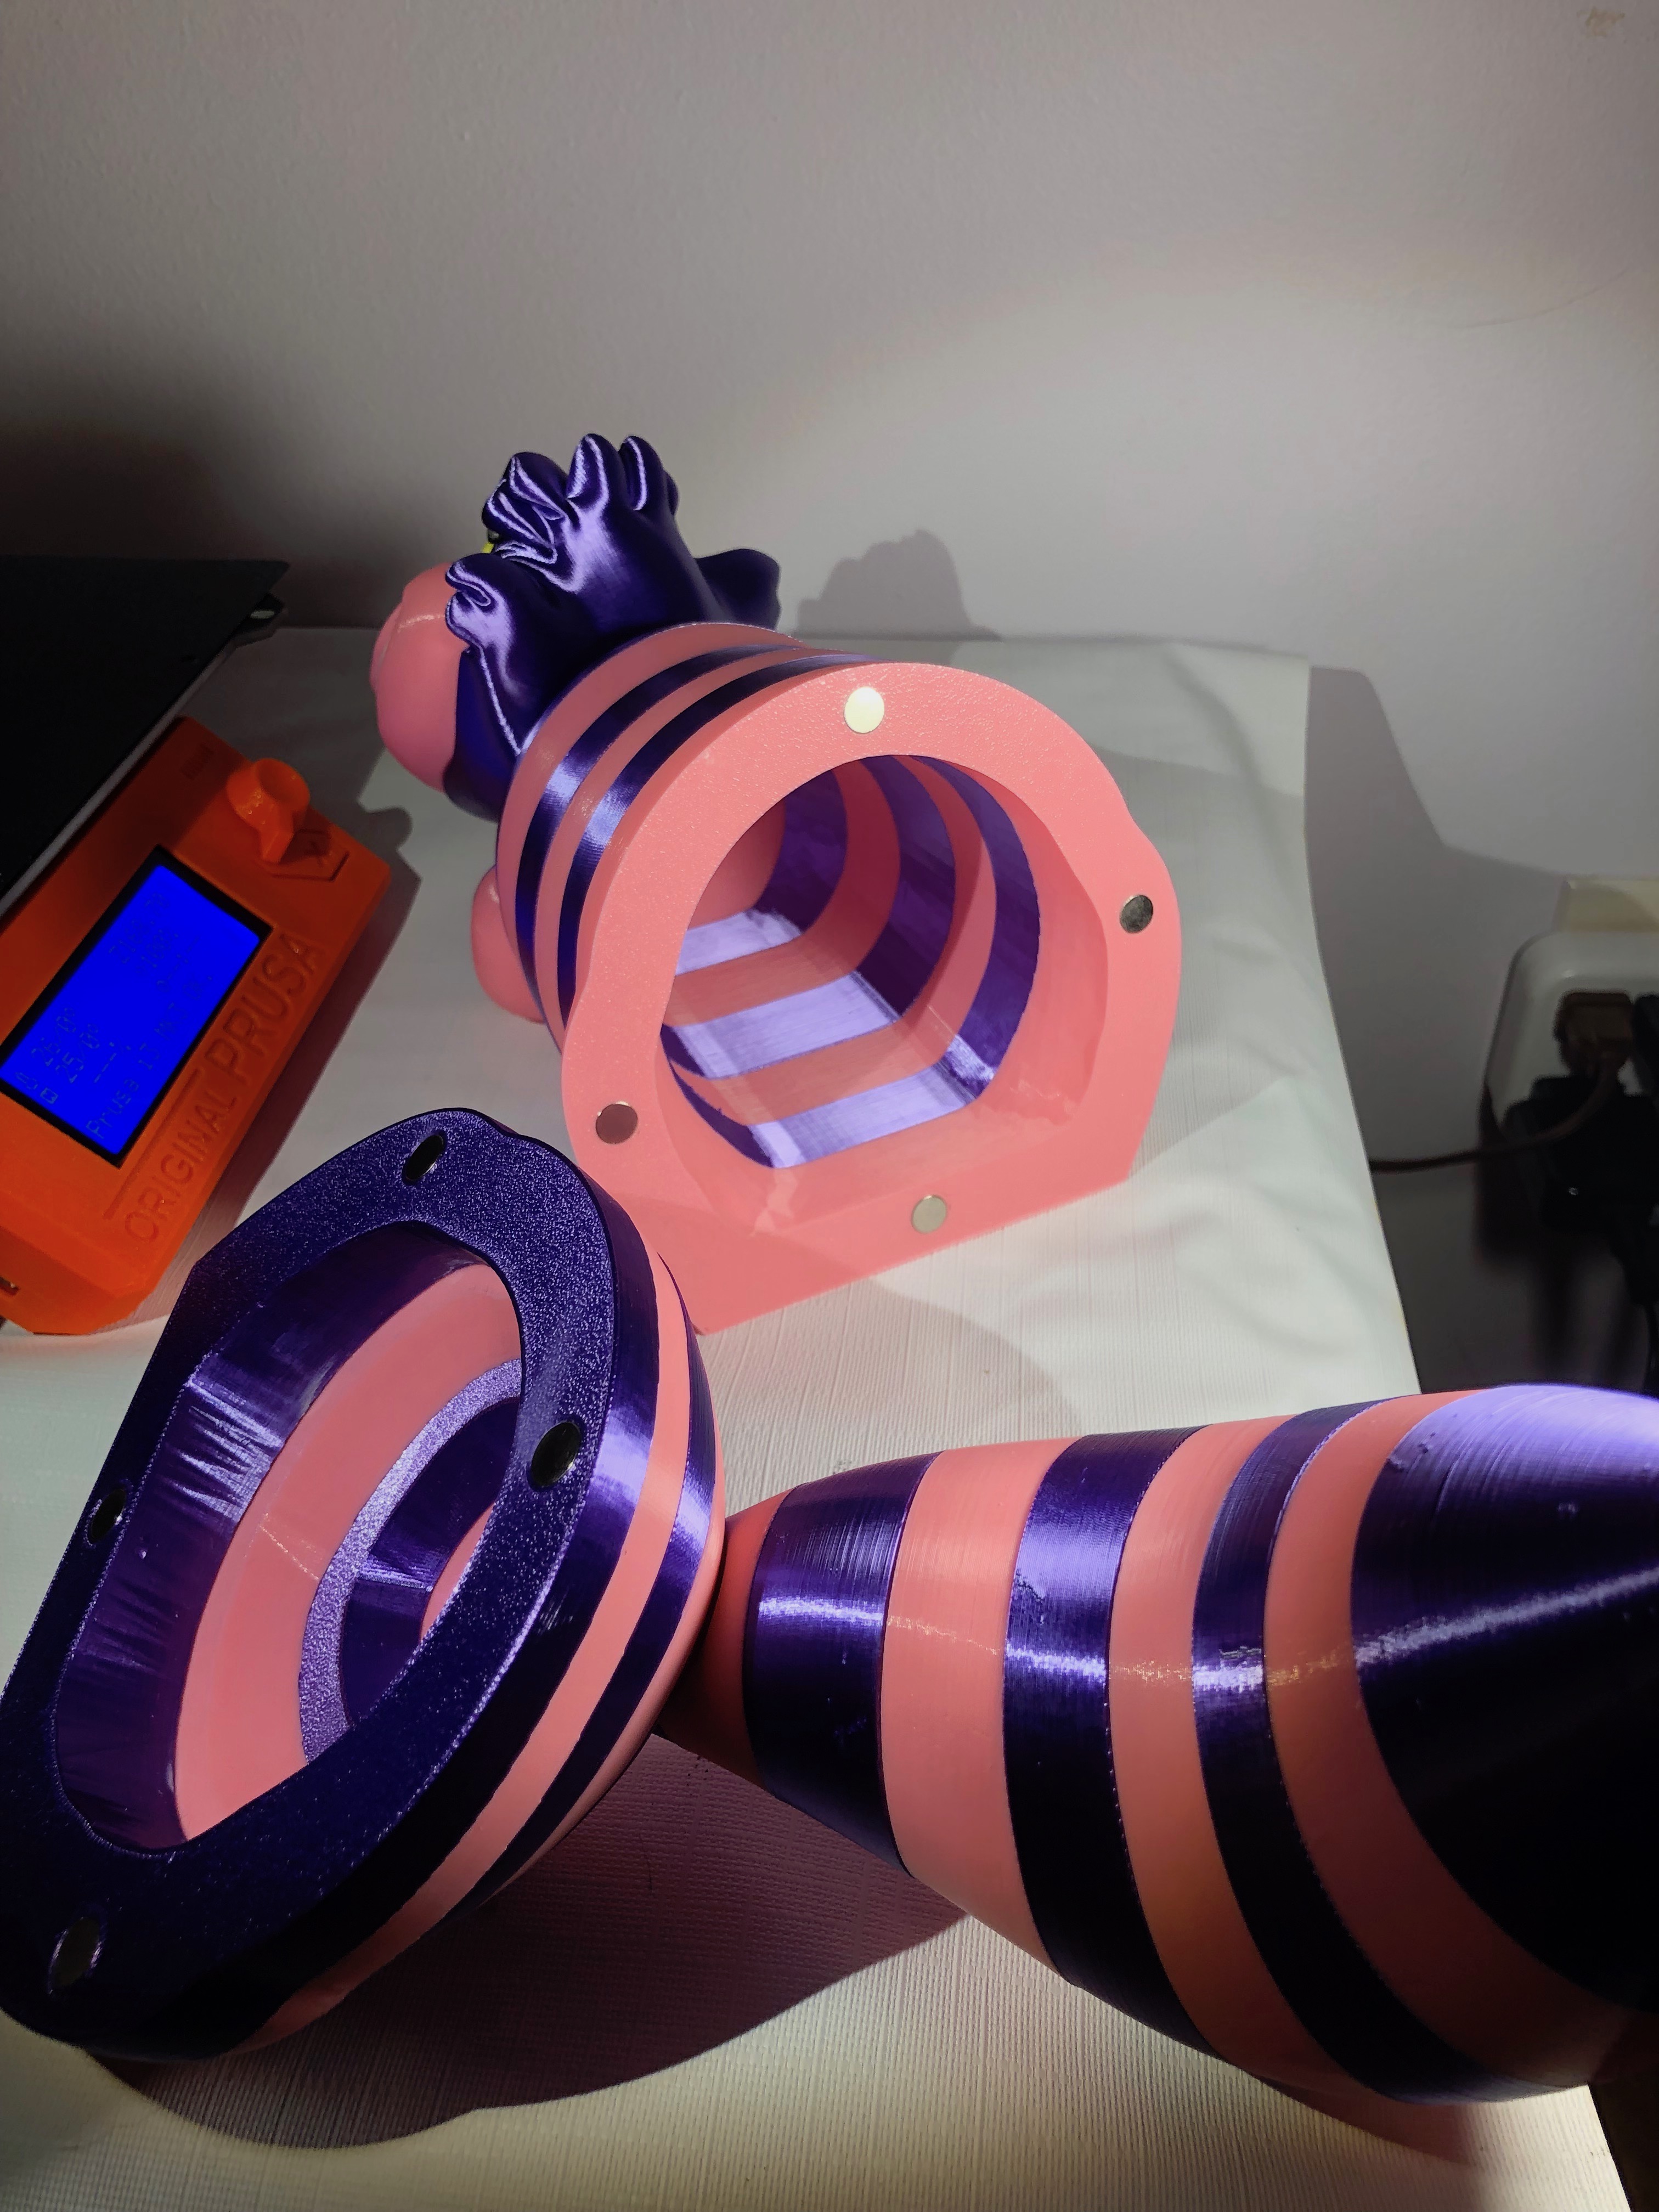
<p>This is a very simple remix of two parts you can swap out for the full-sized assembly version of Reddadsteve’s Cheshire Cat, replacing the two parts that use the "body bump" files instead</p><p>Basically, there are 4 hole cutouts in two sections of the body in which you slip 8x3mm rare earth magnets so that you create a way to easily have a little hidey-hole you can store.....stuff in.</p><p>I just used whatever 8x3mm magnets I got off amazon, nothing special, and they fit really well, completely flush with the surface so you can't tell when the parts are stuck together that there is any gap. I would say its a "close to flawless" alignment (you can be the judge by the second pic). I had to just do it in tinkercad, but I truly can't tell which part of the model comes off when the magnets are on, so I think I got it about as close as anyone will need. FYI the holes themselves are 3mm deep and 8.15mm in diameter to accept the magnets; a dab of glue is needed on each magnet so one side doesn't pull the other side out when you separate the pieces.</p><p>Just make sure you TRIPLE CHECK the ORIENTATION of your magnets before you glue so they don't repulse each other by accident. Also, the assembly graphic says the parts with the body bumps are parts body 5 & 6 but they are actually 6 and 7 just FYI --- there's actually a little tiny piece right near the tail that can't be seen from the orientation of the picture so I think that's how it got mislabeled).</p><h3>Print instructions</h3><p>Category: 3D Printing</p>
With this file you will be able to print Cheshire Cat 8x3mm Magnet Inserts (for parts body_6 & body_7) with your 3D printer. Click on the button and save the file on your computer to work, edit or customize your design. You can also find more 3D designs for printers on Cheshire Cat 8x3mm Magnet Inserts (for parts body_6 & body_7).