Cherry MX typewriter keycap
thingiverse
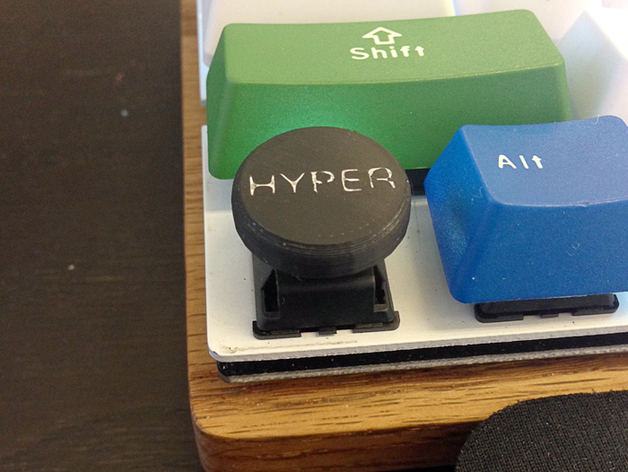
A simple typewriter-style keycap design inspired by http://www.thingiverse.com/thing:417509 was created due to the large size which didn't fit on keyboards. All other cherry keycaps had a major issue with stems not fitting properly onto switches, requiring significant cutting and filing efforts. In contrast, this new design features extremely thin stem walls that printer software ignored, producing four sturdy posts that fit seamlessly onto the switch components. The key in the photo is printed using ABS plastic. Similar results were achieved when printing it with PLA, but the ABS showed a snugger fit on the switch due to possible shrinkage effects. For users wanting to create their own versions of this design, follow these step-by-step instructions carefully: 100% fill 0.15mm layer thickness (users may adjust this value according to personal preferences) 0.8mm shell thickness is crucial for the integrity of the design. When printing with an Ultimaker 2 or any similar device, it's best to lower print speeds down to 40mm/s to achieve accurate stem details. Setting first-layer thickness to 0.06 larger than standard and layer line width to 50% greater can significantly improve letter clarity in printed designs. However, users may notice these specifications being unnecessary when printing plain keycaps as shown in the example picture.
With this file you will be able to print Cherry MX typewriter keycap with your 3D printer. Click on the button and save the file on your computer to work, edit or customize your design. You can also find more 3D designs for printers on Cherry MX typewriter keycap.