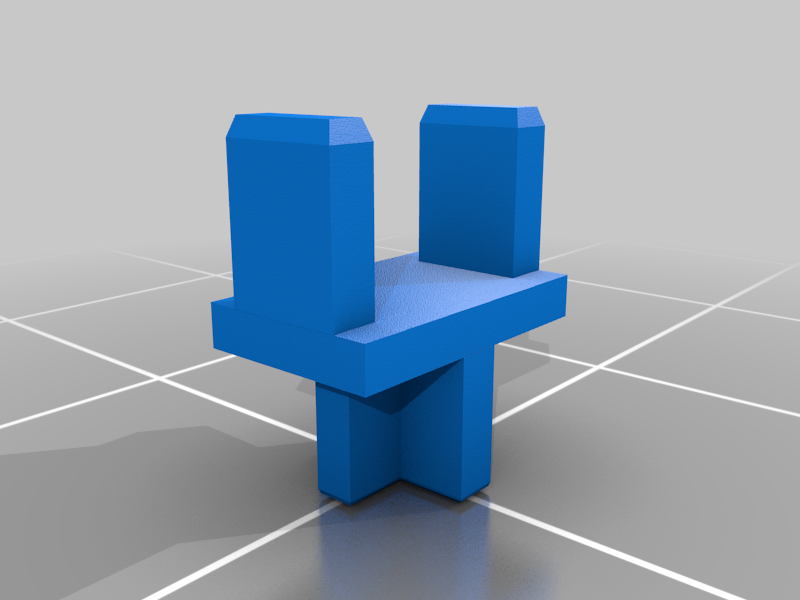
Cherry MX keycap to low-profile Kailh Choc switch adapter (Havit Keyboards)
prusaprinters
<p>Remixed from: <a href="https://www.thingiverse.com/thing:4134048">https://www.thingiverse.com/thing:4134048</a></p> <p>Modified to work with my Havit keyboard. The original design didn't fit; the legs were a bit too close together and short to fit and stay in the switch (I understand this is a slight difference to the low-profile choc switches on Havit keyboards).</p> <h3>Changes:</h3> <ul> <li>Made MX end thicker for tighter keycap fit (no longer comes off with a sticky finger on press)</li> <li>spread and lengthened legs on the choc end for a fuller, closer fit</li> <li><p>minimized footprint of intermediate piece; with a wide profile it couldn't sit flush in the switch<br/> I used PLA initially, which feels sturdy enough, but can confirm PETG works well too (albeit a bit stiffer). The tolerances are really small; I got the best/most consistent results printing with the MX side facing down (with supports) and choc side up. I also printed at 0.05mm, but there didn't seem to be any benefit to doing so. Be careful removing supports.</p> <p>I've also included "Alternate-Cherry-MX-keycap-to-low-profile-Choc-switch" which closer matches the legs on the Havit keyboard keycaps. I was able to print in PLA but the thinner part of the legs were too fragile and snapped when inserting into the switch. YMMV.</p> </li> </ul> <h3>Print instructions</h3><h3>Category: Parts Summary</h3> <p>Modified to work with my Havit keyboard. The original design didn't fit; the legs were a bit too close together and short to fit and stay in the switch (I understand this is a slight difference to the low-profile choc switches on Havit keyboards).</p> <h3>Changes:</h3> <ul> <li>Made MX end thicker for tighter keycap fit (no longer comes off with a sticky finger on press)</li> <li>spread and lengthened legs on the choc end for a fuller, closer fit</li> <li><p>minimized footprint of intermediate piece; with a wide profile it couldn't sit flush in the switch<br/> I used PLA initially, which feels sturdy enough, but can confirm PETG works well too (albeit a bit stiffer). The tolerances are really small; I got the best/most consistent results printing with the MX side facing down (with supports) and choc side up. I also printed at 0.05mm, but there didn't seem to be any benefit to doing so. Be careful removing supports.</p> <p>I've also included "Alternate-Cherry-MX-keycap-to-low-profile-Choc-switch" which closer matches the legs on the Havit keyboard keycaps. I was able to print in PLA but the thinner part of the legs were too fragile and snapped when inserting into the switch. YMMV.</p> <h3>Print Settings</h3> </li> </ul> <p><strong>Printer Brand:</strong> Prusa</p> <p><strong>Printer:</strong> I3 MK3S</p> <p><strong>Rafts:</strong> No</p> <p><strong>Supports:</strong> Yes</p> <p><strong>Resolution:</strong> 0.07mm</p> <p><strong>Infill:</strong> 100%</p> <p><strong>Filament:</strong> Prusament PLA Silver</p>
With this file you will be able to print Cherry MX keycap to low-profile Kailh Choc switch adapter (Havit Keyboards) with your 3D printer. Click on the button and save the file on your computer to work, edit or customize your design. You can also find more 3D designs for printers on Cherry MX keycap to low-profile Kailh Choc switch adapter (Havit Keyboards).
