Cherry MX Button Box
prusaprinters
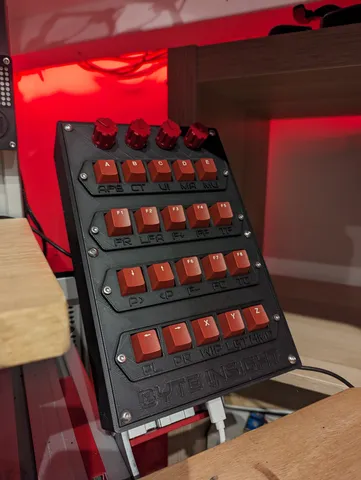
This is version 2 of my original Button Box that can be seen here. The key differences are:No 2 way switches. I didn't feel they were useful for simracing.Different Encoders that provide a stronger notch feel.But I also used Cherry MX Buttons because I could. You will need to print:A baseA top4 x switch backs - I would screw these into place before gluing them. Then add the switches and front panels.4 x Front Panels - I have included mine and a blank so you can make your own.The Arduino side of things is pretty much the same although the circuit arrangement and code is slightly different. The uploads I have provided should be correct for the circuit but please check. The box still uses a Vesa mount arrangement - see other design for a couple of mounts.After trying different methods for securing all the wires on the back together I found blue crimps worked best. If you don't want to buy key caps then it is possible to print some but I just didn't like the look as much as I did the smooth red ones.
With this file you will be able to print Cherry MX Button Box with your 3D printer. Click on the button and save the file on your computer to work, edit or customize your design. You can also find more 3D designs for printers on Cherry MX Button Box.
