Cheapus Maximus - Printed bed extension for the Monoprice Select Mini (MPSM)
thingiverse
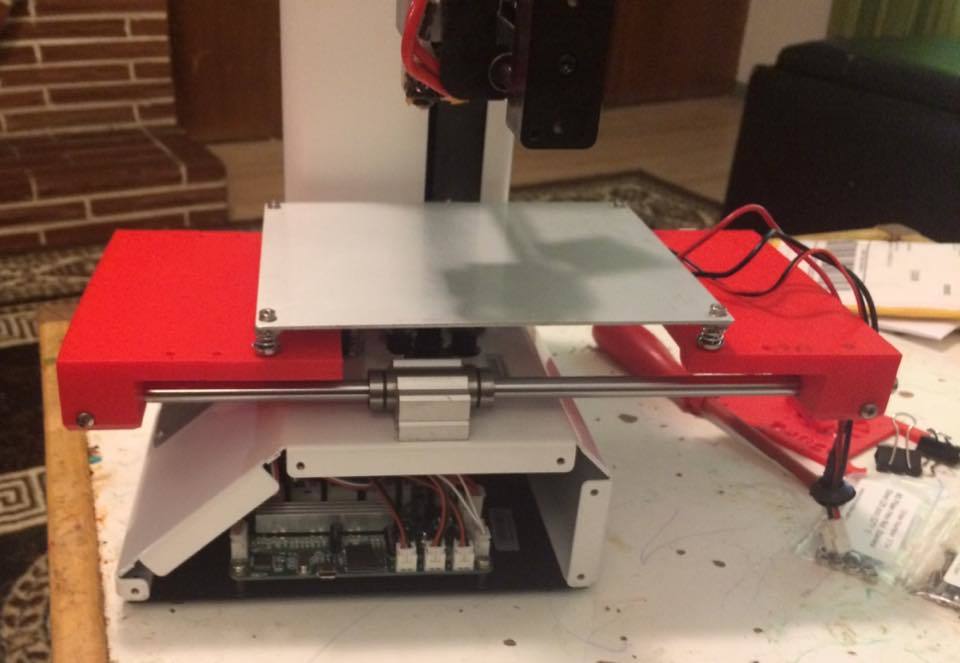
UPDATE 6/30/17 - Made further minor adjustments, including altering the design to accommodate a 125x125 build plate size, allowing for the simultaneous printing of both brackets and thumb screws. Added full plate STL. UPDATE 6/29/17 - Made additional minor adjustments to the front and back bracket after another test fitting. Progress is being made. UPDATE: Following printouts and experimentation with the brackets, I decided to implement a few changes, including the addition of thumb screws for leveling screws, enabling hand-leveling without an allen wrench! This modification necessitates the substitution of M3 Hex nuts with 4 additional square nuts and the printing of four thumbscrew parts. WARNING: Despite multiple iterations and tests, printer issues have arisen (unrelated to the project). The posted design is essentially a beta-version, allowing fellow enthusiasts at the MP Mini FB page to test it while I continue refining it. If you assemble this model, please share your experience, as feedback is greatly appreciated. Design changes will undoubtedly be made. BOM: Front Bracket Back Bracket 4x Thumbscrew Part 2- 8mm x 300mm Linear Shafts (http://www.ebay.com/itm/8mm-x-300mm-Cylinder-Liner-Rail-Linear-Shaft-Optical-Axis-Good-Wear-Resistance-/172547455818?hash=item282ca13b4a:g:TyoAAOSw9p0) 12 M3x14mm Socket Cap Screws 16 M3 Hex Nuts (replaced with square nuts) 8 M3x20mm Flat Socket Countersunk Screws New 300mm Linear Shafts Assembly: 1. Disconnect bed heater and thermistor wires from the mainboard. 2. Remove belt tension spring and carefully clip one of the zipties holding the belt on. 3. Pull off carriage and bed by unscrewing them, leaving 8mm rods in place. 4. Push new 300mm rods into linear bearings to prevent ball bearing loss. 5. Attach brackets to rods, ensuring correct orientation (front/back). 6. Install square nuts into bracket faces and insert M3x14mm socket cap screws for tension. 7. Tighten bolts on rod sides to lock them in place. 8. Reinstall belt using spring tensioner (back or front placement preferred). 9. Ensure bed moves freely, then mark nozzle position and measure distance between marks for new print bed size. Note: I recently improved the design to use thumbscrew for bed level screws, enabling glass installation directly over the screws. Apply super glue/thred locker/JB Weld to fix level screws in place for proper functionality.
With this file you will be able to print Cheapus Maximus - Printed bed extension for the Monoprice Select Mini (MPSM) with your 3D printer. Click on the button and save the file on your computer to work, edit or customize your design. You can also find more 3D designs for printers on Cheapus Maximus - Printed bed extension for the Monoprice Select Mini (MPSM).