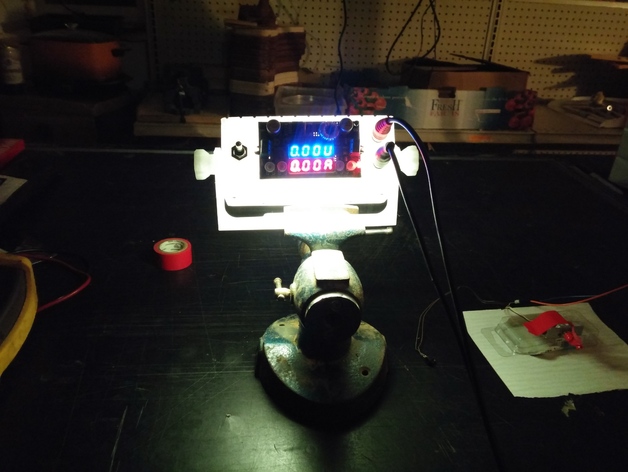
Cheap Bench Power Supply
thingiverse
A buddy of mine recently got into arduino stuff and needed a cheap variable power supply for his projects. This box resulted -- I used box in quotes because the height of the components on the board he bought are higher than the height of the LCD displays, making it challenging to enclose it. It can be attached to a workbench, under a shelf, or to a wall and in any type of installation, tilted for good viewing. It can also be left unattached and instead use the bracket as a tilt stand. Anyway, it works really well.\nAction video: https://vid.me/YNHd\nWiring is straightforward, connect the positive wire from the power supply to the switch, and then attach the other pole of the switch to the positive input terminal. Attach negative from the power supply to the negative input terminal. Then hook up the pos/neg terminals to some sort of jack -- I used RCA jacks because I have a ton of old RCA cables that I'm not using anymore.\nHere are the parts used in this project, with one caveat: everything seems to work just fine but I spent only 15 minutes fooling around with it when it was done, and because it isn't at my workshop, I'll probably never use it again. So, this is a list of parts used to make it, not a recommendation of those parts, if that makes any sense.\nDC-DC converter: $14 (http://www.amazon.com/DROK-Converter-Numerical-Adjustable-Regulator/dp/B016I7ZGWK/)\n15v 5A AC/DC power supply: $6-10 (Note, if you use an old wallwart, you will get slightly less output than input, so a 12v converter will amount to around 11.7v maximum output -- that's why he bought a 15v power supply).\nRCA solderable jacks: $2 ($4 for a pack). I got mine at Radio Shack and it seems to be roughly what you'd pay on Amazon.\nSwitch, some old junk I had lying around. The one I used has an 8.8mm shaft (the radius of the switch can easily be altered in the Freecad source).\nA few small zip ties.\nTwo #10 one inch hex bolts with nuts for mounting knobs.\nSmall screws: ten total, four for board and six for bottom. I designed my holes for these:http://www.amazon.com/gp/product/B00GMQDSRI\nInternal LEDs and resistors if you want to light up the inside of the box (not necessary -- the display makes it obvious when it's on).\nPrint Settings\nPrinter: LulzBot\n \nPrinter: Mini\n \nRafts: No\n \nSupports: No\n \nResolution: 0.25\n \nInfill: 20%\nNotes: The bracket was printed at 30%, the rest at 20%.The parts are optimized for a 0.4mm nozzle (standard on the LB Mini is 0.5, I've swapped that out). The parts shown here were printed in PETG, natural.
With this file you will be able to print Cheap Bench Power Supply with your 3D printer. Click on the button and save the file on your computer to work, edit or customize your design. You can also find more 3D designs for printers on Cheap Bench Power Supply.
