Character Creations - Student Designs
pinshape
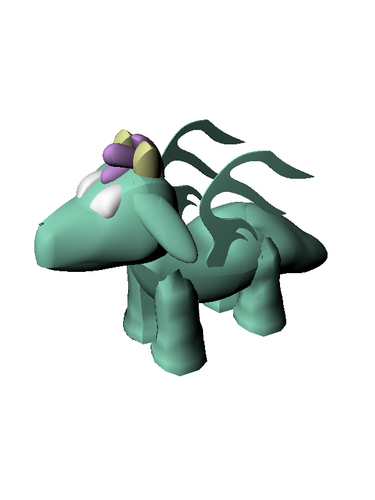
Creature Creations Attached models are crafted by one of my students in the first semester of our 3D modeling course in the high school setting that is mostly complete, but still evolving as this lesson is ongoing. This lesson is part of our Unit 4 and you can see the lesson structure below. It is designed to show students how animated characters are brought to life and used in the animation industry. Unit 4 - surfaces, beyond the basic primitive Overarching Objective: Students will be able to design and create a personalized character Objective 1 - Using CAD modeling, students will learn the process of creating and manipulating surfaces to craft a character Objective 2 - Using a PowerPoint, students will understand how to create a character considering: target audience, emotions, and colors Objective 3 - Students will be encouraged to experiment and try something new while not worrying about mimicking or copying an already existing character. Assessment Have the students experimented and incorporated previously used transform tools into their designs Have the students included multiple levels of detail, going beyond the basic shape construction Have the students used surfaces and surface manipulation points to create custom shapes to create their characters Daily Lessons / Steps Introduce character creations, using a PowerPoint that demonstrates how characters can be modeled and common character considerations (target audience, research other designs, distinctive and unique from what already exists, exaggerate features, color selection, experiment) Research - Using a collaborative Google slide, have each student create 2 slides, one for "good" designs and one for "bad" designs. Good and bad are completely subjective in this case based on the individual target audience or design ideas Surface introduction - Using Rhino (in our case), introduce surfaces. Demonstrate how with single surfaces, control points can be turned on and manipulated. Most characters will start as a sphere (think piece of clay), and sculpted from there, pushing and pulling the control points to mold that sphere to desired shapes. Allow students to create a basic human face, starting with the most exaggerated feature (the nose) and working to more detail at the end (cheeks and wrinkles). This will show them how to get basic features, even if their end goal is a more alien creation or animal based, same rules apply for having all senses present in some way. After completing the basic human face, allow students to begin creating their own character. Remind them to experiment or exaggerate features. If the alien's main sense is smell, there is most likely going to be a very large nose or something that allows for that sense to be the most dominant. Details will be added near the end of the lesson, when most of the main construction is done and the main shapes are in place. Most detail will be added onto the original surface, creating something like scales as separate pieces and added to the main structure at the end. Arms, legs, body, head will most likely be created separately and combined with a boolean union at the end, but each design is different so use your best judgement based on your end goal.
With this file you will be able to print Character Creations - Student Designs with your 3D printer. Click on the button and save the file on your computer to work, edit or customize your design. You can also find more 3D designs for printers on Character Creations - Student Designs.
