Chain Maille Scales Armor
thingiverse
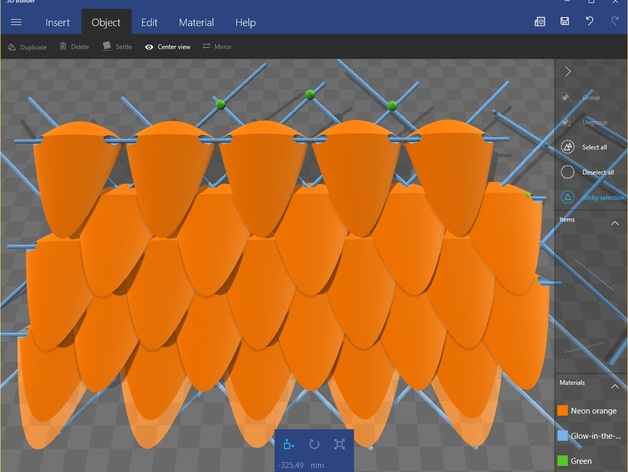
This is one crucial component to print out multiple times to create wearable Scale Maille Armor. I've included a print file for nine pieces, but this single file alone could take around 7 hours to print. Once you have the scale pieces printed, you can then use paracord to connect them. Or whatever cord material you prefer. In the final product it will hardly show. The goal is to create a mesh with the cording material behind the scales to connect to any other armor pieces you've used or wrap around an arm or leg. UPDATE: I made 11 scales to test mesh creation. Original design was too bulky. The concept is again to create a mesh, but vertical instead of horizontal; the horizontals will carry and connect the scales for each row. Start stringing scales onto horizontal runners with odd rows smaller by one scale. So if you have 5 rows of 7 scales you'll need 4 rows of 6 scales to make the pattern work. Start with the larger number of scales as the top or bottom rows. Once scales are strung, lay down in an overlapping pattern. Mesh pattern picture is displayed as reference. Starting with the second scale from the left on the first (odd) row tie a cord onto it. Once you have the first row (odd) knotted then run under the even row so the horizontal cord is over the cord you're working, don't knot. Now knot the cord on the third row the same number of scales in the design. Continue pattern with odd scales getting knots and even rows under the cord between the scales. Tie all odd rows first. Then repeat the process for the even rows. Make a knot on the even rows for each scale. Pass under the next cord and between the two scales. Knot on the next even row cord. When the pattern is complete you should have one row that holds the next row of scales in place. Now basically one knot per scale. The outside scales of the odd rows can be done the same way, but instead of just going under the even cord, knot it instead to lock the scales in place and keep the pattern going. Do this for each edge. If you like you can knot the cord outside of the last scale on the odd rows to lock them in place. Use the horizontal cords to make the connection around whatever you're building your armor for. It will take some tinkering and ingenuity on your part to include this armor into your final version of armor design. Resist printing in a vertical orientation, as this may cause them to become brittle and break easily along the build lines. Printed in this horizontal fashion makes them much more durable and flexible. Printer Settings Printer Brand: RepRap Printer: Anet A8 Rafts: Doesn't Matter Supports: No Resolution: .2 Notes: At .2 resolution gives the scales texture. Use lines only as infill, it will be much easier to remove. Post-Printing Use Support Line Patterns Only With support there is a lot of cleanup. The complete underside of the scale needs support, use only lines, not a grid pattern, it's much easier to clean out that way. Use a metal spoon to scoop/scrape out supports. I used a Dremel to clean the scales off and used a small tip to round out the holes to make them smooth. Very important if you're using 550 paracord, it snags easily. It barely fits through the hole. How I Designed This Designed in Microsoft 3D Builder I made a cone that was flatter than round. Duplicated it, then shrank it a little and subtracted that from the first cone. I sliced that cone to make a pleasing rounded shape for the bottom piece. For the top piece, I duplicated the sliced cone rotated it around and shrank the rounded portion without proportionality. Then I rotated it to meet the bottom portion and then rotated it upwards until it matched the bottom piece perfectly. I welded these two pieces together. I then inserted a cylinder and sized it to 5.5MM and 2.5MM and made it longer than the scale piece. I then made one more cylinder 5.5MM wide and duplicated that. I took the longer rod and positioned, 5.5MM parallel to the scale directionality, it to go through the upper portion where I merged the two pieces. I picked a place that looked good, didn't cut into the top and left a fair amount on the bottom for strength. Then I subtracted the rod to create the holes. But those had a jagged point that might cut the paracord. I arranged the two cylinders to create a rounded top portion and eliminate this jagged part, on both sides of the piece. Then you should have a completed armor scale.
With this file you will be able to print Chain Maille Scales Armor with your 3D printer. Click on the button and save the file on your computer to work, edit or customize your design. You can also find more 3D designs for printers on Chain Maille Scales Armor.
